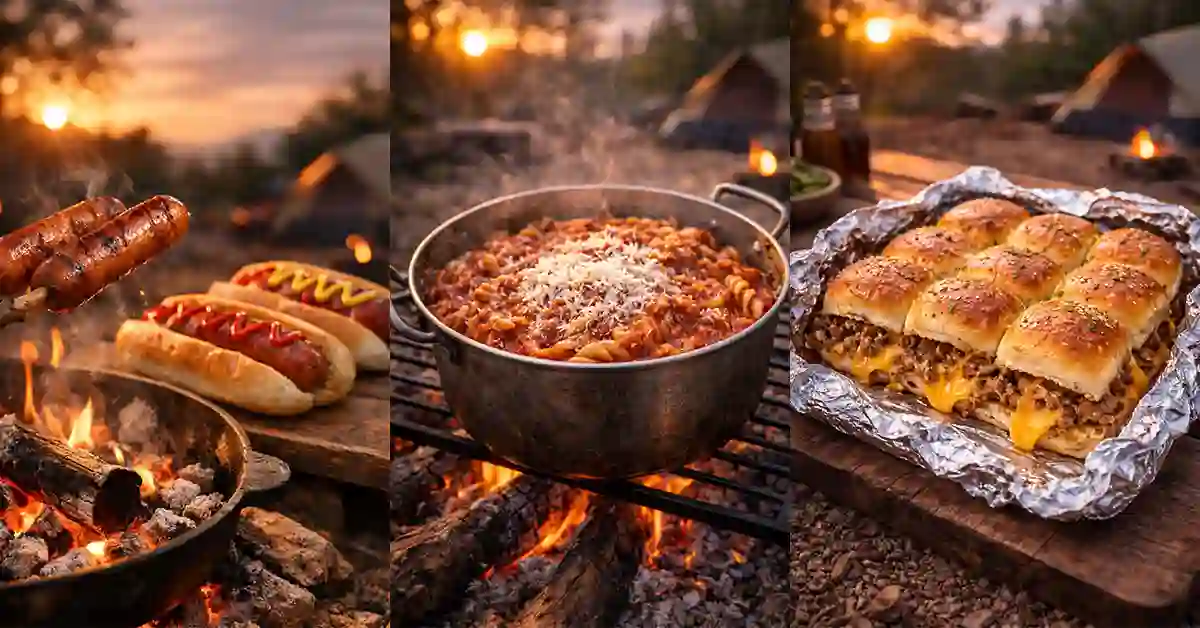
Easy Camping Meals Recipes for Quick Dinners
Discover easy camping meals recipes that are simple, quick, and perfect for outdoor cooking.
From hearty breakfasts to easy dinners, these recipes need few ingredients and basic tools.
Enjoy tasty campfire meals that save time and effort, so you can relax and enjoy your trip with family and friends in the great outdoors.
Upgrade everyday comfort and outdoor fun with smart essentials like a camping cooking utensil set, retractable waterproof string lights, and a soft memory foam sleeping pad designed for easy travel, cozy rest, and simple convenience anywhere.
1 – Campfire Hot Dogs.

Campfire hot dogs are one of the easiest meals you can make outdoors.
They are simple, quick, and loved by both kids and adults. After a long day of hiking, fishing, or setting up your tent, you want food that takes little effort.
This meal gives you just that.
You only need a few basic ingredients and a steady fire. There is no need for fancy tools or hard steps.
Just a stick, some hot dogs, and soft buns. You can cook them over an open flame or hot coals. Both ways work great.
Ingredients
- 4 hot dogs
- 4 hot dog buns
- Ketchup
- Mustard
- Relish (optional)
- Sliced onions (optional)
- Cheese slices (optional)
- Chili (optional)
How to Make Campfire Hot Dogs
- Build a safe campfire in a fire pit or ring. Let the wood burn down until you have steady flames and glowing coals. This gives better heat control.
- Find long roasting sticks. Make sure they are clean and dry. Metal skewers also work well.
- Push one hot dog onto the end of each stick. Make sure it is secure so it does not fall into the fire.
- Hold the hot dog a few inches above the flames. Do not place it directly inside strong flames for too long or it may burn.
- Slowly rotate the stick so the hot dog cooks evenly on all sides. This helps prevent charring on one side only.
- Cook for about 5 to 7 minutes. The skin will start to brown and may split slightly. That means it is heated through.
- If you like a crisp outside, hold it closer to the heat for the last minute. Watch it carefully to avoid burning.
- While the hot dogs cook, open the buns and keep them ready. You can warm them near the fire for 30 seconds if you like them toasted.
- Once cooked, carefully slide the hot dog into the bun. Use a fork or clean hands to remove it safely.
- Add your favorite toppings like ketchup, mustard, onions, cheese, or chili. Serve right away while warm.
Nutritional Facts (Per One Basic Hot Dog with Bun)
- Calories: 250 to 300
- Protein: 10 to 12 grams
- Fat: 18 to 22 grams
- Carbohydrates: 20 to 25 grams
- Fiber: 1 gram
- Sodium: 500 to 700 milligrams
- Values may change depending on brand and toppings added.
2 – Foil Packet Chicken and Veggies.
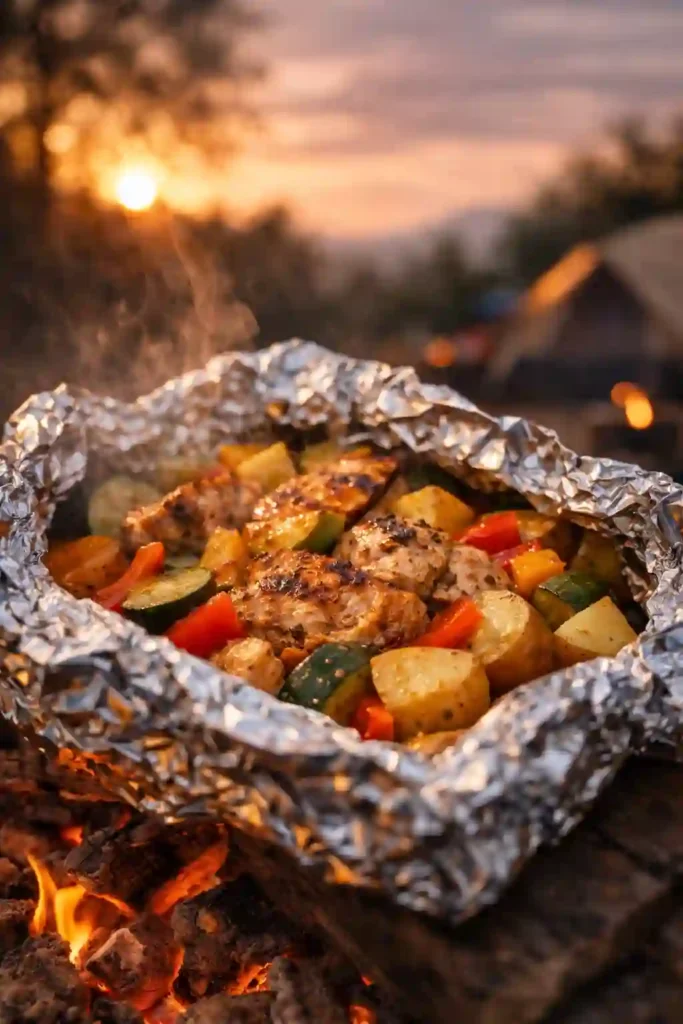
Foil packet chicken and veggies is one of the easiest meals you can make while camping.
It is simple, filling, and needs very little cleanup. Everything cooks inside one foil wrap, which makes it perfect for outdoor trips.
You do not need pots or pans. Just fresh ingredients, foil, and a steady fire.
This meal is great because you can prep it at home before your trip. When you are ready to eat, place the packet over hot coals and let it cook.
The chicken stays juicy, and the vegetables become soft and full of flavor.
It is also easy to adjust. You can use your favorite vegetables or seasonings. This makes it a smart and stress free dinner for any camping night.
Ingredients
- 2 boneless, skinless chicken breasts
- 1 cup sliced bell peppers
- 1 cup sliced zucchini
- 1 cup diced potatoes
- ½ cup sliced onions
- 2 tablespoons olive oil
- Salt to taste
- Black pepper to taste
- Garlic powder
- Dried Italian seasoning
- Heavy duty aluminum foil
How to Make Foil Packet Chicken and Veggies
- Start by building a safe campfire. Let the flames burn down until you have hot, glowing coals. This gives steady heat for cooking.
- Tear off large sheets of heavy duty aluminum foil. Each sheet should be big enough to fold over the food and seal tightly.
- Cut the chicken breasts into even sized pieces. This helps them cook faster and more evenly.
- Chop all vegetables into small, similar sized pieces. Smaller pieces cook better inside the packet.
- Place the chicken pieces in the center of the foil sheet. Spread them out in a single layer.
- Add the chopped vegetables on top of the chicken. Try to spread them evenly.
- Drizzle olive oil over the chicken and vegetables. This keeps everything moist while cooking.
- Sprinkle salt, black pepper, garlic powder, and Italian seasoning over the top. Make sure all pieces are lightly coated.
- Fold the foil over the food. Bring the long sides together and fold them down tightly. Then fold the ends inward to fully seal the packet. This traps steam inside.
- Place the sealed foil packet directly on the hot coals. Do not place it over strong flames.
- Cook for about 20 to 25 minutes. Flip the packet halfway through to cook evenly on both sides.
- Carefully remove the packet using tongs. Let it rest for 5 minutes before opening.
- Open the foil slowly to avoid hot steam. Check that the chicken is fully cooked and no longer pink inside.
- Serve straight from the foil or transfer to a plate. Enjoy while hot.
Nutritional Facts (Per Serving)
- Calories: 350 to 400
- Protein: 30 to 35 grams
- Fat: 15 to 18 grams
- Carbohydrates: 25 to 30 grams
- Fiber: 4 to 6 grams
- Sodium: 300 to 500 milligrams
3 – Breakfast Burritos.
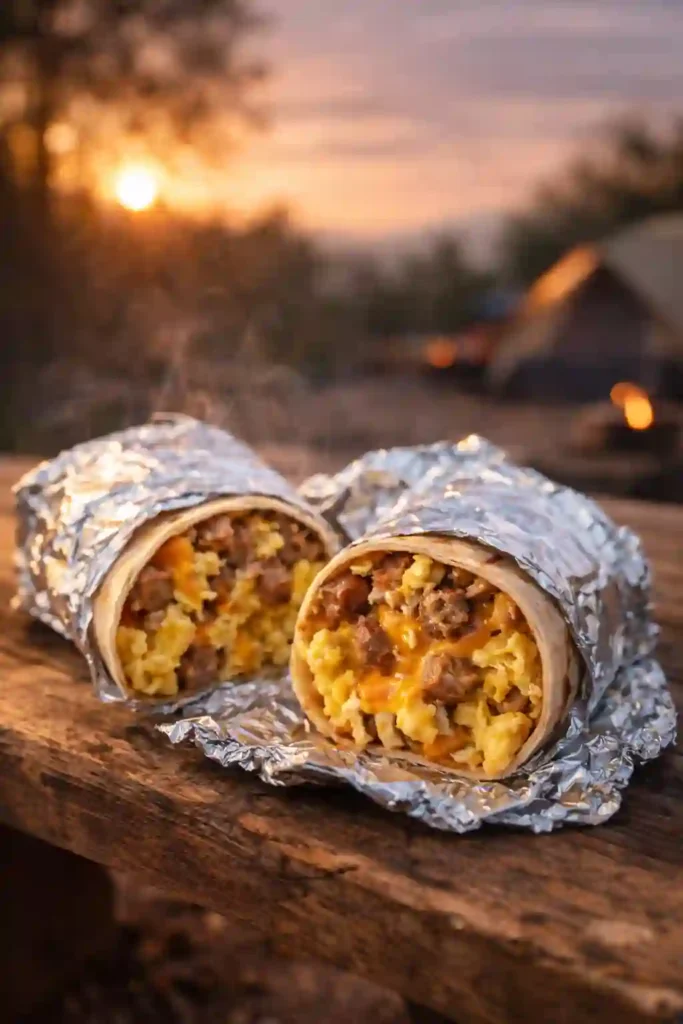
Breakfast burritos are a warm and filling way to start your morning outdoors.
When you wake up at the campsite, you want something that is quick, tasty, and easy to cook.
This meal checks all the boxes. It is simple to make and keeps everyone full for hours.
You can prepare most of the ingredients at home and pack them in a cooler.
When morning comes, just heat everything in a pan and wrap it in a soft tortilla. You can also wrap the burritos in foil and warm them over the fire.
Breakfast burritos are easy to customize. Add more veggies, switch the meat, or keep it simple with eggs and cheese. It is a flexible meal that works for any camping trip.
Ingredients
- 4 large flour tortillas
- 6 large eggs
- 1 cup cooked breakfast sausage
- 1 cup shredded cheddar cheese
- ½ cup diced bell peppers
- ½ cup diced onions
- 2 tablespoons butter or oil
- Salt to taste
- Black pepper to taste
- Salsa (optional)
How to Make Breakfast Burritos
- Start by heating a skillet over medium heat on your camp stove or grill grate over the fire. Add butter or oil and let it melt fully.
- Add the diced onions and bell peppers to the skillet. Cook them for about 3 to 5 minutes until they become soft and slightly golden. Stir often so they do not burn.
- If your sausage is not pre cooked, cook it in the skillet until fully done. Drain any extra grease before moving forward.
- Crack the eggs into a bowl. Add salt and black pepper. Whisk them well until the yolks and whites are fully mixed.
- Pour the eggs into the skillet with the vegetables and meat. Let them sit for a few seconds, then gently stir with a spatula.
- Continue stirring slowly until the eggs are fully cooked but still soft. Do not overcook them or they may become dry.
- Warm the tortillas by placing them on a clean skillet for about 20 seconds on each side. This makes them soft and easier to fold.
- Lay one tortilla flat. Spoon a portion of the egg mixture into the center.
- Sprinkle shredded cheese over the warm eggs so it melts slightly. Add salsa if desired.
- Fold the sides of the tortilla inward, then roll it tightly from the bottom up to form a burrito.
- For extra warmth, wrap each burrito in foil and place it near the fire for 2 to 3 minutes. Turn once for even heating.
- Serve warm and enjoy your outdoor breakfast.
Nutritional Facts (Per Burrito)
- Calories: 400 to 450
- Protein: 20 to 25 grams
- Fat: 25 to 30 grams
- Carbohydrates: 25 to 30 grams
- Fiber: 2 to 3 grams
- Sodium: 600 to 800 milligrams
4 – One Pot Mac and Cheese.
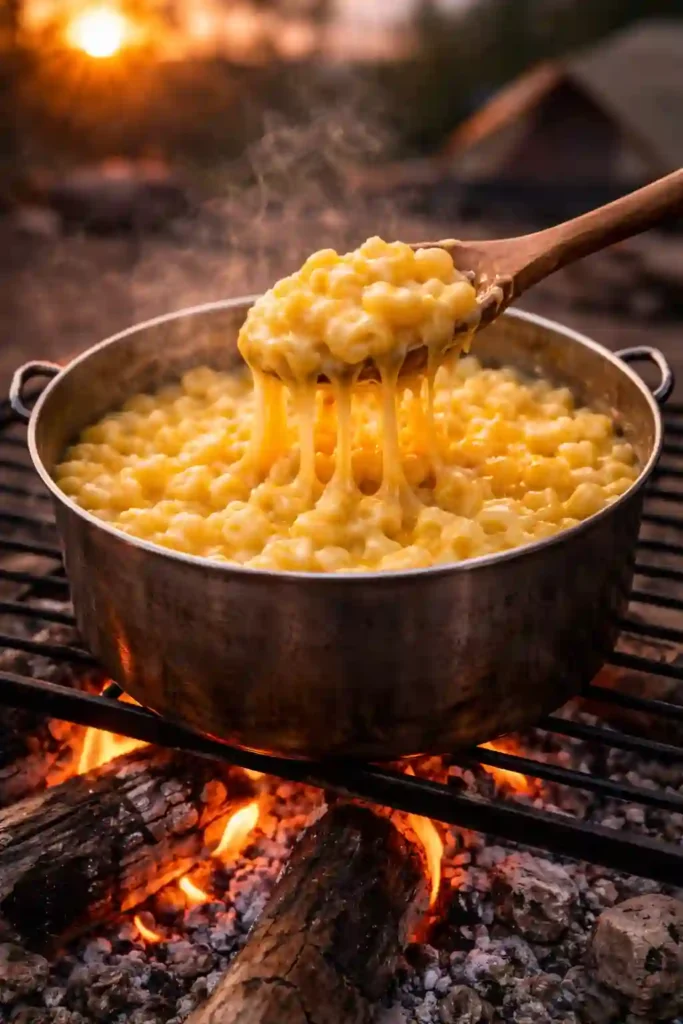
One Pot Mac and Cheese is the kind of meal that brings comfort to any camping trip.
After a long day outdoors, a warm and creamy bowl of pasta feels just right. The best part is that everything cooks in one pot, which makes it simple and easy to clean up.
This meal does not need many ingredients. You only need pasta, cheese, milk, and a few basic seasonings.
It cooks quickly over a camp stove or over steady campfire heat. There is no need to boil pasta in one pot and mix in another. It all comes together in the same pot.
Kids and adults both love this dish. It is filling, rich, and easy to make.
For a quick and cozy camping dinner, one pot mac and cheese is always a great choice.
Ingredients
- 2 cups elbow macaroni
- 2 cups water or broth
- 1 cup milk
- 1 ½ cups shredded cheddar cheese
- 2 tablespoons butter
- Salt to taste
- Black pepper to taste
- Garlic powder (optional)
How to Make One Pot Mac and Cheese
- Place a large pot on a camp stove or on a grill grate over steady campfire coals. Make sure the heat is medium and not too strong.
- Add the elbow macaroni to the pot. Pour in the water or broth. The liquid should just cover the pasta.
- Bring the mixture to a gentle boil. Stir often so the pasta does not stick to the bottom of the pot.
- Once boiling, reduce the heat slightly. Let the pasta simmer for about 8 to 10 minutes. Stir every few minutes to prevent burning.
- As the pasta cooks, it will absorb most of the liquid. If it looks too dry before the pasta is tender, add a small splash of water.
- When the pasta is soft and most of the liquid is gone, lower the heat. Add the butter and stir until fully melted.
- Slowly pour in the milk. Stir gently to combine. This helps create a creamy texture.
- Add the shredded cheddar cheese a little at a time. Stir continuously so the cheese melts smoothly into the pasta.
- Sprinkle salt, black pepper, and garlic powder if using. Taste and adjust seasoning as needed.
- Continue stirring for 2 to 3 minutes until the sauce becomes thick and creamy. If it becomes too thick, add a small amount of milk.
- Remove the pot from heat. Let it sit for a few minutes to thicken slightly before serving.
- Serve warm straight from the pot for an easy and satisfying camping meal.
Nutritional Facts (Per Serving)
- Calories: 450 to 500
- Protein: 15 to 20 grams
- Fat: 20 to 25 grams
- Carbohydrates: 50 to 55 grams
- Fiber: 2 grams
- Sodium: 500 to 700 milligrams
5 – Grilled Cheese Sandwiches.
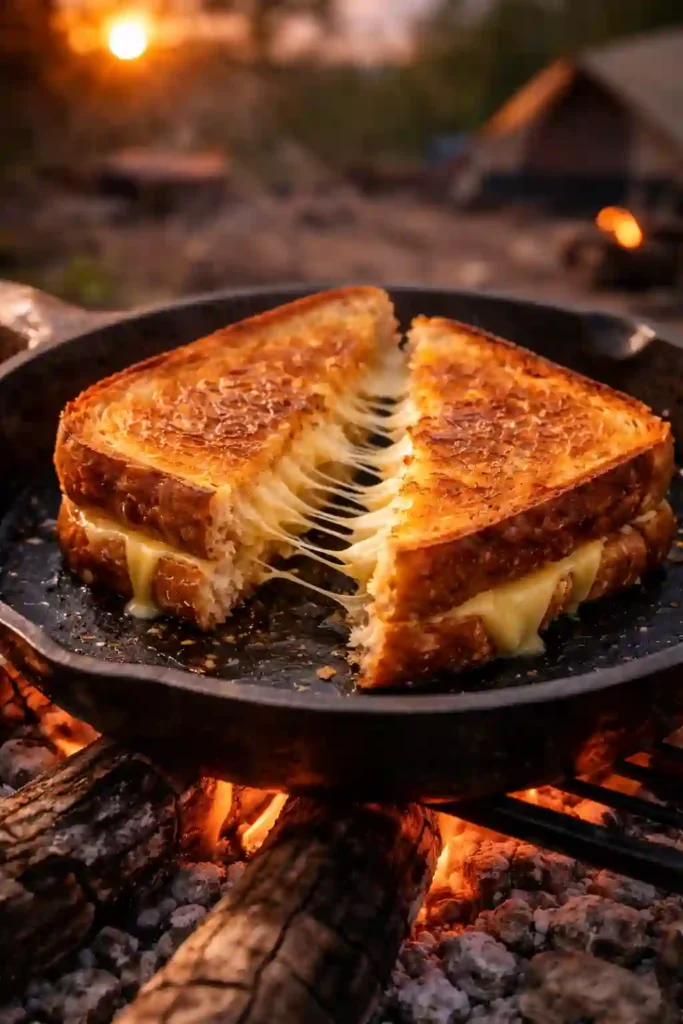
Grilled cheese sandwiches are a simple and comforting meal for any camping trip.
After a long day outside, nothing feels better than warm bread with melted cheese inside.
This meal is quick to make and does not require many ingredients.
All you need is bread, cheese, and a little butter. You can cook it in a skillet over a camp stove or place the pan on a grill grate above hot coals.
The outside turns golden and crisp while the inside becomes soft and creamy.
Grilled cheese sandwiches are also easy to change based on taste.
Add tomato slices, cooked , or a slice of ham if you want more flavor.
Whether for lunch or dinner, this classic sandwich is always a crowd favorite around the campsite.
Ingredients
- 8 slices of bread
- 4 slices cheddar cheese
- 4 slices mozzarella or American cheese
- 4 tablespoons butter
- Pinch of salt (optional)
How to Make Grilled Cheese Sandwiches
- Place a skillet on a camp stove or on a grill grate over medium heat. Make sure the heat is steady and not too high.
- Spread butter evenly on one side of each slice of bread. This will help create a crisp, golden crust.
- Lay one slice of bread, butter side down, onto the warm skillet.
- Place one slice of cheddar cheese and one slice of mozzarella or American cheese on top of the bread. Layering cheese helps create a rich flavor and smooth melt.
- Cover with another slice of bread, butter side facing up. Press gently with a spatula.
- Cook for about 3 to 4 minutes on the first side. Check the bottom often to make sure it does not burn. The bread should turn golden brown.
- Carefully flip the sandwich using a spatula. Cook the other side for another 3 to 4 minutes.
- Press down lightly while cooking to help the cheese melt evenly inside.
- If the bread browns too fast, lower the heat slightly. Slow cooking helps the cheese melt fully.
- Once both sides are golden and the cheese is melted, remove the sandwich from the skillet.
- Let it rest for one minute before slicing. This keeps the melted cheese from spilling out too quickly.
- Repeat the steps for the remaining sandwiches. Serve warm and enjoy by the campfire.
Nutritional Facts (Per Sandwich)
- Calories: 400 to 450
- Protein: 15 to 18 grams
- Fat: 25 to 30 grams
- Carbohydrates: 30 to 35 grams
- Fiber: 2 grams
- Sodium: 600 to 800 milligrams
6 – Campfire Quesadillas.
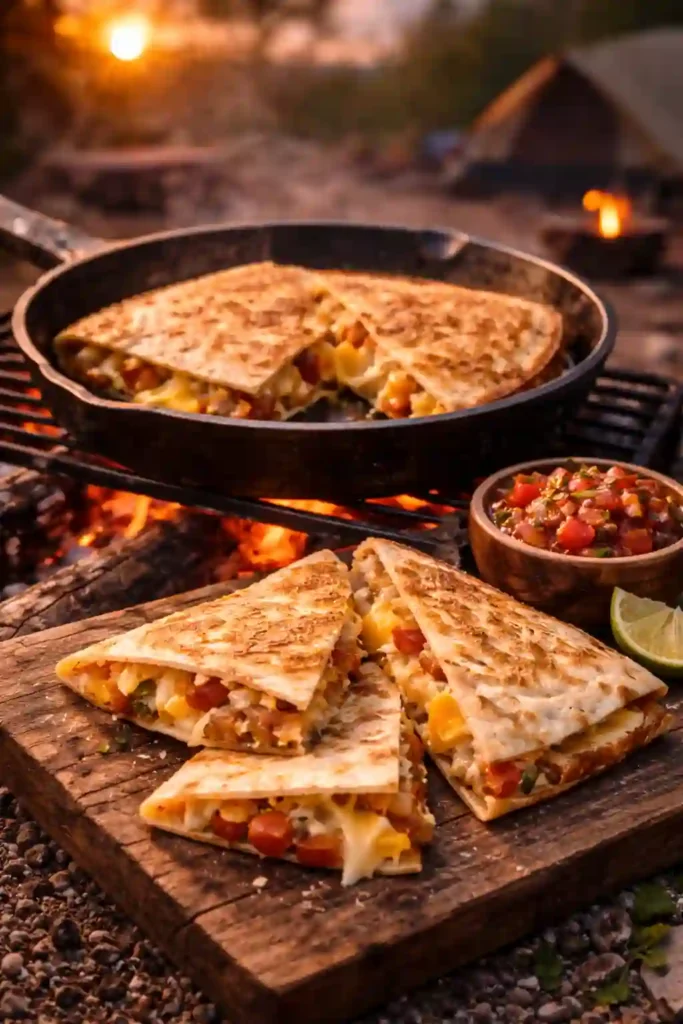
Campfire quesadillas are a quick and tasty meal that works great for camping.
They are simple to make and need only a few basic ingredients. After a busy day outside, this warm and crispy dish is easy to prepare and fun to eat.
You can cook quesadillas in a skillet over a camp stove or place the pan on a grill grate above hot coals.
The tortilla becomes golden and crisp while the cheese melts inside. You can also add cooked chicken, beans, or veggies for extra flavor.
This meal is easy to adjust for both kids and adults. It cooks fast and requires very little cleanup.
Campfire quesadillas are a smart choice when you want something filling without spending too much time cooking.
Ingredients
4 large flour tortillas
1 ½ cups shredded cheddar or Mexican blend cheese
1 cup cooked chicken, diced (optional)
½ cup canned black beans, drained (optional)
½ cup diced bell peppers
¼ cup diced onions
2 tablespoons oil or butter
Salt to taste
Salsa or sour cream for serving (optional)
How to Make Campfire Quesadillas
- Place a skillet on a camp stove or on a grill grate over medium heat. Allow the pan to warm evenly.
- Add a small amount of oil or butter to the skillet. Spread it lightly to prevent sticking.
- Lay one tortilla flat in the skillet. Make sure it sits evenly in the center.
- Sprinkle a layer of shredded cheese over half of the tortilla. Do not overload it, or it may spill out while cooking.
- Add diced chicken, black beans, bell peppers, and onions on top of the cheese if using. Spread the filling evenly.
- Add a little more cheese on top of the filling. This helps hold everything together when melted.
- Fold the empty half of the tortilla over the filled side to form a half circle. Press gently with a spatula.
- Cook for about 3 to 4 minutes on the first side. Check the bottom often to avoid burning. It should turn golden brown and slightly crisp.
- Carefully flip the quesadilla using a spatula. Cook the other side for another 3 to 4 minutes.
- Press down lightly while cooking to help the cheese melt evenly inside.
- Once both sides are golden and the cheese is fully melted, remove from heat.
- Let it cool for one minute before slicing into wedges. This keeps the filling in place.
- Serve warm with salsa or sour cream if desired. Repeat the process for the remaining tortillas.
Nutritional Facts (Per Quesadilla)
- Calories: 400 to 500
- Protein: 18 to 25 grams
- Fat: 22 to 28 grams
- Carbohydrates: 30 to 35 grams
- Fiber: 3 to 5 grams
- Sodium: 600 to 800 milligrams
7 – Sausage and Potato Skillet.
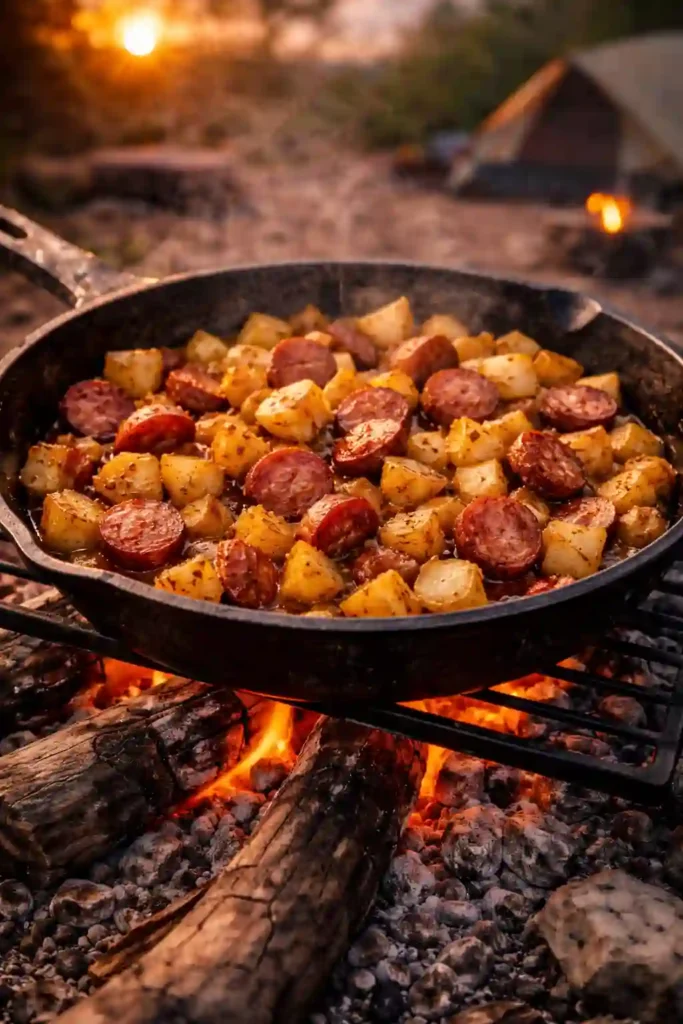
Sausage and potato skillet is a filling and simple meal that works perfectly for camping.
It cooks in one pan, which makes it easy to manage outdoors. After a long day of hiking or exploring, this warm and hearty dish brings comfort to the campsite.
The mix of crispy potatoes and savory sausage creates rich flavor without needing many ingredients.
You can cook it over a camp stove or in a cast iron skillet placed on a grill grate above hot coals. It works well for both breakfast and dinner.
This meal is easy to adjust. Add peppers, onions, or your favorite seasoning to change the flavor.
With little prep and easy cleanup, sausage and potato skillet is a reliable outdoor favorite.
Ingredients
- 4 medium potatoes, diced
- 1 pound smoked sausage, sliced
- 1 cup diced bell peppers
- ½ cup diced onions
- 2 tablespoons olive oil
- Salt to taste
- Black pepper to taste
- Garlic powder
- Paprika (optional)
How to Make Sausage and Potato Skillet
- Place a large cast iron skillet on a camp stove or over steady campfire coals. Let it heat for a few minutes on medium heat.
- Add olive oil to the skillet. Spread it evenly across the surface to prevent sticking.
- Add the diced potatoes in a single layer. Sprinkle salt, black pepper, and garlic powder over them.
- Cook the potatoes for about 10 to 12 minutes. Stir every few minutes so they brown evenly and do not burn.
- Once the potatoes begin to soften and turn golden, add the sliced sausage to the skillet. Spread it evenly among the potatoes.
- Continue cooking for another 5 to 7 minutes. The sausage should brown slightly and heat through fully.
- Add diced bell peppers and onions. Sprinkle a small amount of paprika if desired for extra flavor.
- Stir everything together and cook for another 5 minutes until the vegetables soften.
- Check the potatoes with a fork. They should be tender inside and lightly crisp on the outside. If they are still firm, cook a few minutes longer.
- Taste and adjust seasoning as needed. Add a pinch more salt or pepper if desired.
- Remove the skillet from heat and let it rest for 2 minutes before serving.
- Serve warm directly from the skillet for a simple and satisfying camping meal.
Nutritional Facts (Per Serving)
- Calories: 450 to 550
- Protein: 18 to 22 grams
- Fat: 28 to 35 grams
- Carbohydrates: 35 to 40 grams
- Fiber: 4 to 5 grams
- Sodium: 700 to 900 milligrams
8 – BBQ Chicken Wraps.
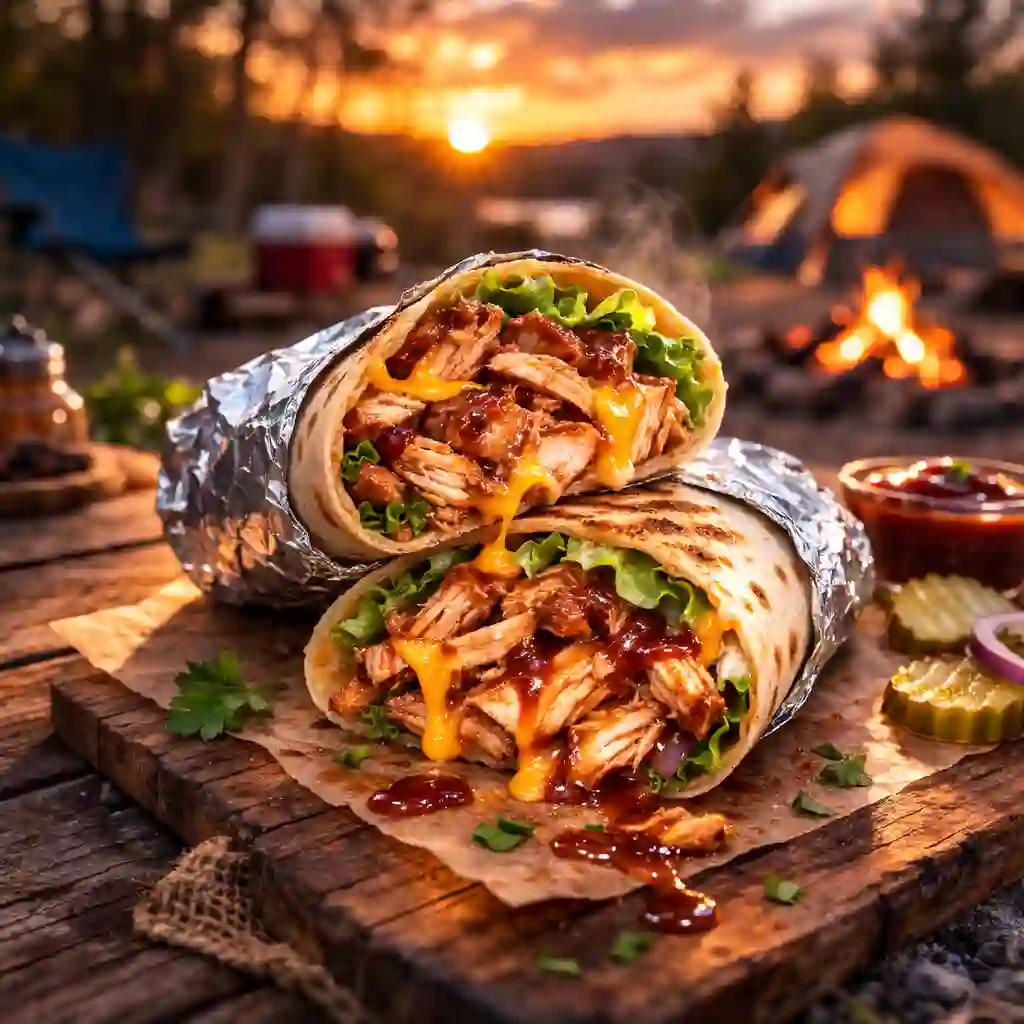
BBQ chicken wraps are a simple and satisfying meal for camping trips.
They are easy to prepare, packed with flavor, and require very little cooking time. After a long day outside, this meal comes together fast and keeps everyone full.
You can cook the chicken over a camp stove or grill it on a grate above hot coals.
Once it is warm and coated in barbecue sauce, just wrap it inside a soft tortilla with fresh toppings.
The mix of smoky chicken, crisp lettuce, and creamy sauce creates a balanced bite.
BBQ chicken wraps are also easy to customize. Add cheese, onions, or even beans to make them heartier.
With quick prep and easy cleanup, this meal is perfect for relaxed nights at the campsite.
Ingredients
- 2 cups cooked chicken, shredded or diced
- ½ cup barbecue sauce
- 4 large flour tortillas
- 1 cup shredded lettuce
- ½ cup shredded cheddar cheese
- ¼ cup sliced red onions
- 2 tablespoons ranch or mayo (optional)
- 1 tablespoon oil
How to Make BBQ Chicken Wraps
- Place a skillet on a camp stove or grill grate over medium heat. Add a small amount of oil to prevent sticking.
- Add the cooked chicken to the skillet. Stir gently and allow it to heat for about 3 to 4 minutes.
- Pour the barbecue sauce over the chicken. Stir well so all pieces are coated evenly.
- Let the chicken cook for another 3 to 5 minutes. Stir occasionally until it is fully heated and slightly thickened with sauce.
- While the chicken warms, lightly heat the tortillas. Place each tortilla in a clean skillet for about 20 seconds per side. This makes them soft and easier to fold.
- Lay one tortilla flat on a clean surface. Spoon a portion of the BBQ chicken mixture into the center.
- Add shredded lettuce, cheddar cheese, and sliced red onions on top of the chicken.
- Drizzle ranch or mayo if desired for extra creaminess.
- Fold the bottom edge of the tortilla up over the filling. Then fold in the sides tightly.
- Roll the wrap forward until fully closed. Press gently to keep it secure.
- For a warm finish, place the wrapped tortilla back in the skillet for 1 to 2 minutes per side. This gives a light crisp outside.
- Remove from heat and slice in half if desired. Serve warm and enjoy.
Nutritional Facts (Per Wrap)
- Calories: 450 to 550
- Protein: 30 to 35 grams
- Fat: 18 to 25 grams
- Carbohydrates: 40 to 45 grams
- Fiber: 3 to 4 grams
- Sodium: 700 to 900 milligrams
9 – Walking Tacos.
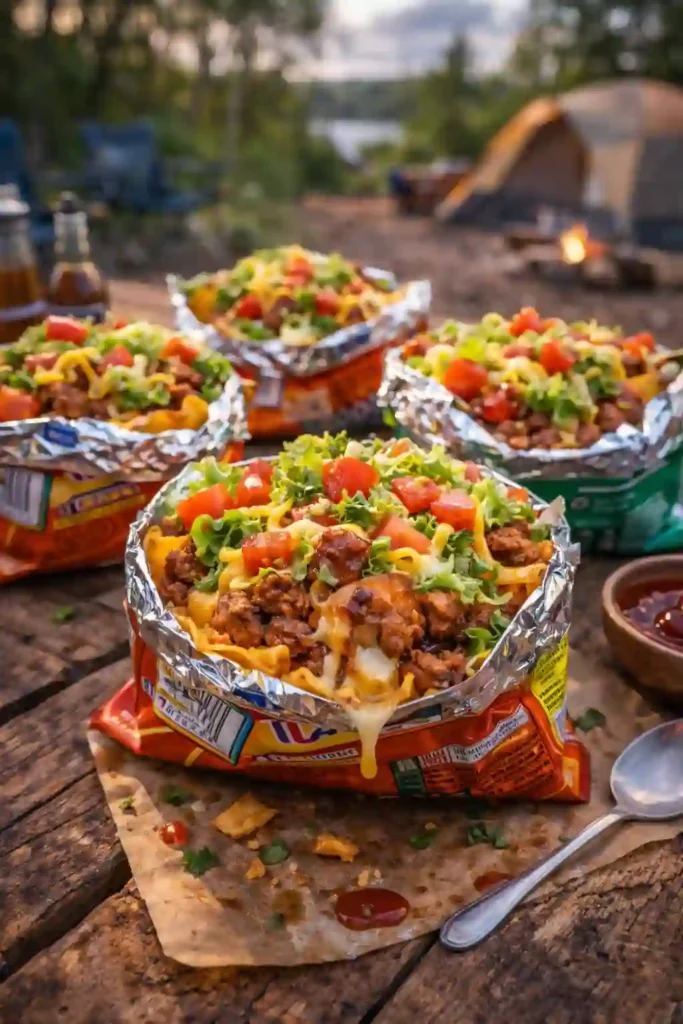
Walking tacos are a fun and simple meal that is perfect for camping.
They are easy to make, easy to serve, and even easier to clean up. Instead of using plates, everything is layered inside a small bag of chips.
That means less mess and less washing up at the campsite.
This meal is great for families and group trips. Each person can build their own taco just the way they like it.
You only need to cook the meat, then set out the toppings. Everyone can mix and enjoy straight from the bag.
Walking tacos are filling, flavorful, and quick to prepare. Whether it is lunch or dinner, this meal brings fun and convenience to any outdoor adventure.
Ingredients
- 1 pound ground beef
- 1 packet taco seasoning
- 6 small bags of corn chips
- 1 cup shredded cheddar cheese
- 1 cup shredded lettuce
- 1 diced tomato
- ¼ cup sliced jalapenos (optional)
- ½ cup salsa
- ½ cup sour cream (optional)
How to Make Walking Tacos
- Place a skillet on a camp stove or grill grate over medium heat. Allow it to warm up evenly.
- Add the ground beef to the skillet. Break it apart with a spatula as it cooks. Stir often so it browns evenly.
- Cook the beef for about 7 to 10 minutes until it is fully browned and no pink remains.
- Carefully drain any extra grease from the skillet. This helps keep the tacos from becoming too oily.
- Add the taco seasoning to the cooked beef. Follow the packet directions and add a small amount of water if needed.
- Stir well and let the meat simmer for 3 to 5 minutes until the sauce thickens. Remove from heat.
- While the meat rests, gently crush each bag of corn chips slightly. Do not crush too much. Leave some texture for crunch.
- Open each bag carefully along the top edge. This creates space for the toppings.
- Spoon a portion of the seasoned beef directly into each chip bag.
- Add shredded cheese so it melts slightly over the warm meat.
- Top with lettuce, diced tomato, jalapenos, salsa, and sour cream as desired.
- Use a fork to mix everything inside the bag. Eat straight from the bag for easy serving and cleanup.
Nutritional Facts (Per Serving)
- Calories: 450 to 550
- Protein: 20 to 25 grams
- Fat: 25 to 30 grams
- Carbohydrates: 35 to 45 grams
- Fiber: 3 to 4 grams
- Sodium: 700 to 900 milligrams
10 – Pasta with Jar Sauce.
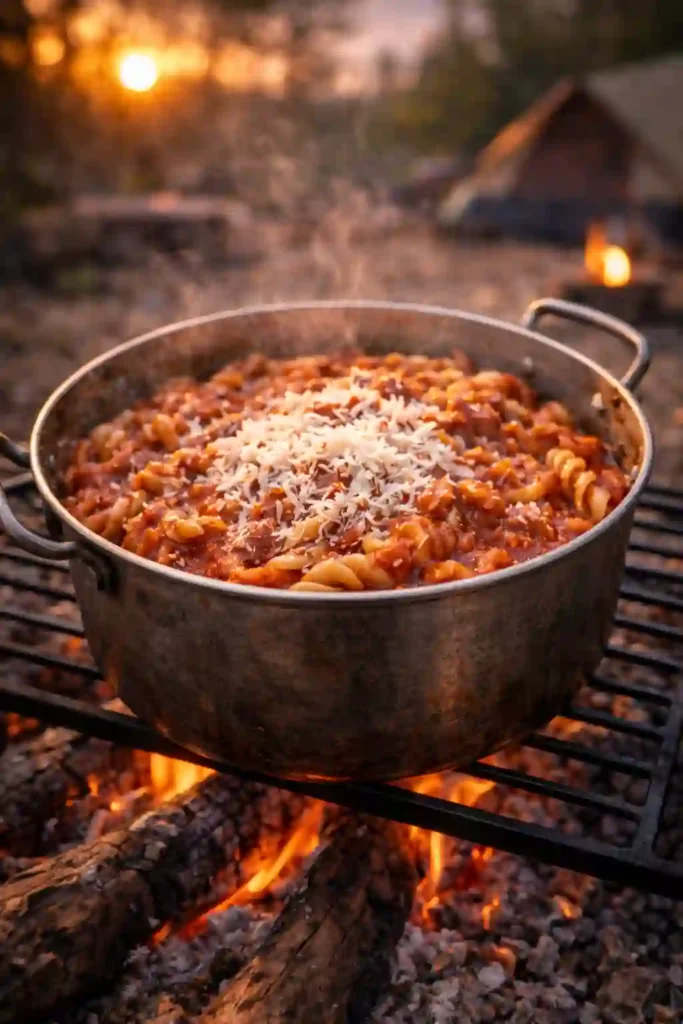
Pasta with jar sauce is one of the easiest meals you can make while camping.
It is warm, filling, and requires only a few simple ingredients. After a long day outside, this dish comes together quickly and satisfies everyone at the campsite.
All you need is pasta, a jar of your favorite sauce, and a pot to cook in.
You can prepare it on a camp stove or over steady campfire coals. There is no need for complex steps or extra tools.
Everything cooks in one pot, which makes cleanup fast and easy.
You can also add cooked meat, vegetables, or cheese to make it heartier.
Pasta with jar sauce is a reliable meal that delivers comfort and flavor with very little effort.
Ingredients
- 2 cups dry pasta (penne or spaghetti)
- 1 jar tomato pasta sauce
- 4 cups water
- 1 tablespoon olive oil
- ½ teaspoon salt
- ½ teaspoon black pepper
- ½ cup grated parmesan cheese (optional)
- 1 cup cooked ground beef or sausage (optional)
How to Make Pasta with Jar Sauce
- Place a large pot on a camp stove or on a grill grate over medium heat. Add water and bring it to a steady boil.
- Once the water is boiling, add salt and a small amount of olive oil. This helps improve flavor and reduce sticking.
- Add the dry pasta to the boiling water. Stir immediately to keep it from clumping together.
- Let the pasta cook for 8 to 12 minutes, depending on the type. Stir every few minutes to prevent sticking to the bottom of the pot.
- Check the pasta for doneness. It should be tender but still slightly firm when bitten.
- Carefully drain the water using a lid or strainer. Be cautious of hot steam.
- Return the pot with the cooked pasta to low heat.
- Pour the jar of tomato sauce over the pasta. Stir gently to coat all pieces evenly.
- If using cooked meat, add it at this stage. Mix well so the meat warms through.
- Sprinkle black pepper over the mixture. Taste and adjust seasoning if needed.
- Let the pasta and sauce simmer together for about 3 to 5 minutes. This allows the flavors to blend. Stir occasionally.
- Remove the pot from heat. Add grated parmesan cheese if desired and stir lightly.
- Let the pasta rest for a minute before serving. Serve warm for a comforting camping meal.
Nutritional Facts (Per Serving)
- Calories: 400 to 500
- Protein: 12 to 20 grams
- Fat: 10 to 18 grams
- Carbohydrates: 60 to 70 grams
- Fiber: 3 to 5 grams
- Sodium: 600 to 900 milligrams
11 – Campfire Nachos.
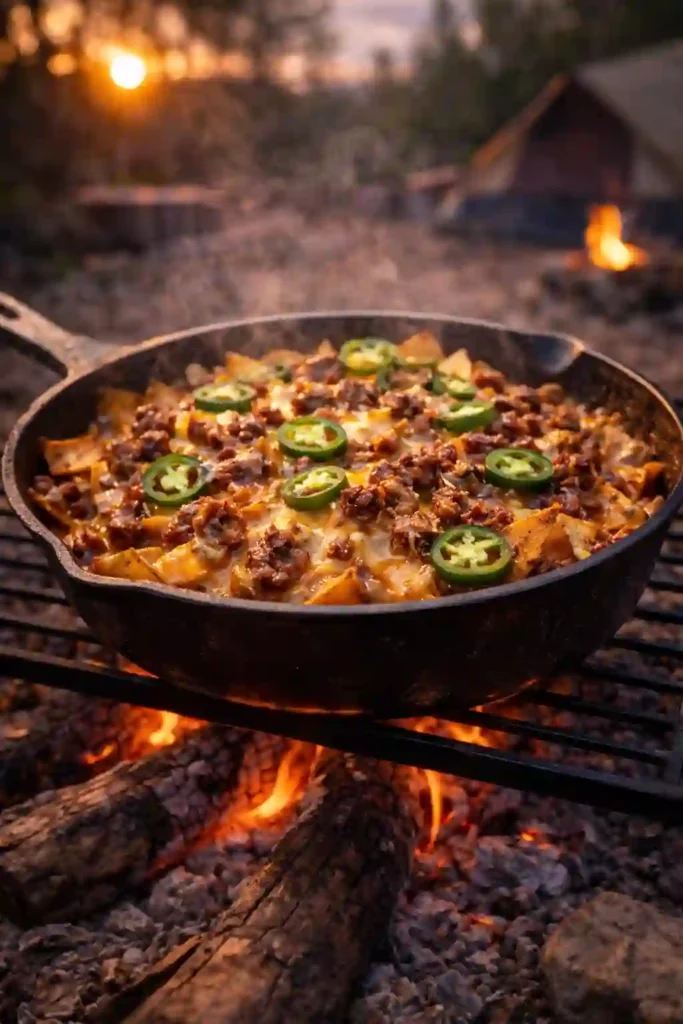
Campfire nachos are a fun and flavorful meal that is perfect for camping trips.
They are easy to prepare, quick to cook, and great for sharing. After a long day outdoors, this warm and cheesy dish brings everyone together around the fire.
You only need a skillet, some tortilla chips, cheese, and your favorite toppings.
Everything layers into one pan and melts together over steady heat. The result is crispy chips topped with gooey cheese and savory flavors.
Campfire nachos are simple to adjust based on taste. Add cooked meat, beans, or fresh vegetables for extra texture and flavor.
With minimal prep and easy cleanup, this meal is a smart and satisfying choice for outdoor cooking.
Ingredients
- 1 large bag tortilla chips
- 2 cups shredded cheddar or Mexican blend cheese
- 1 cup cooked ground beef or shredded chicken
- ½ cup canned black beans, drained
- ½ cup diced tomatoes
- ¼ cup sliced jalapenos (optional)
- ¼ cup sliced onions
- ½ cup salsa
- ½ cup sour cream (optional)
How to Make Campfire Nachos
- Place a cast iron skillet on a grill grate over steady campfire coals. Make sure the heat is medium and not too strong.
- Spread a layer of tortilla chips evenly across the bottom of the skillet. Try not to overcrowd them.
- Sprinkle a layer of shredded cheese over the chips. Make sure most chips are lightly covered.
- Add a layer of cooked ground beef or shredded chicken on top of the cheese. Spread it evenly.
- Sprinkle black beans, diced tomatoes, jalapenos, and onions over the meat layer.
- Add another light layer of cheese on top. This helps hold everything together when melted.
- Cover the skillet loosely with foil or a lid. This traps heat and helps the cheese melt evenly.
- Let the nachos cook for about 5 to 8 minutes. Check often to make sure the chips do not burn on the bottom.
- Once the cheese is fully melted and bubbly, carefully remove the skillet from the heat. Use heat safe gloves if needed.
- Let the nachos cool for 1 to 2 minutes before serving. This allows the cheese to set slightly.
- Top with salsa and sour cream if desired. Serve directly from the skillet for easy sharing.
- Enjoy while warm for the best texture and flavor.
Nutritional Facts (Per Serving)
Calories: 500 to 600
Protein: 20 to 25 grams
Fat: 30 to 35 grams
Carbohydrates: 40 to 50 grams
Fiber: 4 to 6 grams
Sodium: 800 to 1000 milligrams
12 – Beaf and Cheese Sliders.
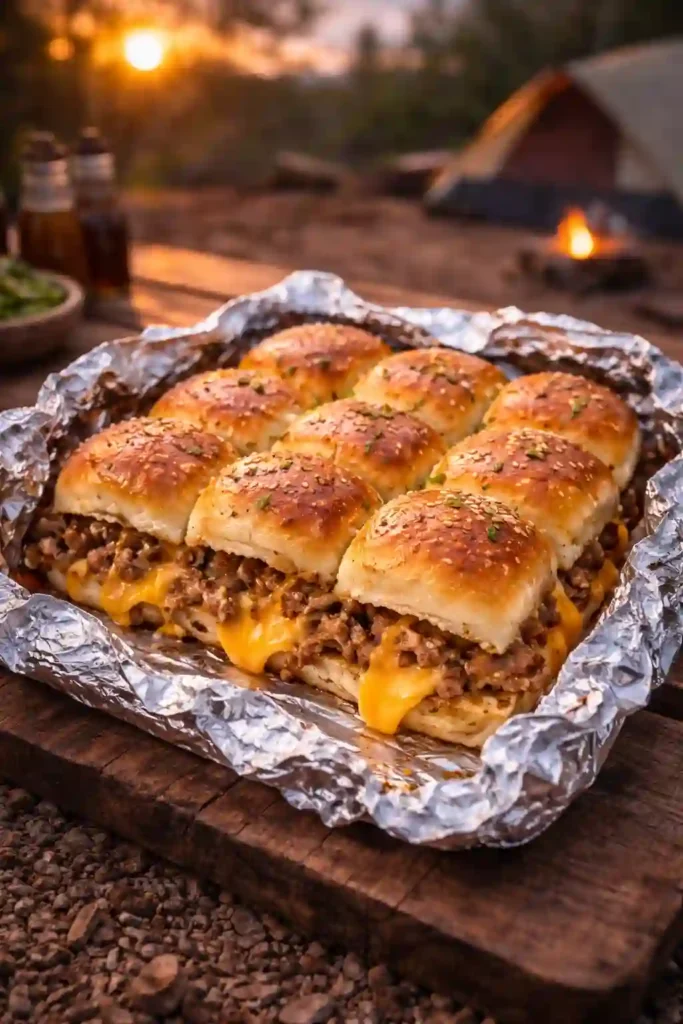
Beaf and cheese sliders are a simple and satisfying meal for camping trips.
They are easy to prepare, quick to heat, and perfect for feeding a group. After a long day outside, these warm mini sandwiches are both filling and comforting.
You can assemble the sliders at home and wrap them in foil before your trip.
When it is time to eat, just place the foil pack over steady campfire coals or on a grill grate.
The cheese melts, the Beaf warms, and the buns turn soft and slightly crisp on the edges.
Beaf and cheese sliders are easy to adjust. Add mustard, pickles, or even a light butter glaze for extra flavor. They are perfect for lunch or dinner at the campsite.
Ingredients
- 12 slider buns
- 12 slices deli Beaf
- 6 slices cheddar or Swiss cheese
- 3 tablespoons butter, melted
- 1 tablespoon mustard (optional)
- 1 teaspoon garlic powder
- 1 teaspoon dried parsley (optional)
How to Make Beaf and Cheese Sliders
- Slice the slider buns in half horizontally without separating them into individual pieces. Keep the top and bottom halves intact.
- Place the bottom half of the buns on a large sheet of heavy duty foil. Make sure the foil is big enough to wrap the sliders fully.
- Lay the Beaf slices evenly across the bottom buns. Cover the surface so each slider has enough filling.
- Place cheese slices on top of the Beaf. You can cut the cheese slices in half to fit evenly across the buns.
- If using mustard, spread a thin layer on the inside of the top bun section.
- Place the top half of the buns over the cheese layer to form the sliders.
- In a small bowl, mix melted butter with garlic powder and dried parsley.
- Brush the butter mixture evenly over the top of the buns. This adds flavor and helps the tops brown slightly.
- Wrap the entire set of sliders tightly in foil. Seal the edges well to trap heat inside.
- Place the foil packet on a grill grate over medium campfire coals. Avoid direct strong flames.
- Heat for about 10 to 15 minutes. Flip the packet halfway through to warm evenly.
- Carefully remove from heat and let rest for 2 minutes before unwrapping. Slice into individual sliders and serve warm.
Nutritional Facts (Per Slider)
- Calories: 200 to 250
- Protein: 10 to 12 grams
- Fat: 10 to 14 grams
- Carbohydrates: 18 to 22 grams
- Fiber: 1 gram
- Sodium: 400 to 600 milligrams
Admin