Banana Pudding Cheesecake Cones Recipe Kids Love
You know those days when you want something sweet, creamy, and comforting… but you do not want to spend hours baking in the kitchen?
This recipe is exactly for those moments.
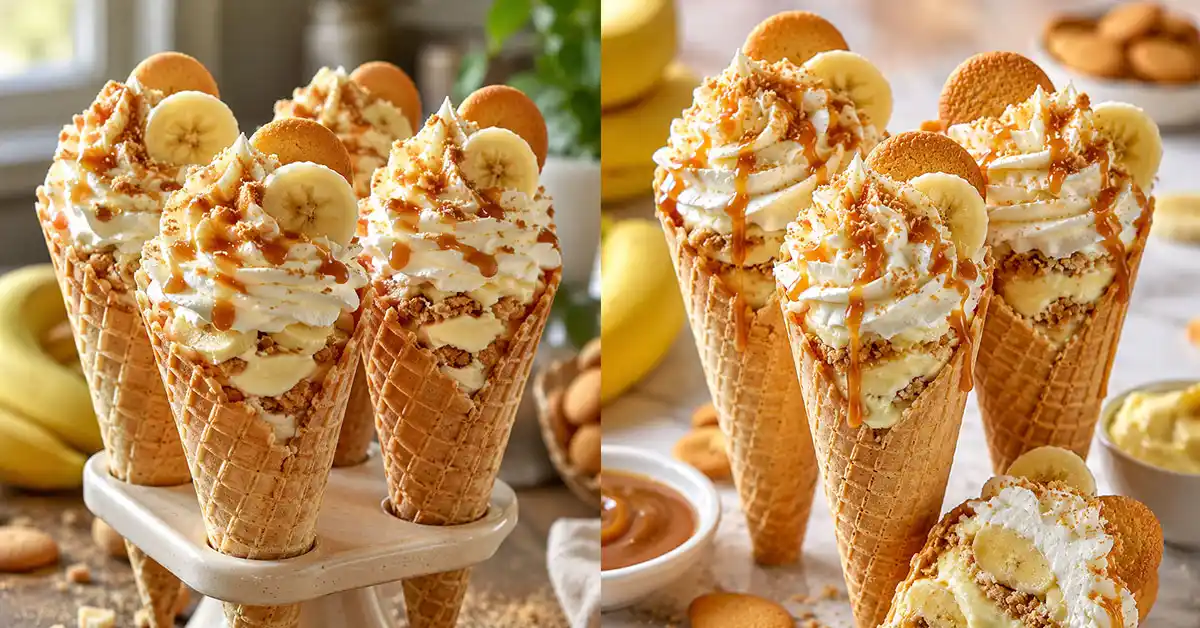
These Banana Pudding Cheesecake Cones are soft, creamy, crunchy, and packed with sweet banana flavor in every bite. They taste like a mix of classic banana pudding, rich cheesecake, and your favorite ice cream cone all in one fun dessert.
The best part?
You do not even need to turn on the oven.
Everything comes together fast with simple ingredients you may already have at home. That means less stress, less mess, and more time enjoying dessert with your family.
And honestly… once you take the first bite, it is hard to stop.
The smooth cheesecake filling, soft banana slices, crunchy cookies, and crispy cone create the perfect mix of textures. It feels fancy, but it is secretly one of the easiest desserts you can make.
If you want a dessert that looks beautiful, tastes amazing, and keeps everyone asking for more, you are going to love this recipe.
What Is This Recipe?
Banana Pudding Cheesecake Cones are a fun no bake dessert made with creamy cheesecake filling, banana pudding flavor, fresh bananas, and crunchy cookies stuffed inside crispy waffle cones.
Think of it like classic banana pudding… but upgraded.
Instead of serving it in a bowl, you fill crunchy cones with layers of creamy cheesecake mixture and sweet toppings. Every bite gives you smooth, soft, crunchy, and creamy textures all at once.
What makes this recipe special is how easy it is to customize. You can make it for birthday parties, summer cookouts, movie nights, or quick family desserts. It looks cute, tastes rich, and takes very little effort.
Kids love it. Adults love it. And it disappears fast every single time.
Why You Will Love This Recipe
- It takes less than 30 minutes to make from start to finish
- No baking means less heat and less kitchen mess
- The creamy cheesecake filling tastes rich and smooth without being too heavy
- Waffle cones make this dessert fun, crunchy, and easy to hold
- You only need simple and budget friendly ingredients
- It is perfect for parties because everyone gets their own cone
- Fresh bananas add natural sweetness and soft texture
- You can make it ahead for busy days or special events
- Kids can help make it, which makes dessert time even more fun
- It feels like a bakery style treat without the expensive cost
Here’s where most people get this wrong…
They overfill the cones too early and end up with soggy cones. Do not worry. I will show you the best way to keep them crispy and fresh.
Ingredients
- 8 waffle cones for the crispy dessert base
- 1 package instant banana pudding mix for rich banana flavor
- 1 cup cold milk to help the pudding become thick and creamy
- 8 ounces cream cheese, softened so it blends smooth without lumps
- 1 cup whipped topping for a light and fluffy texture
- 1 teaspoon vanilla extract for warm sweet flavor
- 2 ripe bananas sliced into small rounds
- 1 cup crushed vanilla wafers for crunch and classic banana pudding taste
- 2 tablespoons powdered sugar to sweeten the cheesecake filling
- Extra whipped cream for topping if you want a pretty bakery style finish
- Caramel drizzle or chocolate syrup for extra sweetness
- Small banana slices and cookie crumbs for garnish
Try using very ripe bananas because they taste sweeter and softer. If your bananas are green or firm, the dessert will not taste as rich and creamy.
You can also swap the waffle cones with sugar cones if you want a lighter crunch. Some people even use mini cones for party desserts.
For a richer flavor, use full fat cream cheese. Low fat works too, but the filling may not taste as creamy.
How To Make Banana Pudding Cheesecake Cones
Step 1
Start by making the cheesecake filling. In a large bowl, add the softened cream cheese and powdered sugar. Mix slowly at first so the sugar does not fly everywhere. Then beat until the mixture looks smooth, creamy, and fluffy. Add the vanilla extract and continue mixing for another minute. In a separate bowl, whisk together the banana pudding mix and cold milk. Keep stirring until it becomes thick and silky. Pour the pudding mixture into the cream cheese bowl and fold everything together gently. Add the whipped topping slowly and mix until the filling becomes light, creamy, and smooth. The texture should look thick enough to hold inside the cones without dripping. If it feels too soft, place it in the fridge for 10 minutes before using. This small trick makes a huge difference because cold filling stays firm and tastes even creamier.
Step 2
Now prepare the crunchy layers and toppings. Slice the bananas into small thin rounds so they fit nicely inside the cones. Crush the vanilla wafers into small crumbs using your hands or a zip bag and rolling pin. You want some fine crumbs and some bigger crunchy pieces for texture. Take each waffle cone and spoon a little cookie crumb mixture into the bottom. This helps stop the cone from getting soggy too fast. Add a spoonful of cheesecake filling on top, then place a few banana slices inside. Continue layering the filling, bananas, and cookie crumbs until the cone is full. Press gently while filling so there are no empty spaces inside the cone. Be careful not to overfill because the filling can spill out once you add toppings. The layers should look thick, creamy, and colorful with crunchy cookie bits in between.
Step 3
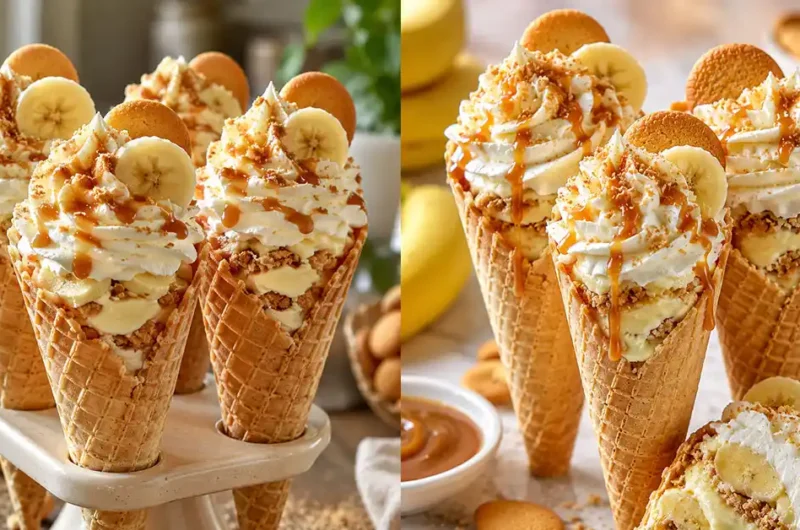
Once the cones are filled, it is time to make them look extra special. Pipe or spoon whipped cream on top of each cone in a soft swirl shape. Sprinkle extra cookie crumbs over the whipped cream for crunch and flavor. Add a banana slice on top for a fresh bakery style look. If you love rich desserts, drizzle caramel or chocolate sauce over everything. Place the cones upright in cups while chilling so they stay steady and neat. Let them chill in the fridge for about 15 minutes before serving. This helps all the flavors blend together and makes the filling taste thick, cold, and creamy. When you bite into the cone, you will get crunchy waffle cone, smooth cheesecake filling, soft bananas, and sweet cookies all at once. It is the kind of dessert that makes people stop talking after the first bite.
Pro Tips
- Always use softened cream cheese because cold cream cheese creates lumps that are hard to remove. Smooth filling makes the dessert taste more professional.
- Chill the filling before stuffing the cones. Cold filling stays thick and helps prevent messy cones.
- Add cookie crumbs at the bottom of the cone first. This creates a small barrier that keeps the cone crispy longer.
- Use ripe bananas with small brown spots. They taste sweeter and blend better with the cheesecake flavor.
- Fill the cones close to serving time for the best crunch. Fresh cones always taste better.
- Do not overmix the whipped topping or the filling may lose its fluffy texture. Fold gently for the best results.
- Want extra crunch? Add chopped nuts or toffee bits between the layers.
- Mini cones work great for birthdays and party dessert trays because guests can grab them easily.
- Chill the finished cones upright in cups so the filling stays neat and pretty.
- Drizzle caramel right before serving so it looks glossy and fresh instead of soaking into the topping.
Common Mistakes To Avoid
- Using warm cream cheese can make the filling too runny and messy.
- Filling cones too early can make them soggy before serving time.
- Using bananas that are too green will make the dessert taste less sweet.
- Skipping the chilling step can cause soft filling that does not hold shape well.
- Overfilling the cones can make the toppings slide off the sides.
- Using too much milk in the pudding mixture makes the filling thin and watery.
- Crushing cookies too finely removes the crunchy texture that makes this dessert special.
- Leaving bananas uncovered too long can make them turn brown quickly.
- Adding heavy toppings can break delicate waffle cones.
- Not layering ingredients properly can leave empty gaps inside the cone.
- Using stale cones ruins the crispy texture completely.
- Storing finished cones overnight may soften the cone too much.
Variations And Customization Ideas
Want more protein? Add vanilla protein powder or Greek yogurt into the filling for a high protein dessert version.
For a vegan version, use dairy free cream cheese, coconut whipped topping, and plant based pudding mix.
Need a faster version? Use store bought cheesecake filling to save extra time.
Love chocolate? Add mini chocolate chips or chocolate pudding layers.
Want a tropical twist? Add crushed pineapple and toasted coconut flakes.
You can also try strawberry slices, peanut butter drizzle, or cinnamon cookie crumbs for fun flavor changes.
Now let’s make it even better…
Try freezing the cones for 20 minutes before serving. They taste almost like cheesecake ice cream cones.
Serving Ideas
- Serve them at birthday parties for easy handheld desserts
- Enjoy them during movie nights with extra caramel drizzle
- Make mini versions for baby showers or summer cookouts
- Serve after dinner with cold coffee or iced tea
- Add colorful sprinkles for fun kid friendly desserts
- Place them on a dessert tray with brownies and cookies
Storage And Reheating
Store the cheesecake filling separately in the fridge for up to 3 days. Keep it inside an airtight container so it stays fresh and creamy.
Do not store fully filled cones overnight because the cones can become soft.
If needed, prepare everything ahead and fill the cones right before serving.
This dessert does not need reheating because it tastes best cold.
Nutrition Facts
Approximate Per Cone:
- Calories: 320
- Protein: 4g
- Carbs: 38g
- Fat: 16g
- Sugar: 24g
Quick Summary
- Easy no bake dessert
- Ready in about 20 minutes
- Creamy cheesecake and banana pudding flavor
- Crunchy waffle cones and cookie layers
- Perfect for parties and summer snacks
- Fun for kids and adults
- Easy to customize with toppings and flavors
When To Eat This
These Banana Pudding Cheesecake Cones are perfect for so many moments.
Need a quick dessert after dinner?
This recipe works perfectly.
Want something fun for movie night or weekend cravings?
These cones disappear fast.
Hosting a summer party or family gathering?
People love handheld desserts that look cute and taste amazing.
Late night sweet craving?
One cold creamy cone feels comforting and satisfying without a lot of work.
And honestly…
Sometimes you just need a dessert that makes you smile after a long day. These cones do exactly that.
Frequently Asked Questions About Banana Pudding Cheesecake Cones
1. Can I make Banana Pudding Cheesecake Cones ahead of time?
Yes, but it is best to keep the filling and cones separate until serving time. If you fill the cones too early, they can become soft and lose their crunch. Store the cheesecake filling in the fridge and assemble the cones right before eating for the best texture and flavor.
2. How long do these cheesecake cones last?
The cheesecake filling can stay fresh in the refrigerator for about 3 days when stored in an airtight container. Fully assembled cones are best eaten within a few hours because the cones slowly absorb moisture from the filling.
3. Can I freeze Banana Pudding Cheesecake Cones?
You can freeze the cheesecake filling for up to 1 month, but freezing the full cones is not recommended because the waffle cones may turn soft after thawing. If you want a frozen dessert feel, chill the filled cones for 15 to 20 minutes before serving.
4. What type of cones work best for this recipe?
Waffle cones work best because they are thick, crunchy, and strong enough to hold the creamy filling. Sugar cones also work well if you prefer a lighter crunch and sweeter flavor.
5. Can I use homemade whipped cream instead of whipped topping?
Absolutely. Homemade whipped cream gives the dessert a fresh and rich taste. Just make sure it is whipped until thick and fluffy so the filling stays creamy and stable.
6. How do I stop the cones from getting soggy?
Most people skip this important step. Add crushed cookies or melted chocolate inside the bottom of the cone before filling it. This creates a barrier that helps keep the cone crispy longer.
7. Can I add other fruits to this recipe?
Yes. Strawberries, blueberries, raspberries, or crushed pineapple taste amazing with the creamy cheesecake filling. Mixing fruits can make the dessert even more colorful and fun.
8. Is this recipe good for parties?
Definitely. These cones are easy to hold, easy to serve, and look beautiful on dessert tables. You can even make mini versions for birthdays, baby showers, or summer parties.
9. Can kids help make this recipe?
Yes, and kids usually love it. They can help crush cookies, layer bananas, spoon filling into cones, and add toppings. It is a fun family dessert activity.
10. What makes this recipe different from regular banana pudding?
The crunchy cone changes everything. You still get the creamy banana pudding flavor, but the crispy cone adds texture and makes the dessert more exciting, portable, and fun to eat.
Banana Pudding Cheesecake Cones Recipe Kids Love
Course: Uncategorized8
servings20
minutes320
kcalIngredients
8 waffle cones for the crispy dessert base
1 package instant banana pudding mix for rich banana flavor
1 cup cold milk to help the pudding become thick and creamy
8 ounces cream cheese, softened so it blends smooth without lumps
1 cup whipped topping for a light and fluffy texture
1 teaspoon vanilla extract for warm sweet flavor
2 ripe bananas sliced into small rounds
1 cup crushed vanilla wafers for crunch and classic banana pudding taste
2 tablespoons powdered sugar to sweeten the cheesecake filling
Extra whipped cream for topping if you want a pretty bakery style finish
Caramel drizzle or chocolate syrup for extra sweetness
Small banana slices and cookie crumbs for garnish
Directions
- Start by making the cheesecake filling. In a large bowl, add the softened cream cheese and powdered sugar. Mix slowly at first so the sugar does not fly everywhere. Then beat until the mixture looks smooth, creamy, and fluffy. Add the vanilla extract and continue mixing for another minute. In a separate bowl, whisk together the banana pudding mix and cold milk. Keep stirring until it becomes thick and silky. Pour the pudding mixture into the cream cheese bowl and fold everything together gently. Add the whipped topping slowly and mix until the filling becomes light, creamy, and smooth. The texture should look thick enough to hold inside the cones without dripping. If it feels too soft, place it in the fridge for 10 minutes before using. This small trick makes a huge difference because cold filling stays firm and tastes even creamier.
- Now prepare the crunchy layers and toppings. Slice the bananas into small thin rounds so they fit nicely inside the cones. Crush the vanilla wafers into small crumbs using your hands or a zip bag and rolling pin. You want some fine crumbs and some bigger crunchy pieces for texture. Take each waffle cone and spoon a little cookie crumb mixture into the bottom. This helps stop the cone from getting soggy too fast. Add a spoonful of cheesecake filling on top, then place a few banana slices inside. Continue layering the filling, bananas, and cookie crumbs until the cone is full. Press gently while filling so there are no empty spaces inside the cone. Be careful not to overfill because the filling can spill out once you add toppings. The layers should look thick, creamy, and colorful with crunchy cookie bits in between.
- Once the cones are filled, it is time to make them look extra special. Pipe or spoon whipped cream on top of each cone in a soft swirl shape. Sprinkle extra cookie crumbs over the whipped cream for crunch and flavor. Add a banana slice on top for a fresh bakery style look. If you love rich desserts, drizzle caramel or chocolate sauce over everything. Place the cones upright in cups while chilling so they stay steady and neat. Let them chill in the fridge for about 15 minutes before serving. This helps all the flavors blend together and makes the filling taste thick, cold, and creamy. When you bite into the cone, you will get crunchy waffle cone, smooth cheesecake filling, soft bananas, and sweet cookies all at once. It is the kind of dessert that makes people stop talking after the first bite.
Admin