

Super Bowl appetizer recipes for crowd pleasing snacks

Discover the best Super Bowl appetizer recipes for your game day party.
Find easy, tasty, crowd-pleasing snacks, dips, sliders, wings, and bite-size starters you can make at home.
These recipes are simple to follow, quick to prepare, and perfect for serving guests during the big game and fun gatherings with family and friends.
1 – Beef Nachos

Beef nachos are the ultimate crowd-pleasing appetizer for game day gatherings and party tables.
Crispy tortilla chips layered with seasoned halal beef, melted cheese, and bold toppings create a perfect bite every time.
They are quick to assemble, easy to customize, and ideal for sharing, making them a reliable favorite for any celebration menu.
Prep & Cooking Details
- Prep time: 15 minutes
- Cook time: 20 minutes
- Total time: 35 minutes
- Servings: 4–6 people
- Difficulty: Easy
- Best for: Parties, game nights, snack platters
Ingredients
- 300g halal ground beef
- 1 large bag tortilla chips
- 2 cups shredded cheddar or Mexican-blend cheese
- 1 small onion, finely chopped
- 2 cloves garlic, minced
- 1 tomato, diced
- 1 jalapeño, sliced (optional)
- 1 tsp chili powder
- 1 tsp cumin powder
- ½ tsp paprika
- Salt to taste
- 2 tbsp oil
- ½ cup black beans (optional)
- ½ cup sweet corn (optional)
- Fresh coriander or parsley for garnish
- Optional toppings: sour cream, salsa, guacamole
How to Make Beef Nachos (Step-by-Step)
- Heat a skillet over medium heat and add oil. Once warm, add the chopped onion and cook until soft and lightly golden. This builds a sweet, savory base for the beef mixture.
- Add minced garlic and cook for about 30 seconds until fragrant, stirring so it doesn’t burn.
- Add the halal ground beef to the pan. Break it apart with a spatula and cook until fully browned and no pink remains.
- Sprinkle in chili powder, cumin, paprika, and salt. Mix thoroughly so the spices coat the beef evenly. Cook for another 3–4 minutes to deepen the flavor.
- Stir in black beans and corn if using. Cook for 2 minutes more, then remove from heat. The mixture should be moist but not watery.
- Preheat your oven to 190°C (375°F). Line a baking tray with parchment for easy cleanup.
- Spread tortilla chips in an even layer. Try not to overlap too much so every chip gets toppings.
- Spoon the hot beef mixture evenly across the chips. Make sure each section gets some meat.
- Scatter diced tomatoes and jalapeño slices over the top for freshness and heat.
- Generously sprinkle shredded cheese across everything, covering most of the surface for a proper melt.
- Bake for 8–12 minutes until the cheese is fully melted and bubbling and the chip edges are lightly toasted.
- Remove from the oven and rest for 2 minutes. Finish with chopped coriander or parsley and any cold toppings. Serve immediately while hot and gooey.
2 – Spinach Artichoke Dip
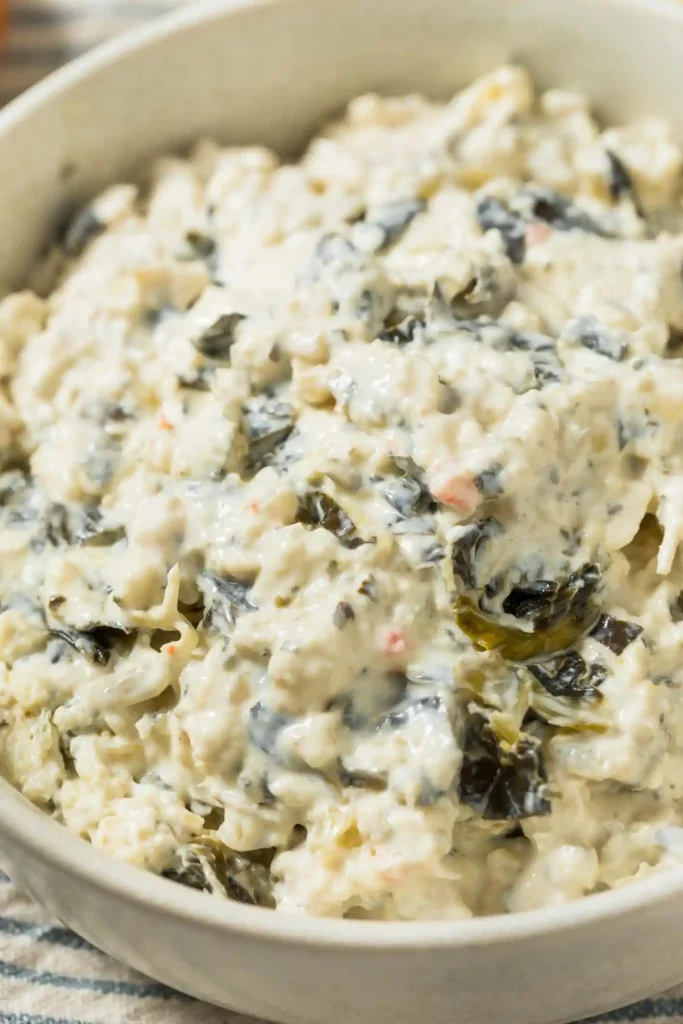
Spinach Artichoke Dip is a warm, creamy appetizer that delivers rich flavor in every scoop.
Blended with cheese, tender spinach, and tangy artichokes, this dip is perfect for game nights and gatherings.
It pairs beautifully with chips, bread, or crackers and can be prepared ahead, then baked fresh before serving for maximum taste and texture.
Prep & Cooking Details
- Prep time: 15 minutes
- Cook time: 25 minutes
- Total time: 40 minutes
- Servings: 6–8 people
- Difficulty: Easy
- Best served: Hot and freshly baked
Ingredients
- 2 cups chopped spinach (fresh or frozen, thawed and squeezed dry)
- 1 cup chopped artichoke hearts (canned or jarred, drained)
- 200g cream cheese, softened
- ½ cup sour cream
- ½ cup mayonnaise
- 1 cup shredded mozzarella cheese
- ½ cup grated parmesan cheese
- 2 cloves garlic, minced
- ½ tsp black pepper
- ½ tsp salt (adjust to taste)
- ½ tsp chili flakes (optional)
- For serving: tortilla chips, crackers, or toasted bread slices
How to Make Spinach Artichoke Dip (Step-by-Step)
- Preheat your oven to 180°C (350°F). Lightly grease a small baking dish so the dip doesn’t stick and cleaning is easier later.
- If using frozen spinach, thaw it completely and squeeze out as much water as possible using your hands or a clean towel. Excess moisture will thin the dip.
- Chop the artichoke hearts into small bite-sized pieces so they distribute evenly throughout the mixture.
- In a large mixing bowl, add the softened cream cheese. Stir it with a spoon or spatula until smooth and lump-free. This creates a creamy base.
- Add sour cream and mayonnaise to the bowl. Mix thoroughly until fully combined and silky in texture.
- Stir in minced garlic, salt, black pepper, and chili flakes if using. Mix well so the seasoning spreads evenly.
- Add chopped spinach and artichokes into the cream mixture. Fold gently to distribute without over-mashing the vegetables.
- Mix in mozzarella and half of the parmesan cheese. Stir until everything is evenly combined and thick.
- Transfer the mixture into the prepared baking dish. Spread it evenly and smooth the top with a spoon.
- Sprinkle the remaining parmesan cheese over the surface to create a golden, slightly crisp top layer.
- Bake uncovered for about 20–25 minutes until the dip is bubbling around the edges and lightly browned on top.
- Remove from the oven and let it rest for 5 minutes to thicken slightly before serving.
- Serve hot with chips, crackers, or toasted bread. Stir once before serving for the creamiest texture.
3 – Chicken Shawarma Sliders
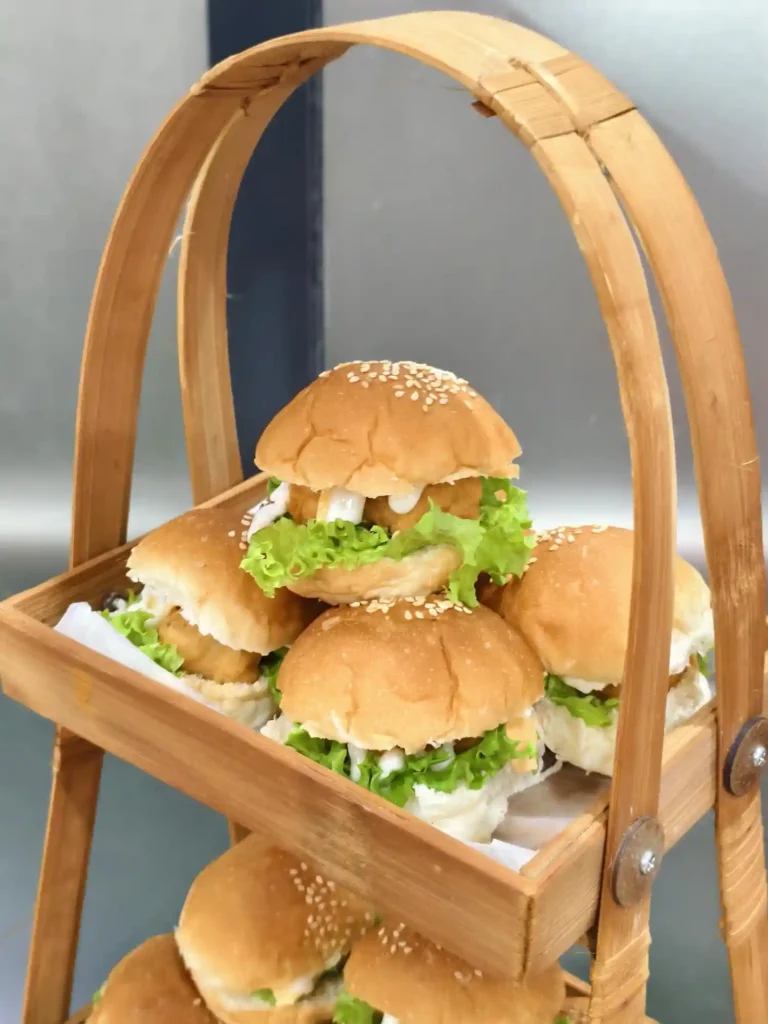
Chicken Shawarma Sliders are bold, juicy, and packed with Middle Eastern-inspired flavor.
Tender halal chicken is marinated with warm spices, cooked until caramelized, and tucked into soft mini buns with creamy sauce and fresh toppings.
These sliders are easy to prepare, highly satisfying, and perfect for party platters, game nights, and casual gatherings.
Prep & Cooking Details
- Prep time: 20 minutes
- Marination time: 1–4 hours (recommended)
- Cook time: 20 minutes
- Total time: About 40 minutes + marination
- Servings: 8–10 sliders
- Difficulty: Easy to Moderate
- Best for: Party platters and snack tables
Ingredients
For the Chicken
- 500g halal boneless chicken thighs or breast, sliced thin
- 3 tbsp plain yogurt
- 2 tbsp oil
- 2 cloves garlic, minced
- 1 tsp cumin powder
- 1 tsp paprika
- ½ tsp turmeric
- 1 tsp coriander powder
- ½ tsp black pepper
- ¾ tsp salt
- 1 tbsp lemon juice
- For Assembly
- 8–10 mini slider buns
- 1 cup shredded lettuce
- 1 tomato, thinly sliced
- ½ onion, thinly sliced
- Garlic Sauce
- ½ cup mayonnaise
- 2 tbsp yogurt
- 1 clove garlic, grated
- Pinch of salt
- 1 tsp lemon juice
How to Make Chicken Shawarma Sliders (Step-by-Step)
- In a large bowl, combine yogurt, oil, minced garlic, lemon juice, and all the spices. Mix until you get a thick, well-blended marinade. This mixture gives the chicken its deep shawarma flavor.
- Add the sliced halal chicken into the marinade. Mix thoroughly so every piece is fully coated. Cover and refrigerate for at least 1 hour, preferably longer for richer taste.
- While the chicken marinates, prepare the garlic sauce by mixing mayonnaise, yogurt, grated garlic, salt, and lemon juice. Stir until smooth and refrigerate to let flavors develop.
- Heat a skillet or grill pan over medium-high heat. Add a small amount of oil to prevent sticking.
- Add the marinated chicken in a single layer. Cook for several minutes without moving so it develops color and slight charring.
- Stir and continue cooking until the chicken is fully cooked, tender, and slightly caramelized at the edges. Avoid overcrowding the pan; cook in batches if needed.
- Lightly toast the slider buns on a dry pan or in the oven for a few minutes. This keeps them from getting soggy after filling.
- Spread a spoonful of garlic sauce on the bottom half of each bun.
- Add a generous portion of hot shawarma chicken on top of the sauce.
- Layer with shredded lettuce, tomato slices, and onions for freshness and crunch.
- Add a little more sauce on the top bun if desired, then close the sliders.
- Arrange on a serving tray and serve warm. For best texture and flavor, serve immediately after assembly.
4 – Mutton Samosas

Mutton samosas are crisp, golden pastries filled with richly spiced minced mutton and aromatics.
Each bite delivers a flaky exterior and a savory, juicy center that makes them a standout appetizer for gatherings and celebrations.
They can be prepared in advance and fried fresh before serving, making them practical and impressive for any party spread.
Prep & Cooking Details
- Prep time: 30 minutes
- Cook time: 25 minutes
- Total time: 55 minutes
- Servings: 18–22 mini samosas
- Difficulty: Moderate
- Make-ahead friendly: Yes
- Best served: Hot and crispy
Ingredients
For the Filling
- 400g minced mutton (halal)
- 2 tbsp oil
- 1 medium onion, finely chopped
- 2 cloves garlic, minced
- 1 tsp ginger paste
- 1 tsp cumin powder
- 1 tsp coriander powder
- ½ tsp garam masala
- ½ tsp black pepper
- ¾ tsp salt (adjust to taste)
- 1 green chili, finely chopped (optional)
- 2 tbsp fresh coriander leaves, chopped
- For the Pastry
- Samosa sheets or spring roll wrappers
- 2 tbsp flour + water (to make sealing paste)
- For Frying
- Oil for deep frying
How to Make Mutton Samosas (Step-by-Step)
- Heat oil in a pan over medium heat. Add the finely chopped onion and cook until soft and lightly golden. Properly cooked onions create a deep flavor base.
- Add garlic and ginger paste. Cook briefly until aromatic, stirring continuously so nothing burns.
- Add the minced mutton and cook while breaking it apart with a spoon. Stir frequently so it browns evenly and does not clump.
- Once the meat changes color and starts to release moisture, add cumin, coriander, garam masala, black pepper, salt, and green chili if using. Mix thoroughly.
- Continue cooking until the moisture evaporates and the filling becomes fairly dry. A dry filling prevents soggy samosas and helps them stay crisp.
- Turn off the heat and mix in fresh coriander leaves. Spread the filling on a plate and let it cool completely before stuffing.
- Prepare a thick paste using flour and water. This will act as edible glue for sealing the wrappers.
- Take a samosa sheet, cut in half if large, and form a cone by folding one side over the other. Seal the edge with flour paste.
- Spoon 1–2 tablespoons of cooled mutton filling into the cone. Do not overfill or it will be difficult to seal.
- Fold the top flap down and seal all edges firmly with the flour paste, pressing gently to remove air pockets.
- Repeat until all filling is used. Keep covered with a cloth so wrappers don’t dry out.
- Heat frying oil over medium heat. Test with a small wrapper piece — it should rise slowly, not burn quickly.
- Fry samosas in small batches, turning occasionally, until deep golden and crisp on all sides. Frying on medium heat ensures a blistered, crunchy shell.
- Remove and drain on paper towels. Let them rest for a few minutes before serving. Serve hot with mint chutney or tamarind sauce.
5 – Mozzarella Sticks
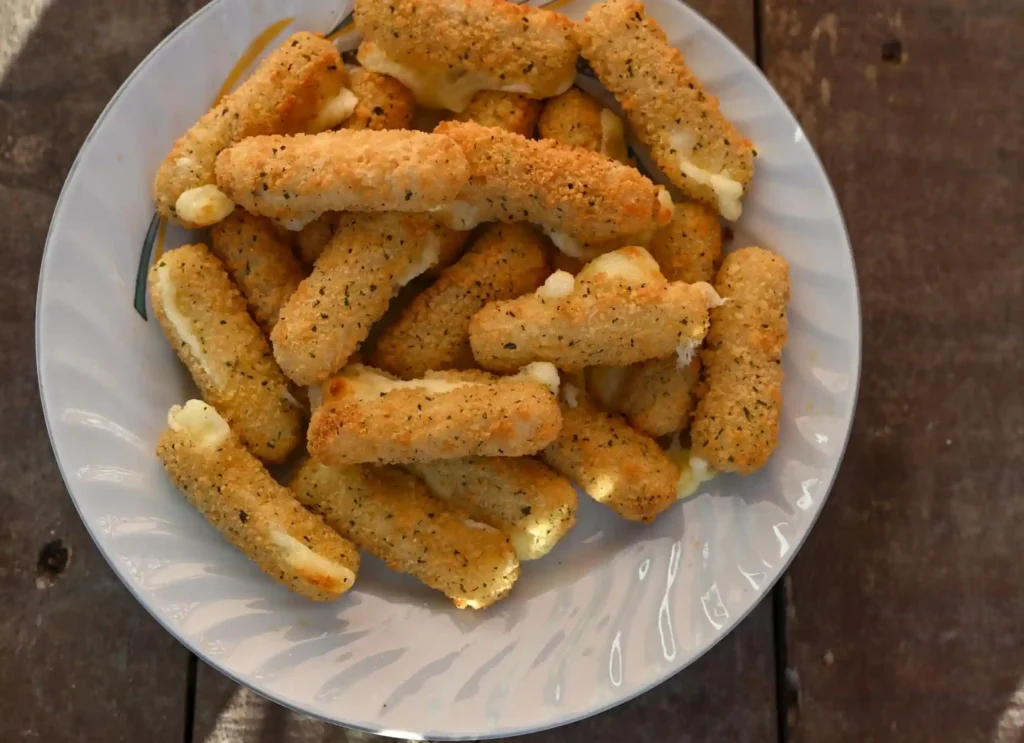
Mozzarella sticks are a classic party appetizer loved for their crunchy coating and perfectly melted cheese center.
Each stick is breaded, seasoned, and fried until golden, then served hot with a dipping sauce.
They are simple to prepare, freezer-friendly, and ideal for gatherings, snack platters, and game-day spreads where quick, satisfying bites are essential.
Prep & Cooking Details
- Prep time: 20 minutes
- Freeze time: 45–60 minutes
- Cook time: 6–8 minutes
- Total time: About 1 hour 20 minutes
- Servings: 4–6 people
- Difficulty: Easy
- Best served: Hot and fresh
Ingredients
- 12 mozzarella string cheese sticks (halal-certified)
- 1 cup all-purpose flour
- 2 large eggs
- 2 tbsp milk
- 1½ cups breadcrumbs (regular or panko)
- ½ cup fine breadcrumbs (for extra coating)
- 1 tsp garlic powder
- 1 tsp paprika
- ½ tsp black pepper
- ¾ tsp salt
- Oil for deep frying
- For serving: marinara sauce or chili sauce
How to Make Mozzarella Sticks (Step-by-Step)
- Cut each mozzarella stick in half if you want shorter appetizer portions. Keep them refrigerated until coating time so the cheese stays firm.
- Prepare three separate bowls for the coating station. Put flour in the first bowl. In the second bowl, whisk eggs with milk until smooth.
- In the third bowl, combine breadcrumbs, fine breadcrumbs, garlic powder, paprika, salt, and black pepper. Mix well so seasoning is evenly distributed.
- Take one cheese stick and roll it in flour first. Coat lightly but completely. This dry layer helps the egg stick better.
- Dip the floured stick into the egg mixture, ensuring all sides are covered. Let excess drip off.
- Roll it in the breadcrumb mixture and press gently so crumbs adhere well. For a thicker crust, repeat the egg and breadcrumb step once more. Double coating helps prevent cheese leaks.
- Place the coated sticks on a tray lined with parchment paper. Make sure they are not touching each other.
- Freeze the coated sticks for at least 45–60 minutes. This step is essential so the cheese doesn’t melt too quickly during frying.
- Heat oil in a deep pan to medium heat. The oil should be hot but not smoking. Test with a breadcrumb — it should sizzle gently.
- Fry mozzarella sticks in small batches. Do not overcrowd the pan or the temperature will drop and coating will soften.
- Fry for about 1–2 minutes per batch, turning gently, until the outside becomes deep golden brown and crisp.
- Remove immediately once golden. Overfrying can cause cheese to burst out.
- Drain on paper towels and let them rest for 1–2 minutes.
- Serve hot with marinara or your favorite dipping sauce for the best gooey cheese pull.
6 – Buffalo Meatball Bites.
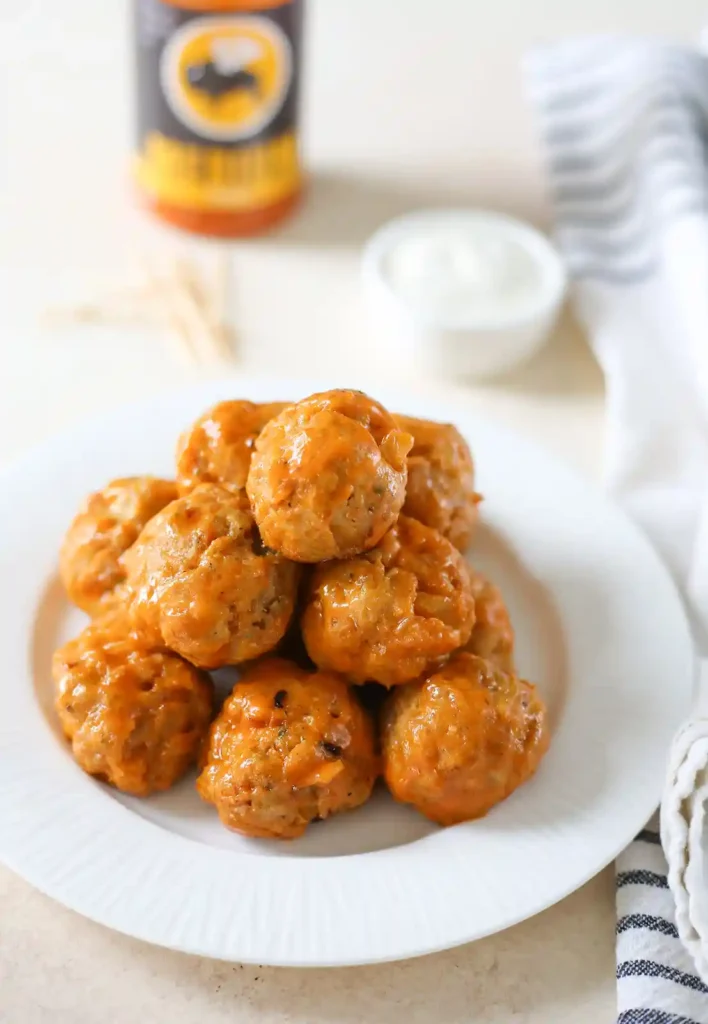
Buffalo Meatball Bites are bold, juicy, and coated in a rich, spicy glaze that makes them irresistible on any appetizer table.
Made with halal minced buffalo meat, these bite-sized treats are oven-baked or pan-cooked, then tossed in a tangy sauce.
They are easy to prepare in batches and perfect for serving with toothpicks at gatherings.
Prep & Cooking Details
- Prep time: 20 minutes
- Cook time: 18–22 minutes
- Total time: About 40 minutes
- Servings: 5–6 people
- Difficulty: Easy
- Best for: Party platters and snack trays
- Make-ahead option: Yes
Ingredients
For the Meatballs
- 500g minced buffalo meat (halal)
- 1 egg
- ½ cup fine breadcrumbs
- 2 tbsp milk
- 2 cloves garlic, minced
- 2 tbsp finely chopped onion
- ½ tsp black pepper
- ¾ tsp salt
- ½ tsp paprika
- 1 tsp cumin powder
- 2 tbsp chopped fresh parsley or coriander
- For the Buffalo Sauce
- ⅓ cup hot chili sauce
- 2 tbsp butter
- 1 tbsp honey or brown sugar
- 1 tbsp vinegar or lemon juice
- Optional for serving: yogurt dip or garlic sauce
How to Make Buffalo Meatball Bites (Step-by-Step)
- Preheat your oven to 200°C (400°F) and line a baking tray with parchment paper or lightly oil it to prevent sticking.
- In a large bowl, combine minced buffalo meat, egg, breadcrumbs, milk, garlic, onion, salt, pepper, paprika, cumin, and chopped herbs.
- Mix gently with your hands or a spoon just until combined. Avoid overmixing, as that can make the meatballs dense instead of tender.
- Scoop small portions and roll into bite-sized balls, about 1 to 1½ inches wide. Keeping them uniform helps them cook evenly.
- Arrange the meatballs on the prepared tray with a little space between each one.
- Bake for 15–18 minutes, turning once halfway, until they are browned outside and fully cooked inside. You can also pan-cook them over medium heat if preferred.
- While the meatballs cook, prepare the sauce. Add hot chili sauce, butter, honey, and vinegar to a small saucepan.
- Heat on low, stirring until the butter melts and the sauce becomes smooth and glossy. Do not boil; gentle heat keeps the flavor balanced.
- Once meatballs are done, transfer them to a large mixing bowl.
- Pour the warm buffalo sauce over the meatballs. Toss carefully until each piece is evenly coated.
- Return them to the tray and bake again for 3–4 minutes to let the sauce cling and slightly caramelize.
- Remove and rest for a few minutes before serving.
- Serve warm with toothpicks and a cool dip on the side to balance the heat.
7 – Chicken Stuffed Jalapeño Poppers .
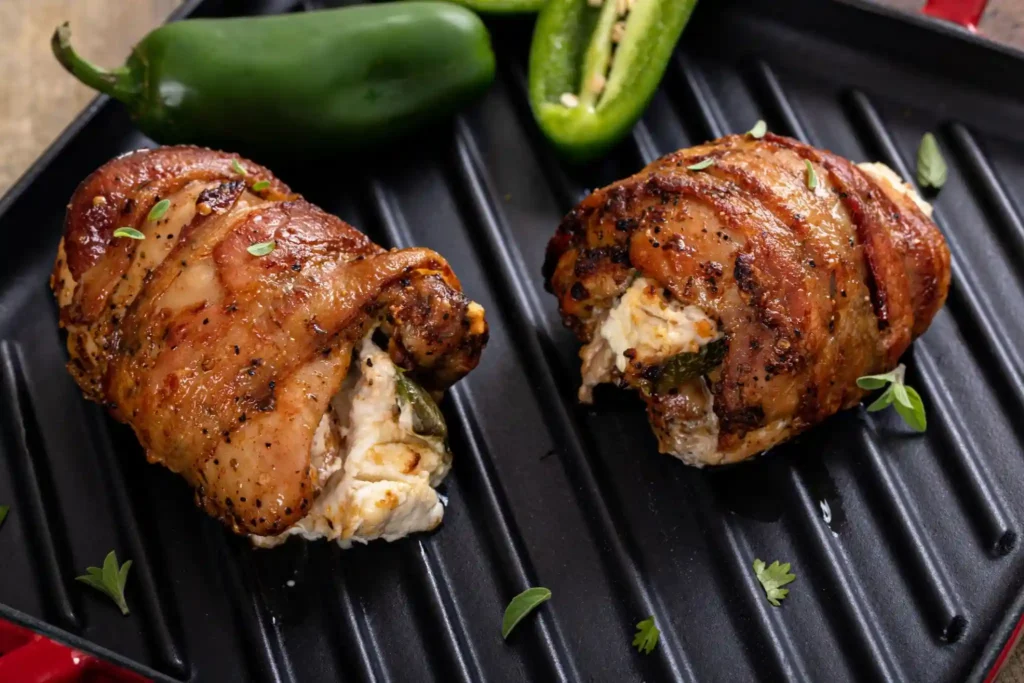
Chicken Stuffed Jalapeño Poppers are bold, creamy, and perfectly balanced between heat and richness.
Fresh jalapeños are filled with a savory halal chicken and cheese mixture, then baked or fried until golden and bubbling.
These bite-sized appetizers are easy to prepare in batches and deliver big flavor, making them ideal for party platters and snack tables.
Prep & Cooking Details
- Prep time: 20 minutes
- Cook time: 18–22 minutes
- Total time: About 40 minutes
- Servings: 20 popper halves
- Difficulty: Easy
- Best for: Party trays and snack platters
- Cooking method: Oven-baked or air-fried
Ingredients
- 10 fresh jalapeños
- 1 cup cooked shredded chicken (halal)
- 150g cream cheese, softened
- ½ cup shredded cheddar or mozzarella cheese
- 2 tbsp mayonnaise or thick yogurt
- 1 clove garlic, grated
- ½ tsp black pepper
- ½ tsp paprika
- ½ tsp salt (adjust to taste)
- 2 tbsp finely chopped coriander or parsley
- Optional topping: ¼ cup breadcrumbs + 1 tbsp oil for crunch
How to Make Chicken Stuffed Jalapeño Poppers (Step-by-Step)
- Preheat your oven to 190°C (375°F). Line a baking tray with parchment paper or lightly grease it to prevent sticking.
- Wash and dry the jalapeños thoroughly. Slice each pepper lengthwise into halves using a sharp knife.
- Use a small spoon to carefully remove the seeds and inner membranes. This reduces heat and creates space for the filling. Wear gloves if your skin is sensitive.
- In a mixing bowl, add softened cream cheese and mayonnaise (or yogurt). Stir until smooth and creamy with no lumps.
- Add shredded halal chicken to the bowl. The chicken should be finely pulled or chopped so the filling is easy to spoon.
- Mix in shredded cheese, grated garlic, black pepper, paprika, salt, and chopped herbs. Stir until everything is evenly combined into a thick filling.
- Taste the mixture and adjust salt or spice if needed. The filling should be savory and slightly bold to balance the pepper heat.
- Spoon the chicken-cheese mixture into each jalapeño half. Press gently so it fills the cavity fully without overflowing too much.
- If you want a crunchy top, mix breadcrumbs with a little oil and sprinkle lightly over each filled pepper.
- Arrange the stuffed jalapeños on the prepared tray in a single layer, leaving small gaps between them.
- Bake for 18–22 minutes until the peppers soften slightly and the tops turn golden with bubbling edges.
- For extra browning, switch to broil/grill mode for the last 2 minutes while watching closely.
- Remove from the oven and let them rest for 5 minutes. The filling will firm up slightly and be easier to handle.
- Serve warm on a platter. They pair well with a cool yogurt or garlic dip to balance the spice.
8 – Hummus & Pita Chips.
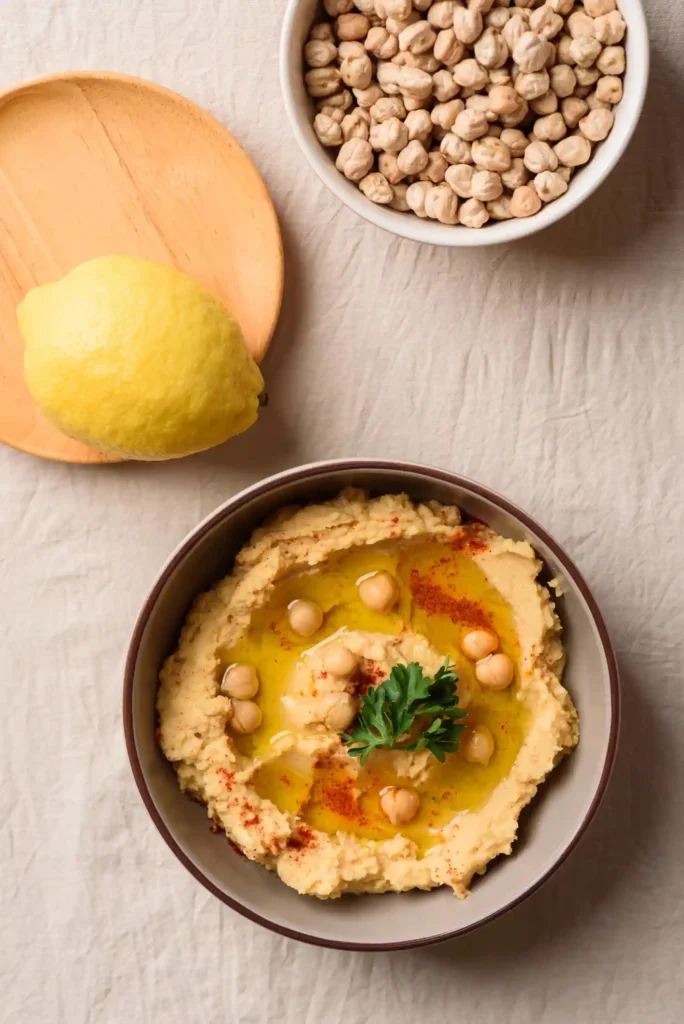
Hummus and pita chips make a reliable, flavor-packed appetizer that suits any gathering.
The dip is creamy, nutty, and balanced with garlic and lemon, while crisp pita chips provide the perfect scoop.
This combination is simple to prepare, easy to present, and works well as a lighter option alongside richer party snacks and hot appetizers.
Prep & Cooking Details
- Prep time: 15 minutes
- Cook time (pita chips): 12–15 minutes
- Total time: About 30 minutes
- Servings: 6 people
- Difficulty: Easy
- Best for: Dips platters and snack boards
- Serving style: Cold dip with warm or crisp chips
Ingredients
For Hummus
- 2 cups canned chickpeas, drained and rinsed
- ¼ cup tahini
- 2 tbsp olive oil
- 2 tbsp lemon juice
- 1–2 cloves garlic
- ½ tsp salt (adjust to taste)
- ½ tsp cumin powder
- 3–5 tbsp cold water (as needed for texture)
- For Pita Chips
- 4 pita breads
- 2 tbsp olive oil
- ½ tsp salt
- ½ tsp paprika or mixed herbs (optional)
- Optional garnish: olive oil drizzle, chili flakes, chopped parsley
How to Make Hummus & Pita Chips (Step-by-Step)
- Start with the hummus. Drain and rinse the chickpeas well to remove excess salt and improve flavor. Pat them slightly dry.
- Add chickpeas to a food processor along with tahini, olive oil, lemon juice, garlic, salt, and cumin powder.
- Blend for about 1 minute until the mixture starts turning into a paste. Stop and scrape down the sides of the bowl.
- Add 2 tablespoons of cold water and blend again. Continue adding water gradually until the hummus becomes smooth and creamy.
- Blend longer than you think necessary — extra blending creates a lighter, silkier texture.
- Taste and adjust with more lemon juice, salt, or garlic if desired. Transfer to a serving bowl and chill while preparing chips.
- Preheat your oven to 180°C (350°F). Line a baking tray with parchment paper.
- Cut each pita bread into triangles, like slicing a pizza. Try to keep sizes similar so they bake evenly.
- Place pita triangles in a bowl. Add olive oil, salt, and paprika or herbs if using. Toss well so each piece is lightly coated.
- Spread the triangles in a single layer on the baking tray without overlapping. Overcrowding can cause uneven crisping.
- Bake for 12–15 minutes, flipping halfway through, until the chips are golden and crisp at the edges. Watch closely near the end to avoid burning.
- Remove and cool for a few minutes — they will become crispier as they set.
- Before serving, drizzle a little olive oil over the hummus and add garnish if desired.
- Serve the hummus with the warm or cooled pita chips arranged around it for easy dipping.
9 – Beef Kofta Bites .
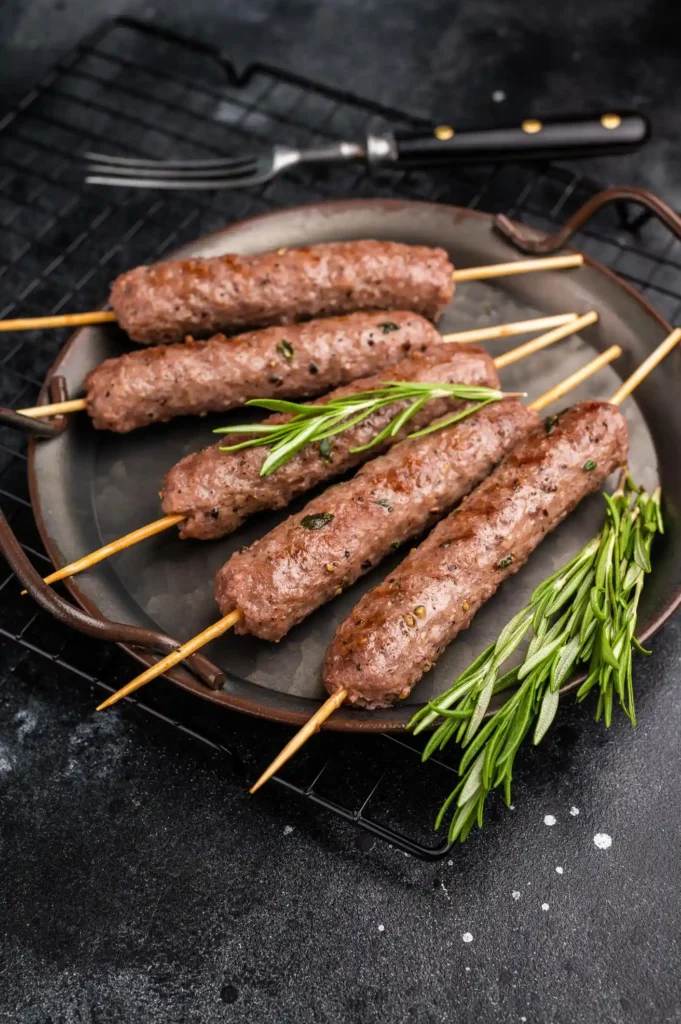
Beef Kofta Bites are tender, aromatic mini kebabs made from seasoned halal ground beef and fresh herbs.
Shaped into small portions and cooked until beautifully browned, they deliver deep flavor in every bite.
These bite-sized appetizers are perfect for party platters, easy to batch-cook, and pair wonderfully with yogurt-based dipping sauces and flatbread.
Prep & Cooking Details
- Prep time: 20 minutes
- Rest time: 15 minutes
- Cook time: 12–15 minutes
- Total time: About 45–50 minutes
- Servings: 20–24 bites
- Difficulty: Easy
- Cooking methods: Pan, oven, or grill
- Best served: Hot with dip
Ingredients
- 500g halal ground beef
- 1 small onion, very finely grated or minced
- 3 cloves garlic, minced
- 3 tbsp chopped fresh coriander or parsley
- 1 egg
- ¼ cup fine breadcrumbs
- 1 tsp cumin powder
- 1 tsp coriander powder
- ½ tsp paprika
- ½ tsp black pepper
- ¾ tsp salt (adjust to taste)
- ½ tsp chili flakes (optional)
- 2 tbsp oil (for cooking)
- Optional dip: thick yogurt, lemon juice, pinch of salt, chopped herbs
How to Make Beef Kofta Bites (Step-by-Step)
- Place the ground halal beef in a large mixing bowl. Make sure it is cold for easier mixing and shaping.
- Add the finely grated onion. If the onion is very watery, squeeze out excess juice so the mixture doesn’t become loose.
- Add minced garlic and chopped herbs to the bowl. These give the kofta a fresh, aromatic base.
- Sprinkle in cumin, coriander powder, paprika, black pepper, salt, and chili flakes if using. Distribute the spices evenly over the meat.
- Add the egg and breadcrumbs. These help bind the mixture and keep the bites tender after cooking.
- Mix everything gently with your hands until just combined. Avoid overmixing, which can make the kofta dense.
- Cover and let the mixture rest for about 15 minutes. This helps the flavors develop and makes shaping easier.
- Lightly oil your hands. Take small portions and roll into balls or short oval shapes, about two bites each. Keep sizes uniform for even cooking.
- For pan cooking, heat a skillet over medium heat and add a thin layer of oil.
- Place kofta bites in the pan without overcrowding. Cook in batches if needed.
- Turn them every 2–3 minutes so all sides brown evenly and develop a slight crust. Total cooking time should be about 10–12 minutes, depending on size.
- Alternatively, bake at 200°C (400°F) for about 12–15 minutes, turning once halfway through.
- Check that they are fully cooked inside and nicely browned outside.
- Rest for a few minutes after cooking so juices redistribute.
- Serve hot with a simple yogurt herb dip and toothpicks for easy party serving.
10 – Crispy Chicken Tenders.

Crispy Chicken Tenders are a timeless appetizer known for their crunchy coating and tender, juicy interior.
Made with halal chicken strips, seasoned breading, and a simple frying or baking method, they are dependable and satisfying.
Perfect for party platters and game-day spreads, these tenders pair well with a variety of dipping sauces and sides.
Prep & Cooking Details
- Prep time: 20 minutes
- Marination time: 30 minutes
- Cook time: 12–15 minutes
- Total time: About 1 hour
- Servings: 4–5 people
- Difficulty: Easy
- Cooking methods: Fry, bake, or air-fry
- Best served: Hot and fresh
Ingredients
- 500g halal chicken breast, cut into strips
- 1 cup buttermilk or milk + 1 tbsp lemon juice
- 1 tsp salt
- ½ tsp black pepper
- 1 tsp paprika
- 1 tsp garlic powder
- Coating
- 1 cup all-purpose flour
- 2 eggs
- 2 tbsp milk
- 1½ cups breadcrumbs or panko
- ½ tsp paprika
- ½ tsp salt
- ½ tsp pepper
- Oil for frying (if deep frying)
- Optional dips: garlic sauce, honey mustard, spicy mayo
How to Make Crispy Chicken Tenders (Step-by-Step)
- Place the halal chicken strips in a bowl. Add buttermilk, salt, pepper, paprika, and garlic powder. Mix well so each strip is coated.
- Cover and let the chicken marinate for at least 30 minutes. This step helps tenderize the meat and adds flavor throughout.
- Prepare a three-step coating station. Put flour in the first bowl. In the second bowl, whisk eggs with milk. In the third bowl, mix breadcrumbs with paprika, salt, and pepper.
- Remove one chicken strip from the marinade and let excess liquid drip off.
- Dredge it in flour first, coating all sides lightly. Shake off extra flour so the coating stays even.
- Dip the floured strip into the egg mixture, ensuring full coverage.
- Transfer to the breadcrumb mixture and press gently so crumbs stick well on all sides. For extra crunch, repeat egg and breadcrumb once more.
- Place coated strips on a tray and let them rest for 5–10 minutes. This helps the coating adhere better during cooking.
- For frying, heat oil over medium heat. Test with a breadcrumb — it should sizzle steadily, not burn instantly.
- Fry chicken tenders in small batches for about 3–4 minutes per side until deep golden and fully cooked inside. Avoid overcrowding the pan.
- Remove and place on paper towels or a rack to drain excess oil while keeping them crisp.
- For baking, arrange on a lined tray, spray lightly with oil, and bake at 200°C (400°F) for 15–18 minutes, flipping halfway.
- For air frying, cook at 190°C (375°F) for about 12–14 minutes, turning once.
- Rest for a few minutes before serving. Serve hot with a selection of dipping sauces for variety.
11 – Stuffed Potato Skins.

Stuffed Potato Skins with cheese and vegetables are a hearty, crowd-pleasing appetizer with a crisp shell and rich, melty filling.
Baked until golden and loaded with colorful veggies and cheese, they offer great texture and flavor in every bite.
These are ideal for party platters, easy to customize, and convenient to prepare ahead.
Prep & Cooking Details
- Prep time: 20 minutes
- Bake time: 35–40 minutes
- Total time: About 1 hour
- Servings: 12 potato skin halves
- Difficulty: Easy
- Make-ahead friendly: Yes
- Best served: Hot and melty
Ingredients
- 6 medium potatoes (russet or similar)
- 1 cup shredded cheddar or mozzarella cheese
- ½ cup finely chopped bell peppers
- ¼ cup sweet corn (boiled or canned)
- 2 tbsp finely chopped onion or spring onion
- 2 tbsp butter or olive oil
- ½ tsp salt
- ½ tsp black pepper
- ½ tsp paprika or chili flakes (optional)
- Optional topping: yogurt sauce or garlic dip, chopped herbs
How to Make Stuffed Potato Skins (Step-by-Step)
- Preheat your oven to 200°C (400°F). Wash and scrub the potatoes thoroughly to remove any dirt since the skins will be eaten.
- Pat the potatoes dry and prick each one a few times with a fork. This prevents bursting while baking.
- Rub the potatoes lightly with oil and a pinch of salt. Place them directly on a baking tray.
- Bake for about 35–40 minutes until the potatoes are tender inside when pierced with a knife.
- Remove from the oven and let them cool just enough to handle safely. They should still be warm but not too hot.
- Cut each potato in half lengthwise using a sharp knife.
- Using a spoon, carefully scoop out most of the inner flesh, leaving a thin layer attached to the skin so it holds shape. Save the scooped potato for another dish.
- Brush the inside and outside of each potato skin with melted butter or olive oil. This helps them crisp up.
- Place skins cut-side down on the tray and bake again for 8–10 minutes until edges start to turn crisp. Flip and bake 5 more minutes.
- In a bowl, mix chopped bell peppers, corn, onion, salt, pepper, and paprika. This creates a quick, colorful filling.
- Turn the potato skins cut-side up. Sprinkle a little cheese first as a base layer.
- Add a spoonful of the vegetable mixture into each skin.
- Top generously with more shredded cheese to cover the filling.
- Return the tray to the oven and bake for another 8–10 minutes until the cheese is fully melted and bubbling.
- Remove and rest for a few minutes so the filling sets slightly. Garnish with herbs and serve hot with a cool dip on the side.
12 – Beef Chili Cheese Dip.
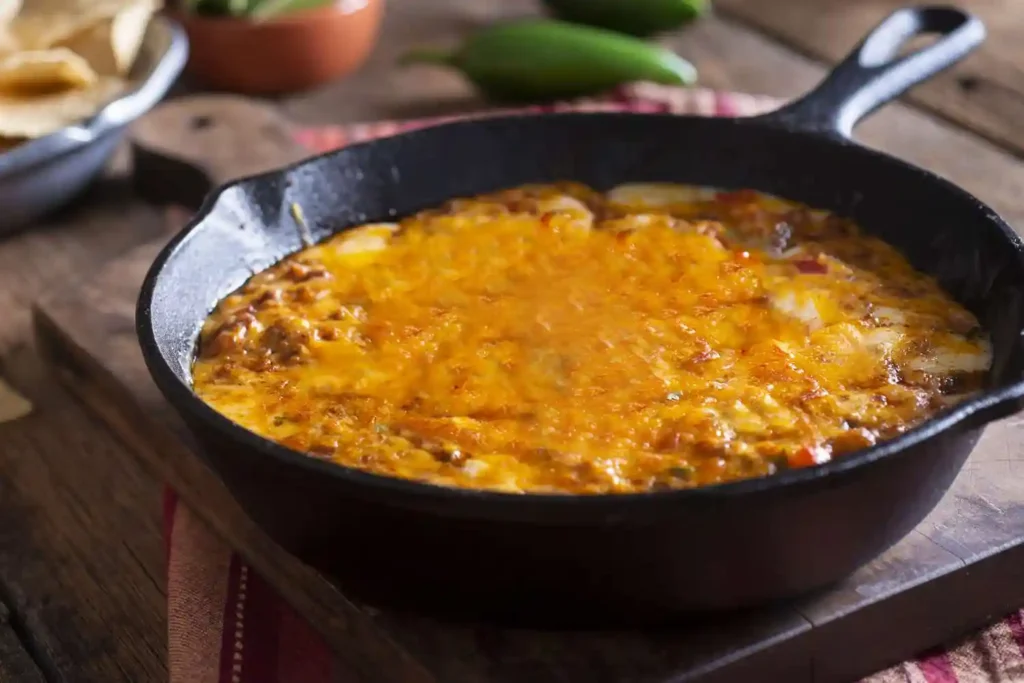
Beef Chili Cheese Dip is a warm, indulgent appetizer packed with seasoned halal beef, creamy cheese, and bold spices.
Served bubbling hot with chips or toasted bread, it delivers deep flavor and a satisfying texture.
It’s easy to prepare in one pan and holds heat well, making it a dependable choice for parties and group gatherings.
Prep & Cooking Details
- Prep time: 15 minutes
- Cook time: 20–25 minutes
- Total time: About 40 minutes
- Servings: 6–8 people
- Difficulty: Easy
- Cooking method: Stovetop + optional oven finish
- Best served: Hot and melted
Ingredients
- 400g halal ground beef
- 1 tbsp oil
- 1 small onion, finely chopped
- 2 cloves garlic, minced
- 1 cup cooked kidney beans or black beans (optional)
- 1 cup crushed tomatoes or tomato puree
- 1 tbsp tomato paste
- 1 tsp chili powder
- 1 tsp cumin powder
- ½ tsp paprika
- ½ tsp black pepper
- ¾ tsp salt (adjust to taste)
- 1½ cups shredded cheddar or mixed cheese
- 100g cream cheese, cubed
- Optional garnish: chopped spring onions, coriander, chili flakes
How to Make Beef Chili Cheese Dip (Step-by-Step)
- Heat a medium skillet or saucepan over medium heat and add oil. Once warm, add the chopped onion and cook until soft and lightly golden. This builds the flavor base.
- Add minced garlic and cook for about 30 seconds, stirring continuously so it becomes fragrant without burning.
- Add the halal ground beef to the pan. Break it apart with a spatula and cook until fully browned and no pink remains. Stir occasionally for even cooking.
- Sprinkle in chili powder, cumin, paprika, black pepper, and salt. Mix thoroughly so the spices coat the beef evenly and toast slightly in the heat.
- Stir in tomato paste and cook for one minute to deepen the flavor and remove raw taste.
- Add crushed tomatoes and beans if using. Mix well and let the mixture simmer gently for about 8–10 minutes until slightly thickened. Stir occasionally to prevent sticking.
- Lower the heat. Add the cream cheese cubes and stir slowly as they melt into the beef mixture, creating a creamy texture.
- Once smooth, add about one cup of the shredded cheese. Stir until melted and fully combined into a thick, rich dip.
- Taste and adjust seasoning if needed. The dip should be bold, savory, and slightly spicy.
- For a baked finish, transfer the dip to a small oven-safe dish and sprinkle the remaining cheese on top.
- Bake at 190°C (375°F) for 8–10 minutes until the top is melted and lightly bubbly.
- Remove and let it rest for 3–5 minutes so it thickens slightly.
- Garnish with chopped herbs or spring onions. Serve hot with tortilla chips, pita chips, or toasted bread slices for easy scooping.
13 – Veggie Spring Rolls.

Veggie Spring Rolls are light, crunchy, and packed with a savory vegetable filling wrapped in thin pastry and fried until golden.
They are ideal for party platters because they are easy to hold, quick to serve, and full of texture.
With a well-seasoned filling and crisp shell, they bring freshness and crunch to any appetizer spread.
Prep & Cooking Details
- Prep time: 25 minutes
- Cook time: 15–18 minutes
- Total time: About 45 minutes
- Servings: 18–20 rolls
- Difficulty: Easy to Moderate
- Cooking method: Deep fry or air fry
- Best served: Hot and crisp
Ingredients
- 20 spring roll wrappers
- 1 cup shredded cabbage
- ½ cup grated carrot
- ½ cup thinly sliced bell peppers
- ¼ cup sliced spring onions
- 1 tbsp oil
- 2 cloves garlic, minced
- 1 tsp soy sauce
- ½ tsp black pepper
- ½ tsp salt (adjust to taste)
- ½ tsp chili flakes (optional)
- 1 tsp vinegar or lemon juice
- For Sealing
- 2 tbsp flour mixed with water (thick paste)
- For Frying
- Oil for deep frying
- For serving: sweet chili sauce or garlic dip
How to Make Veggie Spring Rolls (Step-by-Step)
- Heat a pan over medium heat and add one tablespoon of oil. Once warm, add minced garlic and sauté briefly until fragrant but not browned.
- Add shredded cabbage, grated carrot, sliced bell peppers, and spring onions. Stir-fry for 2–3 minutes. The vegetables should soften slightly but still keep some crunch.
- Add soy sauce, salt, black pepper, chili flakes, and vinegar. Toss everything well so the seasoning spreads evenly.
- Cook for another 2 minutes until excess moisture evaporates. The filling should be fairly dry to keep the rolls crisp.
- Transfer the vegetable mixture to a plate and let it cool completely before wrapping. Warm filling can soften the wrappers.
- Prepare a sealing paste by mixing flour with a little water until thick and glue-like.
- Place one spring roll wrapper on a clean surface in a diamond shape. Keep remaining wrappers covered so they don’t dry out.
- Spoon 1–2 tablespoons of filling near the bottom corner. Shape it into a short line, leaving space at edges.
- Fold the bottom corner over the filling and roll once tightly. Fold in the left and right corners like an envelope.
- Continue rolling upward to form a tight cylinder. Brush the final edge with flour paste and seal firmly.
- Repeat with remaining wrappers and filling. Place finished rolls under a cloth to prevent drying.
- Heat oil over medium heat in a deep pan. Test with a small wrapper piece — it should bubble steadily.
- Fry rolls in small batches, turning occasionally, until evenly golden and crisp on all sides.
- Remove and drain on paper towels or a rack. Let them rest briefly to maintain crunch.
- Serve hot with dipping sauce. For air frying, brush lightly with oil and cook at 190°C (375°F) for 10–12 minutes, turning once.
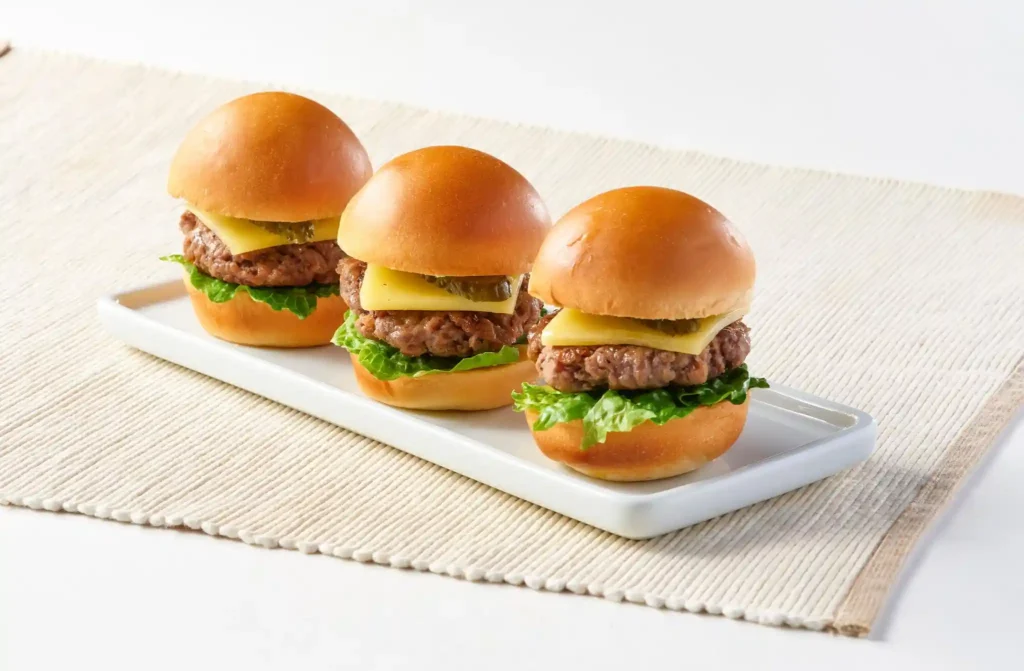
14 – Mini Beef Sliders – Juicy, Flavor-Packed Party Burgers
Mini Beef Sliders are compact, juicy burgers designed for easy serving and big flavor.
Made with seasoned halal ground beef and soft mini buns, these bite-sized sandwiches are ideal for gatherings and appetizer spreads.
They cook quickly, assemble easily, and allow flexible toppings, making them a dependable and satisfying party favorite.
Prep & Cooking Details
- Prep time: 20 minutes
- Cook time: 10–12 minutes
- Total time: About 30–35 minutes
- Servings: 10–12 sliders
- Difficulty: Easy
- Cooking method: Pan, grill, or oven
- Best served: Hot and freshly assembled
Ingredients
For the Beef Patties
- 500g halal ground beef
- 1 small onion, very finely chopped or grated
- 2 cloves garlic, minced
- 1 egg
- ¼ cup fine breadcrumbs
- 1 tsp salt
- ½ tsp black pepper
- 1 tsp paprika
- 1 tsp cumin powder
- 2 tbsp chopped parsley or coriander
- For Assembly
- 10–12 mini slider buns
- 6 cheese slices (cut into small squares) or shredded cheese
- Tomato slices
- Lettuce leaves
- Onion rings
- Simple Sauce
- ½ cup mayonnaise
- 1 tbsp ketchup
- 1 tsp mustard (optional)
How to Make Mini Beef Sliders (Step-by-Step)
- Place the halal ground beef in a large mixing bowl. Make sure it is cold for easier shaping and better texture.
- Add finely chopped onion, minced garlic, egg, breadcrumbs, salt, pepper, paprika, cumin, and chopped herbs.
- Mix gently with your hands until just combined. Do not overwork the mixture, as that can make the patties firm instead of juicy.
- Divide the mixture into small equal portions. Roll each into a ball, then flatten into small patties slightly larger than the buns, since they shrink while cooking.
- Press a slight dent in the center of each patty with your thumb. This helps them cook evenly and stay flat.
- Heat a skillet or grill pan over medium heat and lightly oil the surface.
- Place patties on the hot pan, leaving space between them. Cook in batches if needed.
- Cook for about 3–4 minutes on the first side without pressing down, so juices stay inside.
- Flip and cook another 3–4 minutes until fully cooked through and nicely browned.
- Add a small piece of cheese on each patty during the last minute and cover briefly so it melts.
- While patties cook, mix mayonnaise, ketchup, and mustard to create a quick sauce.
- Lightly toast the mini buns cut-side down on a dry pan for 1–2 minutes. This improves texture and prevents sogginess.
- Spread sauce on the bottom bun, place the hot beef patty on top, then add lettuce, tomato, and onion.
- Close with the top bun and secure with a toothpick if needed.
- Arrange on a serving tray and serve warm for the best flavor and juiciness.
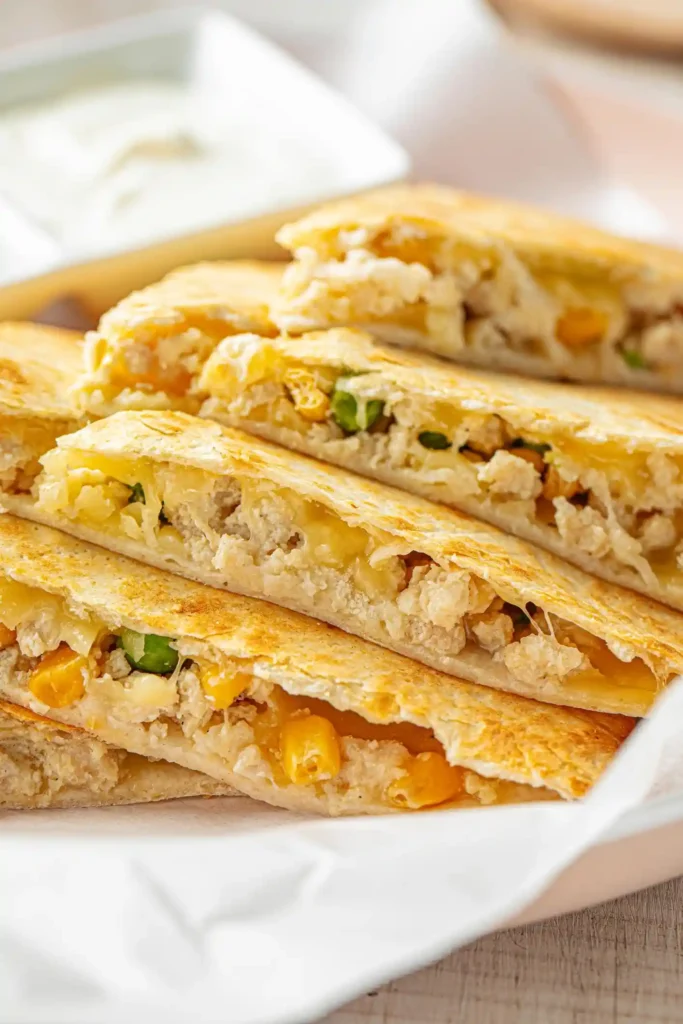
15 – Chicken Quesadilla Triangles.
Chicken Quesadilla Triangles are crisp on the outside, melted and savory inside, and perfectly sized for sharing.
Filled with seasoned halal chicken and gooey cheese between toasted tortillas, they cook quickly and slice into neat wedges.
These handheld bites are ideal for party platters and casual gatherings where warm, cheesy appetizers are always welcome.
Prep & Cooking Details
- Prep time: 15 minutes
- Cook time: 12–15 minutes
- Total time: About 30 minutes
- Servings: 4–5 people
- Difficulty: Easy
- Cooking method: Skillet or griddle
- Best served: Hot and freshly sliced
Ingredients
- 2 cups cooked halal chicken, shredded or finely chopped
- 4 large flour tortillas
- 1½ cups shredded cheddar or mozzarella cheese
- ½ cup finely chopped bell peppers
- ¼ cup finely chopped onion
- 2 tbsp chopped coriander or parsley
- 1 tbsp oil or butter (for cooking)
- ½ tsp salt
- ½ tsp black pepper
- ½ tsp paprika or chili flakes (optional)
- Optional dips: salsa, yogurt garlic sauce, guacamole
How to Make Chicken Quesadilla Triangles (Step-by-Step)
- Place the cooked shredded halal chicken in a mixing bowl. Make sure it is finely chopped so it spreads evenly inside the tortillas.
- Add chopped bell peppers, onion, coriander, salt, black pepper, and paprika or chili flakes if using. Mix well so the seasoning is evenly distributed.
- Add about half a cup of the shredded cheese into the chicken mixture and stir. This helps the filling bind together when melted.
- Lay one tortilla flat on a clean surface. Sprinkle a thin layer of cheese evenly across the surface, leaving a small border at the edges.
- Spread a quarter of the chicken mixture evenly over one half of the tortilla. Do not overfill or it will be difficult to flip.
- Fold the empty half of the tortilla over the filling to form a half-moon shape. Press gently to flatten.
- Repeat the same filling and folding process with the remaining tortillas.
- Heat a skillet or griddle over medium heat and lightly brush with oil or butter.
- Place one folded quesadilla onto the hot surface. Cook for about 2–3 minutes until the bottom turns golden and crisp.
- Carefully flip using a spatula. Cook the other side for another 2–3 minutes until golden and the cheese inside is fully melted.
- Adjust heat if needed — medium heat ensures a crisp exterior without burning before the cheese melts.
- Remove from the pan and rest for 1–2 minutes to allow the filling to set slightly.
- Transfer to a cutting board and slice each quesadilla into 3–4 triangles using a sharp knife or pizza cutter.
- Arrange on a serving platter and serve warm with dips on the side for easy sharing.
16 – Roasted Chickpea Snack Mix
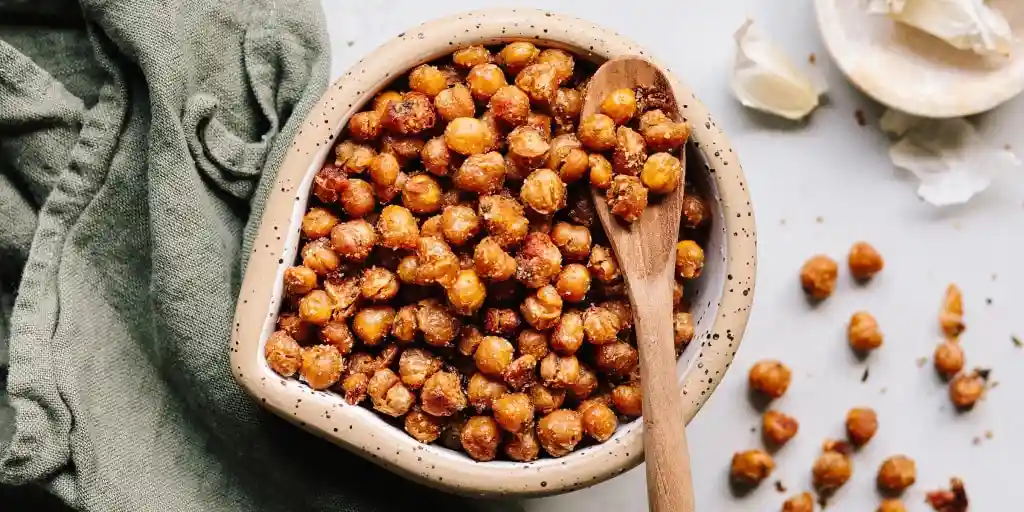
Roasted Chickpea Snack Mix is a crunchy, protein-rich appetizer that brings bold flavor and satisfying texture to any party table.
Made with seasoned chickpeas and roasted until crisp, this snack is simple, budget-friendly, and highly customizable.
It’s perfect for make-ahead preparation and works well as a lighter alternative to fried appetizers and chips.
Prep & Cooking Details
- Prep time: 10 minutes
- Cook time: 30–35 minutes
- Total time: About 45 minutes
- Servings: 4–6 people
- Difficulty: Easy
- Cooking method: Oven-roasted
- Make-ahead friendly: Yes
- Shelf life: 3–4 days in airtight jar
Ingredients
- 2 cups canned chickpeas, drained and rinsed
- 1½ tbsp olive oil
- ¾ tsp salt
- ½ tsp black pepper
- 1 tsp paprika
- ½ tsp cumin powder
- ½ tsp garlic powder
- ¼ tsp chili powder or chili flakes (optional)
- ½ tsp dried oregano or mixed herbs (optional)
- Optional add-ins after roasting: roasted peanuts, almonds, or pumpkin seeds
How to Make Roasted Chickpea Snack Mix (Step-by-Step)
- Preheat your oven to 200°C (400°F). Line a baking tray with parchment paper for easy cleanup and even roasting.
- Drain and rinse the chickpeas thoroughly under running water. This removes excess sodium and improves flavor.
- Spread the chickpeas on a clean kitchen towel or paper towels and pat them completely dry. Removing moisture is essential for maximum crunch.
- Gently rub the chickpeas with the towel to loosen and remove any loose skins. Discard the skins for better texture.
- Transfer the dried chickpeas to a mixing bowl. Add olive oil and toss until all chickpeas are lightly coated.
- Add salt, black pepper, paprika, cumin, garlic powder, and any optional spices. Mix well so seasoning distributes evenly.
- Spread the seasoned chickpeas in a single layer on the prepared tray. Avoid crowding — space helps them roast instead of steam.
- Place the tray in the preheated oven and roast for 15 minutes.
- Remove the tray and shake or stir the chickpeas to ensure even browning on all sides.
- Return to the oven and roast another 15–20 minutes until they are deep golden and crisp.
- Taste one carefully — it should be crunchy outside and dry inside. If still soft, roast 5 more minutes.
- Turn off the oven and let the chickpeas sit inside with the door slightly open for 5 minutes to further dry and crisp.
- Cool completely before serving. They become crunchier as they cool.
- For a snack mix variation, combine with roasted nuts or seeds after cooling.
- Store in an airtight container at room temperature and serve as a grab-and-eat party appetizer.
17 – Mutton Kebabs.
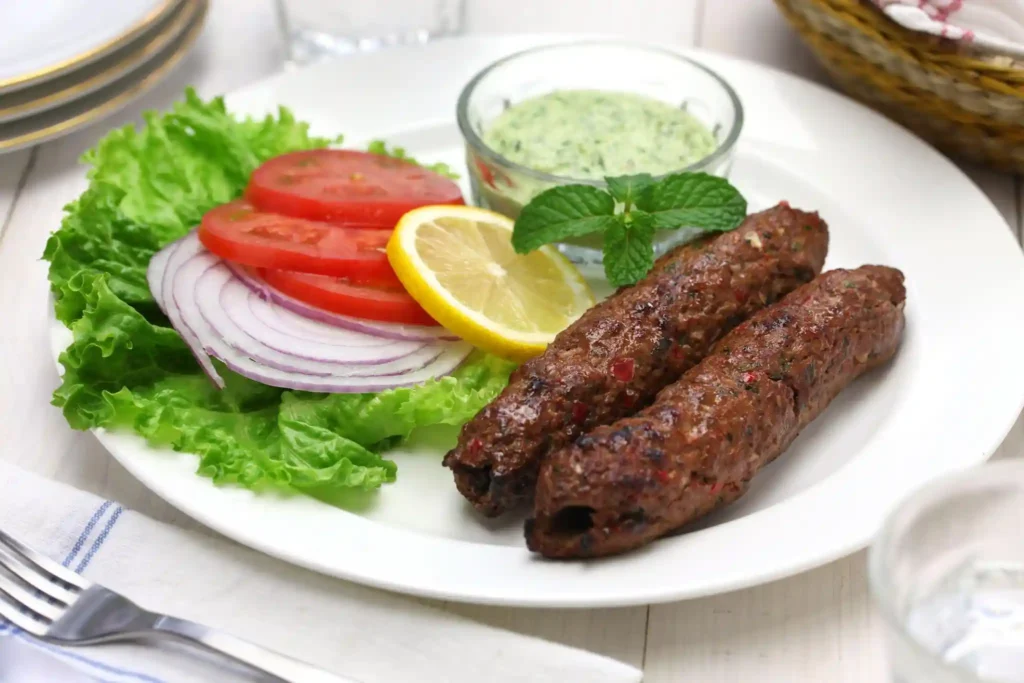
Mutton Seekh Kebabs are tender, aromatic skewers made from finely minced halal mutton blended with herbs and warming spices.
Shaped along skewers and grilled or baked until lightly charred, they deliver deep flavor and a succulent texture.
These kebabs are ideal for appetizer platters, easy to portion, and pair beautifully with fresh dips and flatbread.
Prep & Cooking Details
- Prep time: 25 minutes
- Marination/rest time: 30 minutes
- Cook time: 15–18 minutes
- Total time: About 1 hour 15 minutes
- Servings: 12–14 kebabs
- Difficulty: Moderate
- Cooking method: Grill, oven, or pan
- Best served: Hot off the heat
Ingredients
- 500g finely minced mutton (halal)
- 1 small onion, very finely chopped or grated (water squeezed out)
- 3 cloves garlic, minced
- 1 tbsp ginger paste
- 3 tbsp chopped fresh coriander
- 2 tbsp chopped mint (optional)
- 1 egg
- ¼ cup fine breadcrumbs
- 1 tsp salt
- 1 tsp cumin powder
- 1 tsp coriander powder
- ½ tsp garam masala
- ½ tsp black pepper
- ½ tsp chili flakes or chili powder
- 2 tbsp oil or melted butter (for brushing)
How to Make Mutton Seekh Kebabs (Step-by-Step)
- Place the finely minced halal mutton in a large mixing bowl. The mince should be smooth and not chunky for easy shaping on skewers.
- Add the grated onion and squeeze out excess moisture before mixing. Too much liquid can cause kebabs to break while cooking.
- Add garlic, ginger paste, chopped coriander, and mint if using. These ingredients add freshness and aroma.
- Sprinkle in salt, cumin, coriander powder, garam masala, black pepper, and chili flakes. Distribute spices evenly over the mince.
- Add the egg and breadcrumbs. These help bind the mixture and keep the kebabs tender after cooking.
- Mix everything thoroughly with your hands until the mixture becomes slightly sticky and holds together.
- Cover and rest the mixture in the refrigerator for at least 30 minutes. This firms it up and improves flavor.
- If using wooden skewers, soak them in water for 20 minutes to prevent burning.
- Lightly oil your hands. Take a portion of the mixture and press it around a skewer, shaping into a long, even cylinder.
- Press gently but firmly so the meat adheres well and doesn’t crack. Repeat with remaining mixture.
- Preheat grill or oven to 200°C (400°F). Place kebabs on a lined tray or grill rack.
- Brush each kebab lightly with oil or melted butter to keep them moist and help browning.
- Cook for about 15–18 minutes, turning halfway, until evenly browned and cooked through with slight charred spots.
- If pan-cooking, use a lightly oiled skillet and turn every few minutes for even color.
- Rest for 3–4 minutes after cooking so juices settle. Serve hot with yogurt dip, lemon wedges, and sliced onions.
18 – Loaded Cheese Nachos.
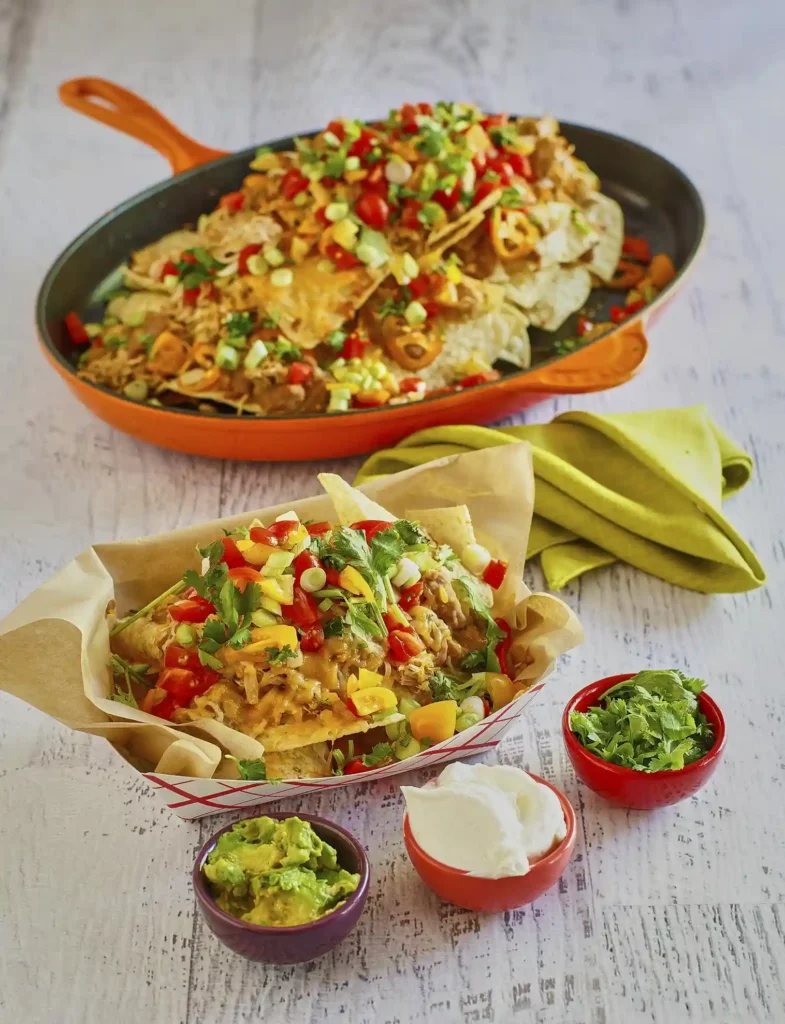
Loaded Cheese Nachos are a fast, crowd-pleasing appetizer built with crispy tortilla chips, generous melted cheese, and colorful toppings.
Every layer brings texture and flavor, from crunchy chips to gooey cheese and fresh garnishes.
They are simple to assemble, quick to bake, and perfect for serving as a shared platter at parties and gatherings.
Prep & Cooking Details
- Prep time: 15 minutes
- Cook time: 10–12 minutes
- Total time: About 25 minutes
- Servings: 4–6 people
- Difficulty: Easy
- Cooking method: Oven-baked
- Best served: Hot and freshly melted
Ingredients
- 1 large bag tortilla chips
- 2 cups shredded cheddar or Mexican-blend cheese
- ½ cup shredded mozzarella (optional for extra stretch)
- 1 small tomato, diced
- ¼ cup sliced jalapeños (fresh or pickled)
- ½ cup sweet corn
- ½ cup black beans or kidney beans, drained
- 2 tbsp finely chopped onion or spring onion
- ½ tsp salt
- ½ tsp paprika or chili flakes (optional)
- Optional toppings after baking: sour cream or yogurt sauce, salsa, guacamole, chopped coriander
How to Make Loaded Cheese Nachos (Step-by-Step)
- Preheat your oven to 190°C (375°F). Choose a wide baking tray or oven-safe platter so the nachos can be spread in layers rather than piled too thick.
- Line the tray with parchment paper for easier cleanup and to prevent sticking from melted cheese.
- Spread half of the tortilla chips in an even layer across the tray. Try to minimize overlap so toppings reach more chips.
- Sprinkle a generous layer of shredded cheddar and mozzarella over the chips. Cover broadly rather than placing cheese in one spot.
- Scatter half of the diced tomatoes, beans, corn, onions, and jalapeños over the cheese layer. Distribute evenly for balanced bites.
- Add the remaining chips as a second layer on top. This layering method ensures flavor throughout the tray, not just on top.
- Sprinkle the remaining cheese over the second layer, making sure edges are covered so chips toast slightly under the melt.
- Add the rest of the vegetable toppings evenly across the surface. Lightly sprinkle salt and paprika or chili flakes if using.
- Place the tray in the oven and bake for about 10–12 minutes. Watch closely near the end — the cheese should be fully melted and bubbling but not over-browned.
- Remove from the oven carefully and let the nachos rest for 2–3 minutes. This helps the cheese set slightly and improves serving.
- Add fresh toppings like yogurt sauce, salsa, or guacamole after baking to keep them cool and fresh.
- Garnish with chopped coriander or spring onions for color and freshness.
- Serve immediately while hot and melty. Nachos are best enjoyed right away to keep their crisp texture.
19 – Chicken Nachos Supreme
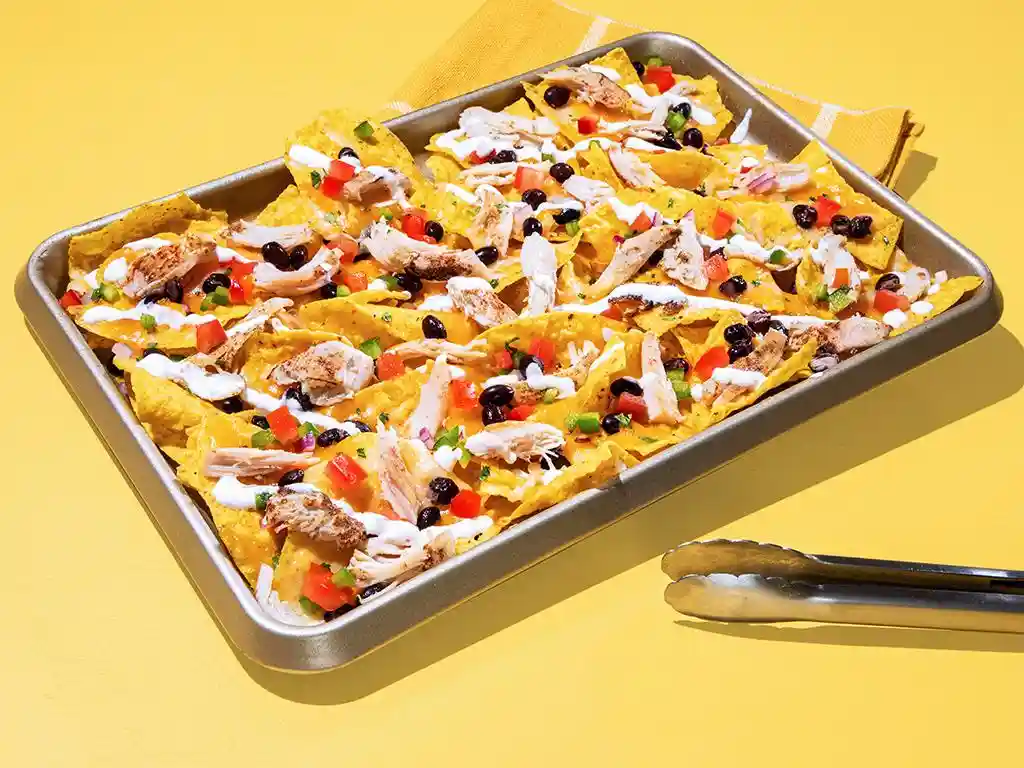
Chicken Nachos Supreme is a layered, oven-baked appetizer packed with seasoned halal chicken, melted cheese, and colorful toppings.
Each bite delivers crunch, heat, and creamy richness.
Designed for sharing, this platter-style dish is quick to assemble and highly customizable, making it a reliable centerpiece for gatherings, game nights, and casual entertaining.
Prep & Cooking Details
Prep time: 20 minutes
Cook time: 12–15 minutes
Total time: About 35 minutes
Servings: 5–6 people
Difficulty: Easy
Cooking method: Oven-baked
Best served: Hot and freshly melted
Ingredients
Chicken Layer
- 2 cups cooked halal chicken, shredded or diced
- 1 tbsp oil
- ½ tsp salt
- ½ tsp black pepper
- 1 tsp paprika
- 1 tsp cumin powder
- Nacho Base
- 1 large bag tortilla chips
- 2 cups shredded cheddar or Mexican-blend cheese
- ½ cup mozzarella (optional)
- Toppings
- 1 small tomato, diced
- ½ cup black beans or kidney beans, drained
- ½ cup sweet corn
- ¼ cup sliced jalapeños
- 2 tbsp chopped spring onions
- Optional after baking: yogurt sauce or sour cream, salsa, guacamole, fresh herbs
How to Make Chicken Nachos Supreme (Step-by-Step)
- Preheat your oven to 190°C (375°F). Choose a wide baking tray or oven-safe dish so the nachos can be layered evenly.
- In a pan over medium heat, add oil and the cooked halal chicken. Sprinkle salt, pepper, paprika, and cumin over it.
- Stir and cook the chicken for 3–4 minutes until warmed through and lightly seasoned. Turn off heat and set aside.
- Line your tray with parchment paper to prevent sticking and make cleanup easier.
- Spread half of the tortilla chips across the tray in a single, even layer. Avoid piling too thickly.
- Sprinkle a layer of shredded cheese over the chips, covering most surfaces for even melting.
- Scatter half of the seasoned chicken evenly across the tray so every section gets some protein.
- Add half of the beans, corn, tomatoes, and jalapeños over the cheese. Keep distribution even.
- Add a second layer of chips on top. This layered approach ensures toppings are spread throughout, not only on top.
- Repeat with remaining cheese, chicken, and vegetable toppings. Finish with a generous cheese layer so it melts over everything.
- Place the tray in the oven and bake for 12–15 minutes until the cheese is fully melted and bubbling at the edges.
- Remove carefully and let rest for 2–3 minutes. This helps the melted layer settle slightly for easier serving.
- Add cool toppings like yogurt sauce, salsa, or guacamole after baking for contrast and freshness.
- Garnish with spring onions or herbs. Serve immediately while hot, crisp, and cheesy for best texture.
20 – Buffalo Chicken Wings

Buffalo Chicken Wings are a fiery, flavor-packed appetizer known for their crispy skin and buttery hot sauce glaze.
Made with halal chicken wings and a bold sauce coating, they are perfect for party platters and casual gatherings.
Whether baked or fried, these wings deliver a satisfying balance of heat, richness, and texture in every bite.
Prep & Cooking Details
- Prep time: 15 minutes
- Marination time: 30 minutes (optional but recommended)
- Cook time: 35–40 minutes
- Total time: About 1 hour 10 minutes
- Servings: 4–5 people
- Difficulty: Easy
- Cooking method: Oven or fryer
- Best served: Hot and freshly coated
Ingredients
For the Wings
- 1 kg halal chicken wings, split and tips removed
- 1 tbsp oil
- 1 tsp salt
- ½ tsp black pepper
- 1 tsp paprika
- 1 tsp garlic powder
- Buffalo Sauce
- ⅓ cup hot chili sauce
- 3 tbsp butter
- 1 tbsp honey or brown sugar
- 1 tbsp vinegar or lemon juice
- Pinch of salt
- Optional serving: yogurt dip or garlic sauce, celery or carrot sticks
How to Make Buffalo Chicken Wings (Step-by-Step)
- Wash and pat the halal chicken wings completely dry using paper towels. Dry skin helps achieve better crispness during cooking.
- Place wings in a large bowl. Add oil, salt, black pepper, paprika, and garlic powder. Toss thoroughly so each wing is evenly coated.
- For deeper flavor, cover and let the wings rest in the refrigerator for about 30 minutes before cooking.
- Preheat your oven to 220°C (425°F). Line a baking tray with foil and place a wire rack on top if available. This allows heat to circulate and crisp the wings.
- Arrange the wings in a single layer with space between pieces. Avoid crowding to ensure even browning.
- Bake for 20 minutes, then flip each wing using tongs. Return to the oven for another 15–20 minutes until golden and crisp.
- For extra crisp skin, switch to high heat or broil for the final 3–4 minutes, watching carefully to prevent burning.
- While the wings cook, prepare the sauce. Add hot chili sauce, butter, honey, vinegar, and a pinch of salt to a small saucepan.
- Heat on low, stirring until the butter melts and the sauce becomes smooth and glossy. Do not boil hard — gentle heat keeps it balanced.
- When wings are fully cooked, transfer them immediately to a large mixing bowl.
- Pour the warm buffalo sauce over the hot wings. Toss quickly and thoroughly so every piece is coated.
- Let them sit for 2–3 minutes so the sauce clings to the surface.
- Arrange on a serving platter and serve hot with a cool dip on the side to balance the heat and richness.
21 – Beef Stuffed Mushrooms
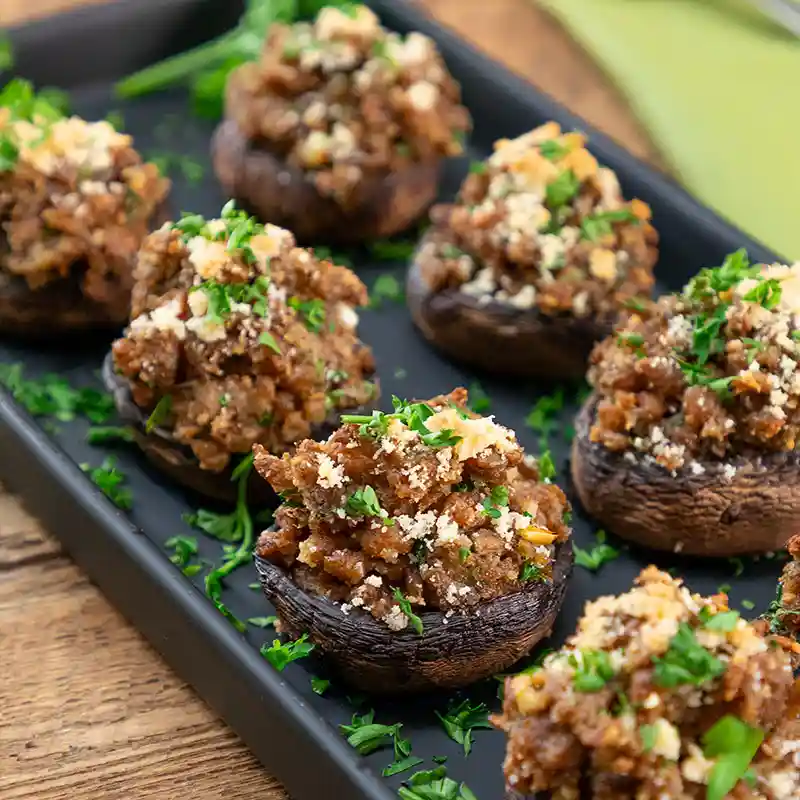
Beef Stuffed Mushrooms are elegant, bite-sized appetizers packed with seasoned halal ground beef and topped with melted cheese.
Tender mushroom caps act as natural cups, holding a rich and savory filling.
They bake quickly and present beautifully, making them an excellent choice for party platters, special gatherings, and warm appetizer spreads.
Prep & Cooking Details
- Prep time: 20 minutes
- Cook time: 18–22 minutes
- Total time: About 40 minutes
- Servings: 18–20 stuffed mushrooms
- Difficulty: Easy
- Cooking method: Oven-baked
- Best served: Warm
Ingredients
- 18–20 large button mushrooms
- 300g halal ground beef
- 1 tbsp oil or butter
- 1 small onion, very finely chopped
- 2 cloves garlic, minced
- ½ tsp salt
- ½ tsp black pepper
- 1 tsp paprika
- ½ tsp cumin powder
- 2 tbsp chopped parsley or coriander
- ½ cup shredded cheddar or mozzarella cheese
- 2 tbsp breadcrumbs
- 2 tbsp cream or thick yogurt (optional, for moisture)
How to Make Beef Stuffed Mushrooms (Step-by-Step)
- Preheat your oven to 190°C (375°F). Line a baking tray with parchment paper or lightly grease it to prevent sticking.
- Clean the mushrooms by wiping them with a damp cloth. Avoid soaking them in water, as they absorb moisture quickly.
- Carefully remove the stems from each mushroom cap. Set the caps aside and finely chop the stems to use in the filling.
- Heat a skillet over medium heat and add oil or butter. Add the chopped mushroom stems and onion first. Cook for 3–4 minutes until softened.
- Add minced garlic and cook briefly until fragrant, stirring constantly.
- Add the halal ground beef to the pan. Break it apart and cook until fully browned and no pink remains.
- Sprinkle in salt, black pepper, paprika, and cumin. Mix well so the spices are evenly distributed through the meat.
- Cook for a few more minutes until the mixture is fairly dry. Excess liquid can make the mushrooms soggy.
- Turn off the heat and stir in chopped herbs, breadcrumbs, and cream or yogurt if using. This keeps the filling tender.
- Let the filling cool slightly so it is easier to handle and pack.
- Arrange the mushroom caps hollow-side up on the prepared tray.
- Spoon the beef mixture into each cap, pressing gently so it holds together but not overflowing.
- Sprinkle shredded cheese on top of each stuffed mushroom for a golden finish.
- Bake for 18–22 minutes until the mushrooms are tender and the tops are melted and lightly browned.
- Rest for 3–4 minutes after baking. Serve warm on a platter, optionally garnished with fresh herbs.
Admin