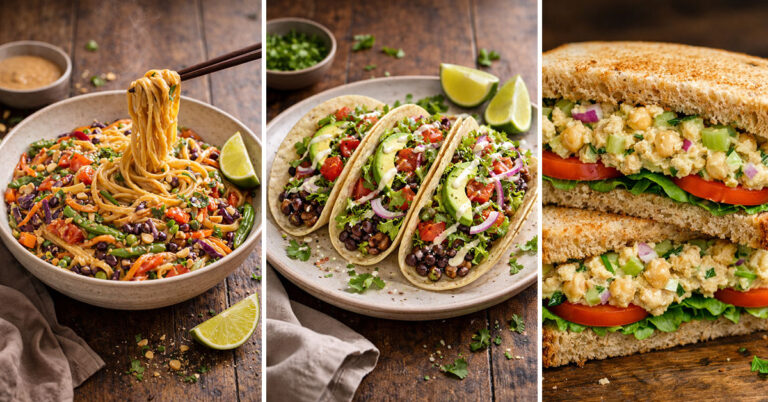

Easy Picnic Sandwiches Recipes for Lunch Ideas
Picnic Sandwiches Recipes are perfect for quick and tasty outdoor meals.
Find easy sandwich ideas made with fresh ingredients that are simple to prepare and easy to pack.
These recipes are great for family trips, park lunches, and summer gatherings. Enjoy classic, healthy, and filling sandwiches that everyone will love on sunny picnic days.
1 – Classic Chicken Salad Sandwich.
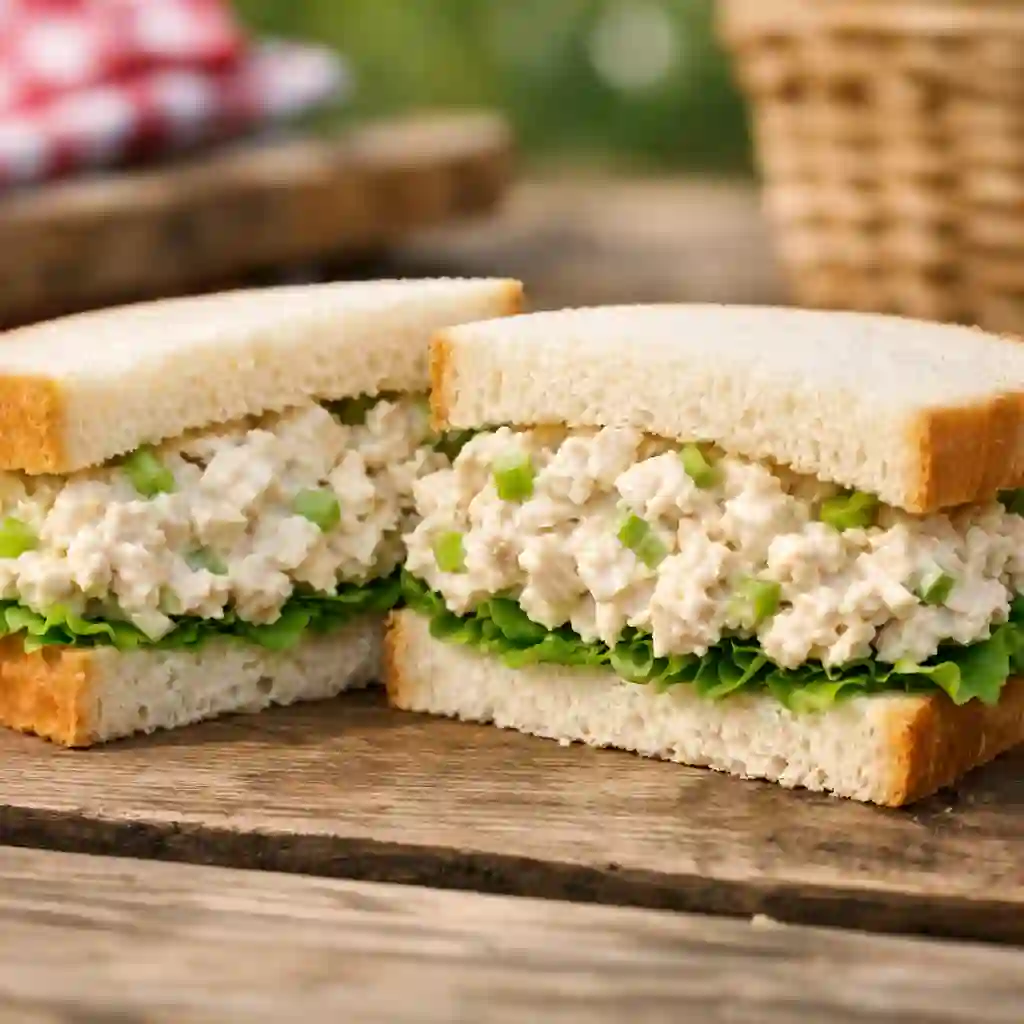
The Classic Chicken Salad Sandwich is a simple and fresh meal that is perfect for any picnic. It is creamy, filling, and easy to prepare at home.
Tender chicken is mixed with smooth mayo, crunchy celery, and light seasoning to create a rich and balanced flavor.
This sandwich travels well and tastes great even after a few hours in a cooler.
Ingredients
- 2 cups cooked chicken, shredded or chopped
- 1/2 cup mayonnaise
- 1/4 cup finely chopped celery
- 2 tablespoons finely chopped onion
- 1 tablespoon fresh lemon juice
- Salt to taste
- Black pepper to taste
- 8 slices sandwich bread
- Lettuce leaves optional
How to Make Classic Chicken Salad Sandwich
- Start by cooking the chicken if not already prepared. You can boil or bake it until fully cooked, then allow it to cool completely.
- Chop or shred the cooled chicken into small bite sized pieces and place it in a large mixing bowl.
- Add mayonnaise to the bowl and mix gently to coat all the chicken pieces evenly.
- Add finely chopped celery for crunch and chopped onion for flavor.
- Pour in fresh lemon juice to brighten the taste.
- Sprinkle salt and black pepper according to your preference.
- Mix everything slowly until the mixture becomes creamy and well blended.
- Cover the bowl and refrigerate for at least 30 minutes to let the flavors blend together.
- Lay out the bread slices on a clean surface.
- Place a lettuce leaf on one slice if using.
- Spoon a generous amount of chicken salad onto the bread and spread evenly.
- Cover with another slice of bread and press gently.
- Cut the sandwich in half and serve fresh or wrap tightly for a picnic.
Nutritional Facts Per Sandwich Approximate
- Calories: 420 to 480 kcal
- Protein: 24 grams
- Carbohydrates: 30 grams
- Fat: 22 grams
- Fiber: 2 grams
- Sodium: 600 mg
2 – Turkey and Cheese Picnic Sandwich.
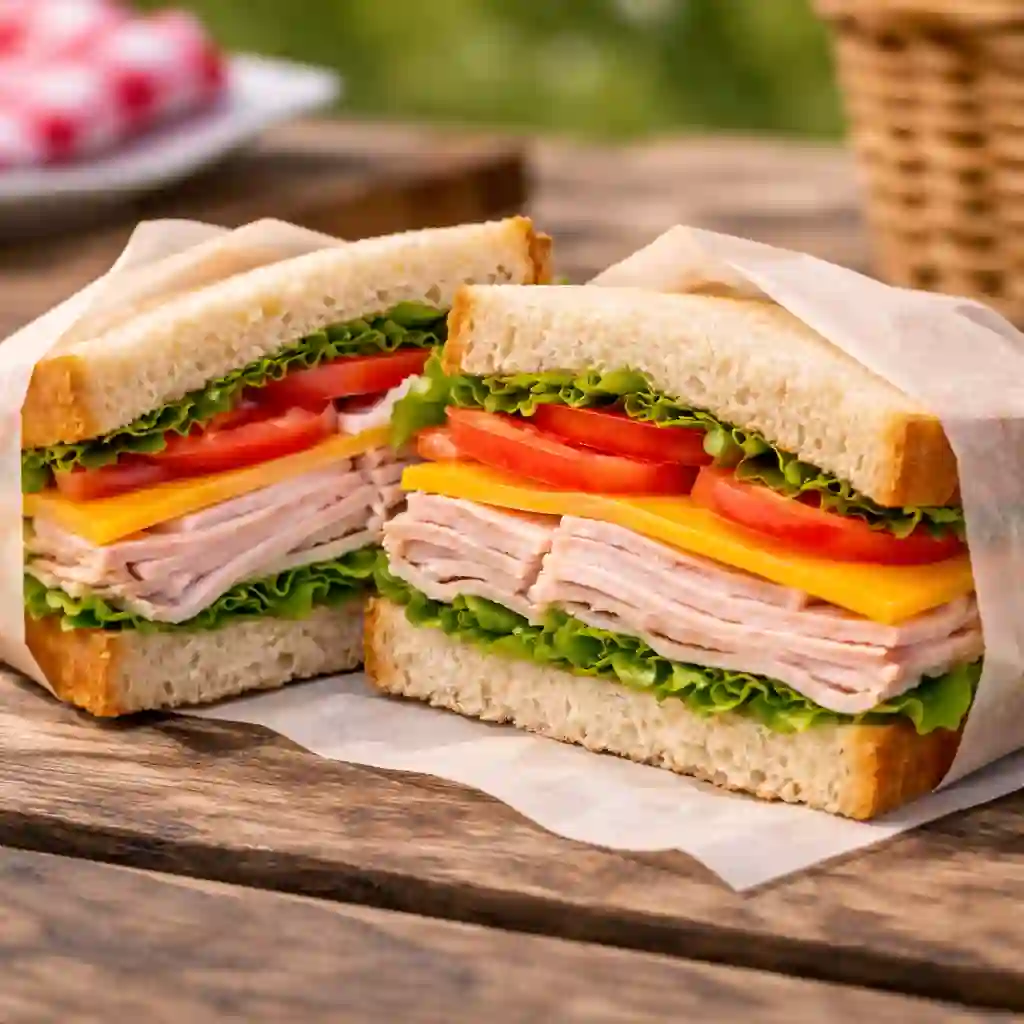
The Turkey and Cheese Picnic Sandwich is a fresh and hearty choice for outdoor meals.
It is easy to prepare, simple to pack, and loved by both kids and adults. Soft bread layered with sliced turkey, creamy cheese, and crisp vegetables creates a perfect balance of flavor and texture.
This sandwich holds up well in a cooler and stays tasty for hours. You can prepare it in minutes, making it ideal for busy mornings before a picnic.
Whether you enjoy it at the park, beach, or backyard, it is always a reliable and satisfying option.
Ingredients
- 8 slices sandwich bread
- 8 slices deli turkey breast
- 4 slices cheddar or Swiss cheese
- 1 small tomato, sliced
- Lettuce leaves
- 2 tablespoons mayonnaise
- 1 tablespoon mustard
- Salt to taste
- Black pepper to taste
- Butter optional for spreading
How to Make Turkey and Cheese Picnic Sandwich
- Lay the bread slices flat on a clean surface.
- Lightly spread butter on one side of each slice if desired. This helps keep the bread soft.
- Spread mayonnaise evenly on four slices of bread.
- Spread mustard on the other four slices for added flavor.
- Place lettuce leaves over the mayonnaise side to create a base layer.
- Add two slices of turkey breast on top of the lettuce for each sandwich. Fold the slices slightly for better texture.
- Place one slice of cheese over the turkey. Make sure it covers most of the surface.
- Add a few slices of tomato on top of the cheese.
- Sprinkle a small pinch of salt and black pepper over the tomatoes.
- Cover with the remaining bread slices, mustard side down.
- Press gently to hold the layers together.
- Cut each sandwich in half for easy serving.
- Wrap tightly in parchment paper or plastic wrap if packing for a picnic.
- Store in a cooler until ready to serve to keep it fresh.
Nutritional Facts Per Sandwich Approximate
- Calories: 390 to 450 kcal
- Protein: 28 grams
- Carbohydrates: 32 grams
- Fat: 18 grams
- Fiber: 3 grams
- Sodium: 850 mg
3 – Egg Salad Sandwich.

The Egg Salad Sandwich is a timeless favorite that is simple, creamy, and full of flavor.
It is perfect for picnics, quick lunches, or light dinners. Soft boiled eggs are mixed with smooth mayo and gentle seasoning to create a rich and comforting filling.
This sandwich is easy to prepare and requires only a few basic ingredients.
It tastes fresh, travels well, and can be made ahead of time. Served on soft bread with crisp lettuce, it delivers a balanced texture in every bite.
It is a classic choice that never goes out of style.
Ingredients
- 6 large eggs
- 1/3 cup mayonnaise
- 1 tablespoon mustard
- 2 tablespoons finely chopped celery
- 1 tablespoon finely chopped onion
- Salt to taste
- Black pepper to taste
- 8 slices sandwich bread
- Lettuce leaves optional
How to Make Egg Salad Sandwich
- Place the eggs in a saucepan and cover them fully with water.
- Bring the water to a gentle boil over medium heat.
- Once boiling, cover the pan and turn off the heat. Let the eggs sit for 10 to 12 minutes.
- Transfer the eggs to a bowl of cold water and allow them to cool completely.
- Peel the eggs carefully and chop them into small pieces.
- Place the chopped eggs into a mixing bowl.
- Add mayonnaise and mustard to the bowl.
- Add finely chopped celery and onion for extra crunch and flavor.
- Sprinkle salt and black pepper according to your taste.
- Mix gently until everything is creamy and well combined. Do not over mix.
- Cover the bowl and refrigerate for at least 30 minutes to allow flavors to blend.
- Lay out the bread slices and place lettuce leaves if using.
- Spoon a generous portion of egg salad onto one slice.
- Spread evenly and top with another slice of bread.
- Cut in half and serve fresh or wrap for later use.
Nutritional Facts Per Sandwich Approximate
- Calories: 400 to 460 kcal
- Protein: 18 grams
- Carbohydrates: 28 grams
- Fat: 25 grams
- Fiber: 2 grams
- Sodium: 520 mg
4 – Tuna Salad Sandwich.
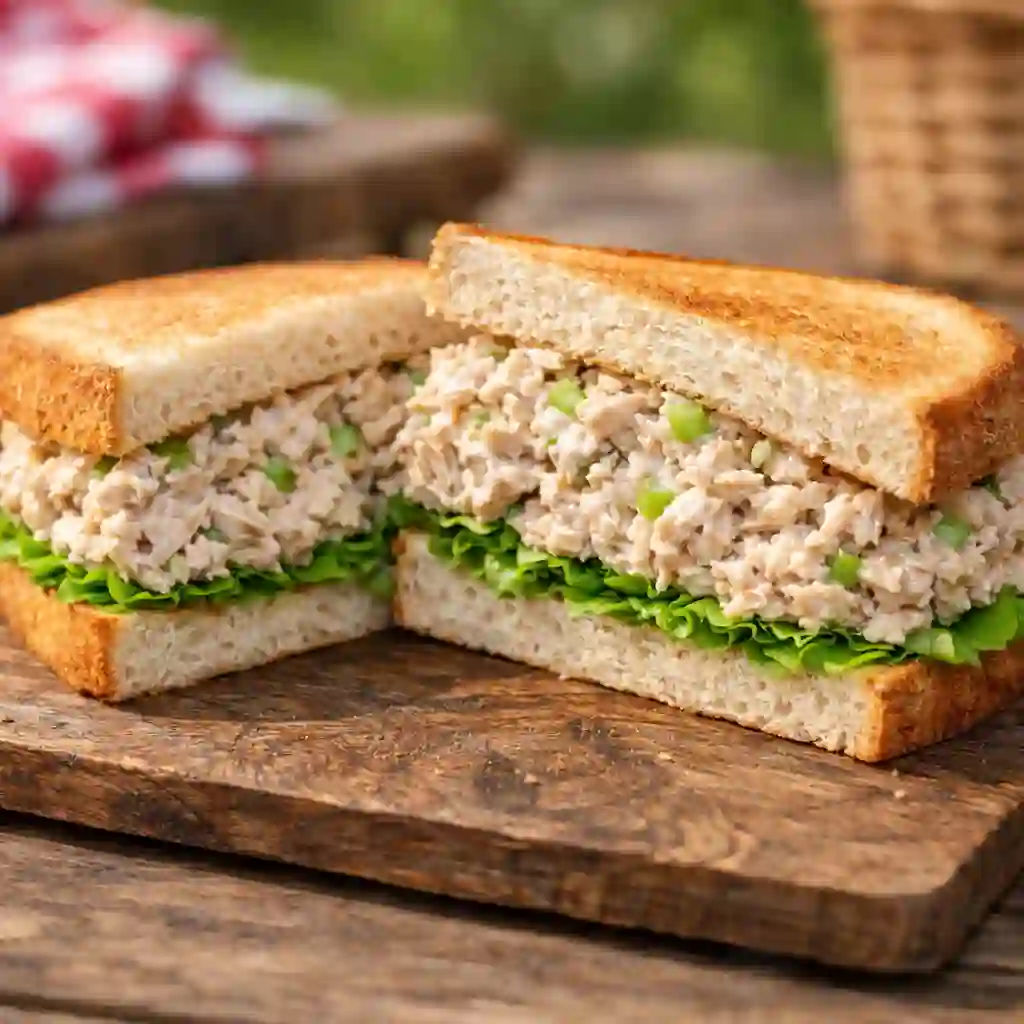
The Tuna Salad Sandwich is a fresh and satisfying meal that is perfect for picnics and quick lunches.
It is creamy, light, and packed with flavor. Flaked tuna mixed with smooth mayo, crisp celery, and simple seasoning creates a balanced and comforting filling.
This sandwich is easy to prepare and can be made in advance, which makes it ideal for busy days.
It stays fresh in a cooler and tastes great served cold. Whether enjoyed at the park or at home, it is a classic choice that is both filling and easy to love.
Ingredients
- 2 cans tuna in water, drained
- 1/3 cup mayonnaise
- 2 tablespoons finely chopped celery
- 1 tablespoon finely chopped onion
- 1 tablespoon lemon juice
- Salt to taste
- Black pepper to taste
- 8 slices sandwich bread
- Lettuce leaves optional
How to Make Tuna Salad Sandwich
- Open the tuna cans and drain the water completely.
- Place the drained tuna in a large mixing bowl.
- Use a fork to break the tuna into small flakes.
- Add mayonnaise to the bowl and mix gently until the tuna is evenly coated.
- Add finely chopped celery for crunch and onion for added flavor.
- Pour in fresh lemon juice to brighten the taste.
- Sprinkle salt and black pepper according to your preference.
- Stir everything slowly until the mixture becomes creamy and well blended.
- Taste and adjust seasoning if needed.
- Cover the bowl and refrigerate for at least 30 minutes so the flavors combine well.
- Lay out the bread slices on a clean surface.
- Place a lettuce leaf on one slice if using.
- Spoon a generous amount of tuna salad onto the bread and spread evenly.
- Top with another slice of bread and press gently.
- Cut in half and serve immediately or wrap tightly for a picnic.
Nutritional Facts Per Sandwich Approximate
- Calories: 380 to 440 kcal
- Protein: 26 grams
- Carbohydrates: 28 grams
- Fat: 20 grams
- Fiber: 2 grams
- Sodium: 600 mg
5 – Beaf and Cheese Slider Sandwich.

Beaf and Cheese Slider Sandwiches are small, warm, and full of flavor.
They are perfect for picnics, family gatherings, and easy lunches. Soft rolls filled with savory Beaf and melted cheese create a rich and comforting bite.
These sliders are simple to prepare and can be baked together in one dish, which saves time.
They are easy to carry and serve, making them a great choice for outdoor meals.
With a golden top and creamy center, these mini sandwiches are always a crowd favorite and taste just as good warm or at room temperature.
Ingredients
- 12 slider rolls
- 12 slices deli Beaf
- 6 slices Swiss or cheddar cheese
- 3 tablespoons butter, melted
- 1 tablespoon mustard
- 1 teaspoon honey
- 1 teaspoon poppy seeds optional
- 1/2 teaspoon garlic powder
How to Make Beaf and Cheese Slider Sandwich
- Preheat your oven to 350 degrees F.
- Slice the slider rolls in half without separating them individually. Keep the rolls connected.
- Place the bottom half of the rolls in a baking dish.
- Layer the Beaf slices evenly over the rolls. Fold slightly if needed to fit.
- Place cheese slices over the Beaf, covering all areas evenly.
- Put the top half of the rolls back in place.
- In a small bowl, mix melted butter, mustard, honey, garlic powder, and poppy seeds.
- Stir well until fully combined.
- Brush the butter mixture evenly over the top of the rolls. Make sure to cover all areas.
- Cover the baking dish with foil.
- Bake for 15 minutes until the cheese melts.
- Remove the foil and bake for another 5 minutes until the tops turn lightly golden.
- Remove from the oven and allow to cool slightly.
- Cut into individual sliders and serve warm or pack for your picnic.
Nutritional Facts Per Slider Approximate
- Calories: 220 to 260 kcal
- Protein: 10 grams
- Carbohydrates: 18 grams
- Fat: 12 grams
- Fiber: 1 gram
- Sodium: 480 mg
6 – Cucumber Cream Cheese Sandwich.
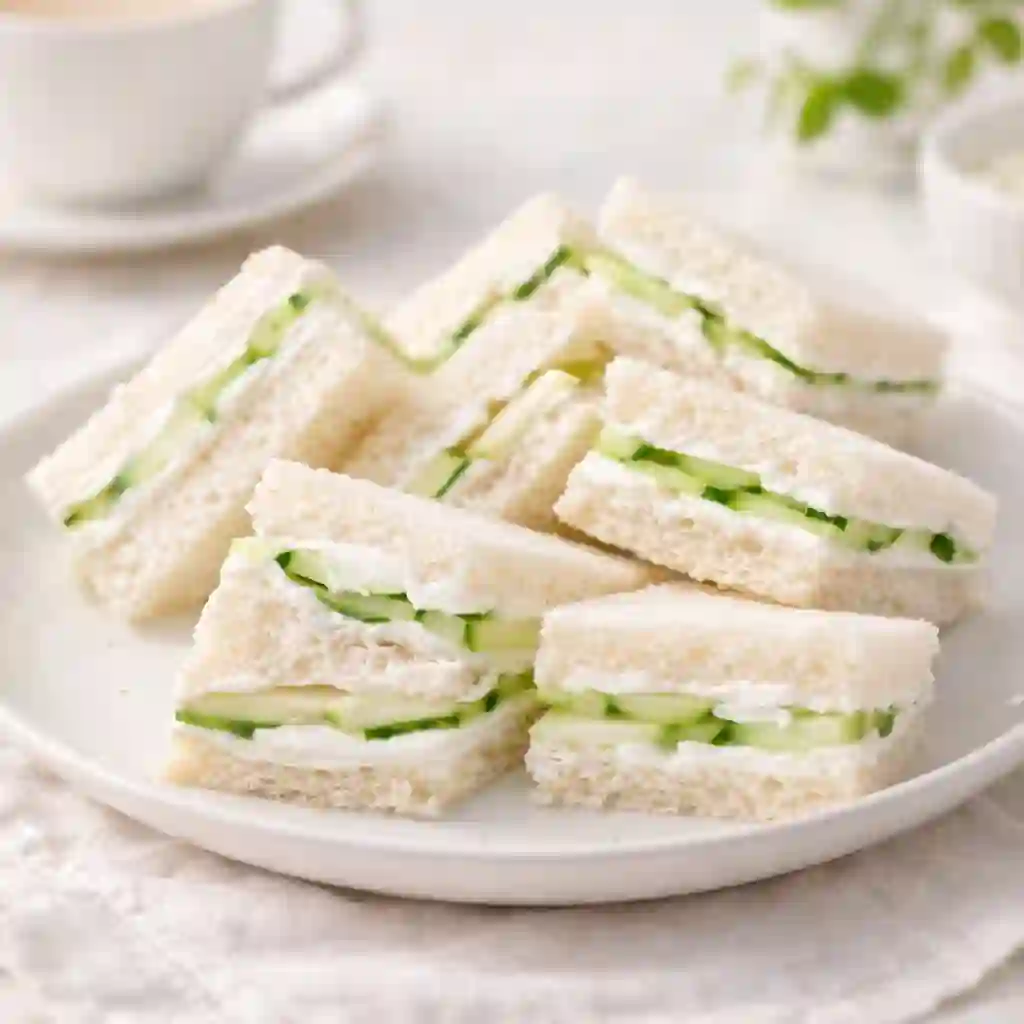
The Cucumber Cream Cheese Sandwich is light, fresh, and perfect for warm days.
It is simple to prepare and brings a clean and soft flavor that feels refreshing with every bite.
Crisp cucumber slices paired with smooth cream cheese create a balanced texture that is both creamy and crunchy.
This sandwich is ideal for picnics, tea time, or a quick afternoon snack. It looks elegant yet takes only a few minutes to assemble.
Served chilled and cut into neat portions, it offers a cool and satisfying option for outdoor meals.
Ingredients
- 8 slices soft white or whole wheat bread
- 1 cup cream cheese, softened
- 1 medium cucumber, thinly sliced
- 1 tablespoon fresh lemon juice
- 1 tablespoon chopped fresh dill optional
- Salt to taste
- Black pepper to taste
How to Make Cucumber Cream Cheese Sandwich
- Wash the cucumber thoroughly and slice it into very thin rounds. Pat the slices dry with a paper towel to remove extra moisture.
- In a mixing bowl, place the softened cream cheese.
- Add fresh lemon juice, chopped dill if using, salt, and black pepper.
- Mix well until the cream cheese becomes smooth and easy to spread.
- Lay the bread slices on a clean flat surface.
- Spread an even layer of the cream cheese mixture on one side of each slice.
- Arrange cucumber slices evenly over four of the bread slices. Slightly overlap them for full coverage.
- Place the remaining bread slices on top, cream cheese side down.
- Press gently to hold the sandwich together.
- Trim the crusts if desired for a softer finish.
- Cut each sandwich into halves or small triangles.
- Cover and refrigerate for at least 20 minutes before serving to keep them cool and fresh.
- Serve chilled for the best flavor and texture.
Nutritional Facts Per Sandwich Approximate
- Calories: 300 to 340 kcal
- Protein: 7 grams
- Carbohydrates: 28 grams
- Fat: 18 grams
- Fiber: 2 grams
- Sodium: 320 mg
7 – Caprese Picnic Sandwich.
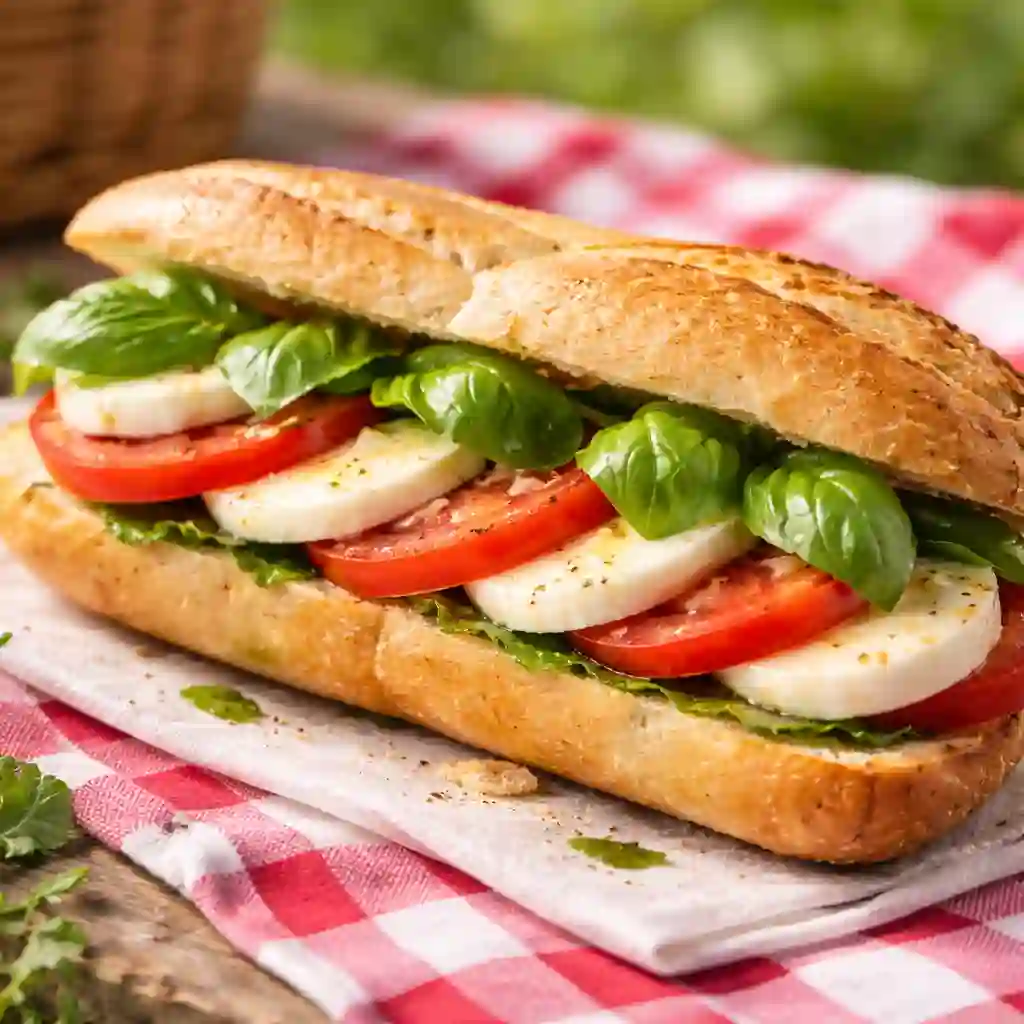
The Caprese Picnic Sandwich is fresh, colorful, and full of simple flavor.
Inspired by classic Italian ingredients, it combines juicy tomatoes, soft mozzarella cheese, and fragrant basil leaves.
A light drizzle of olive oil brings everything together in a smooth and rich way.
This sandwich is perfect for warm days when you want something light yet satisfying. It is easy to prepare and tastes best when served fresh.
With its bright flavors and soft texture, it makes a beautiful and refreshing choice for picnics, outdoor lunches, or relaxed family gatherings.
Ingredients
- 1 large fresh baguette or 8 slices rustic bread
- 2 large ripe tomatoes, sliced
- 8 ounces fresh mozzarella, sliced
- Fresh basil leaves
- 2 tablespoons olive oil
- 1 tablespoon balsamic glaze optional
- Salt to taste
- Black pepper to taste
How to Make Caprese Picnic Sandwich
- Slice the baguette horizontally or lay out the bread slices on a clean surface.
- Lightly drizzle olive oil on the inside of the bread to add moisture and flavor.
- Place slices of fresh mozzarella evenly across the bottom half of the bread.
- Arrange tomato slices on top of the mozzarella. Make sure they cover the surface evenly.
- Sprinkle a small amount of salt and black pepper over the tomatoes to enhance flavor.
- Add fresh basil leaves over the tomatoes. Spread them evenly for balanced taste in every bite.
- Drizzle a small amount of balsamic glaze on top if desired.
- Place the top half of the bread over the filling.
- Press gently to hold the layers together.
- If using a baguette, cut into individual portions for easy serving.
- Wrap tightly in parchment paper if packing for a picnic.
- Keep cool until ready to serve to maintain freshness.
- Slice just before serving for clean and neat pieces.
Nutritional Facts Per Sandwich Approximate
- Calories: 420 to 480 kcal
- Protein: 18 grams
- Carbohydrates: 38 grams
- Fat: 22 grams
- Fiber: 3 grams
- Sodium: 520 mg
8 – BBQ Pulled Chicken Sandwich.
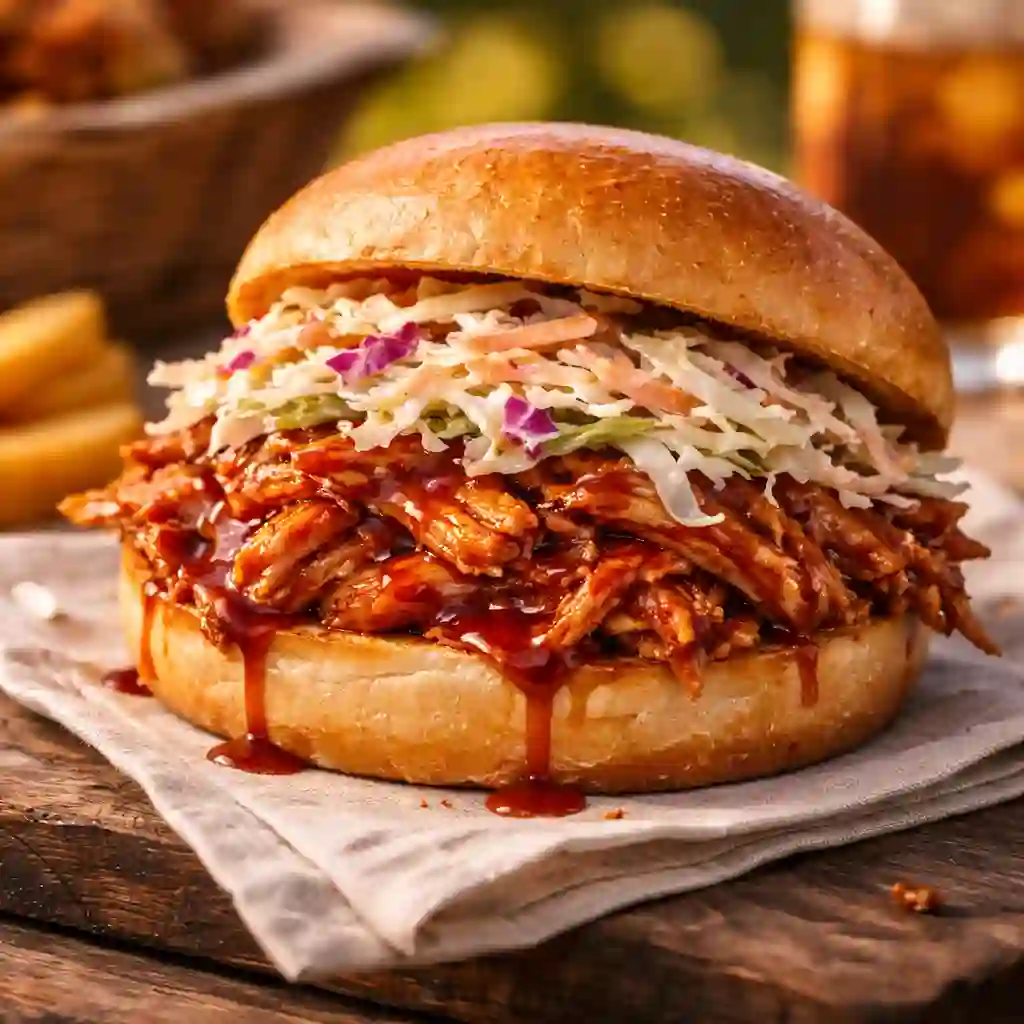
The BBQ Pulled Chicken Sandwich is bold, juicy, and full of rich flavor. Tender shredded chicken coated in smoky barbecue sauce creates a filling that is both sweet and savory.
This sandwich is perfect for picnics, family lunches, and outdoor gatherings. It is easy to prepare and can be made ahead of time, which makes it very convenient.
Served on soft sandwich buns and topped with fresh slaw, it offers a perfect mix of texture and taste.
Each bite delivers comfort and satisfaction, making it a favorite choice for hearty meals.
Ingredients
- 2 cups cooked chicken breast
- 1 cup barbecue sauce
- 4 sandwich buns
- 1 cup coleslaw optional
- 1 tablespoon olive oil
- 1/2 teaspoon garlic powder
- Salt to taste
- Black pepper to taste
How to Make BBQ Pulled Chicken Sandwich
- If the chicken is not cooked, season it lightly with salt and pepper. Cook in a pan with olive oil until fully done. Allow it to cool slightly.
- Use two forks to shred the chicken into thin strips. Place the shredded chicken in a bowl.
- Add barbecue sauce to the bowl and mix well until all the chicken is evenly coated.
- Sprinkle garlic powder for added flavor and stir again.
- Transfer the coated chicken to a saucepan and heat on low for 5 to 7 minutes. Stir gently to prevent sticking.
- Slice the sandwich buns in half and lightly toast them if desired.
- Spoon a generous amount of warm pulled chicken onto the bottom half of each bun.
- Add a layer of fresh coleslaw on top for crunch and freshness.
- Cover with the top half of the bun and press gently.
- Serve warm or wrap tightly for a picnic.
- Store in a cooler if transporting and enjoy within a few hours for best taste.
Nutritional Facts Per Sandwich Approximate
- Calories: 450 to 520 kcal
- Protein: 32 grams
- Carbohydrates: 40 grams
- Fat: 18 grams
- Fiber: 3 grams
- Sodium: 780 mg
9 – Veggie Hummus Sandwich.
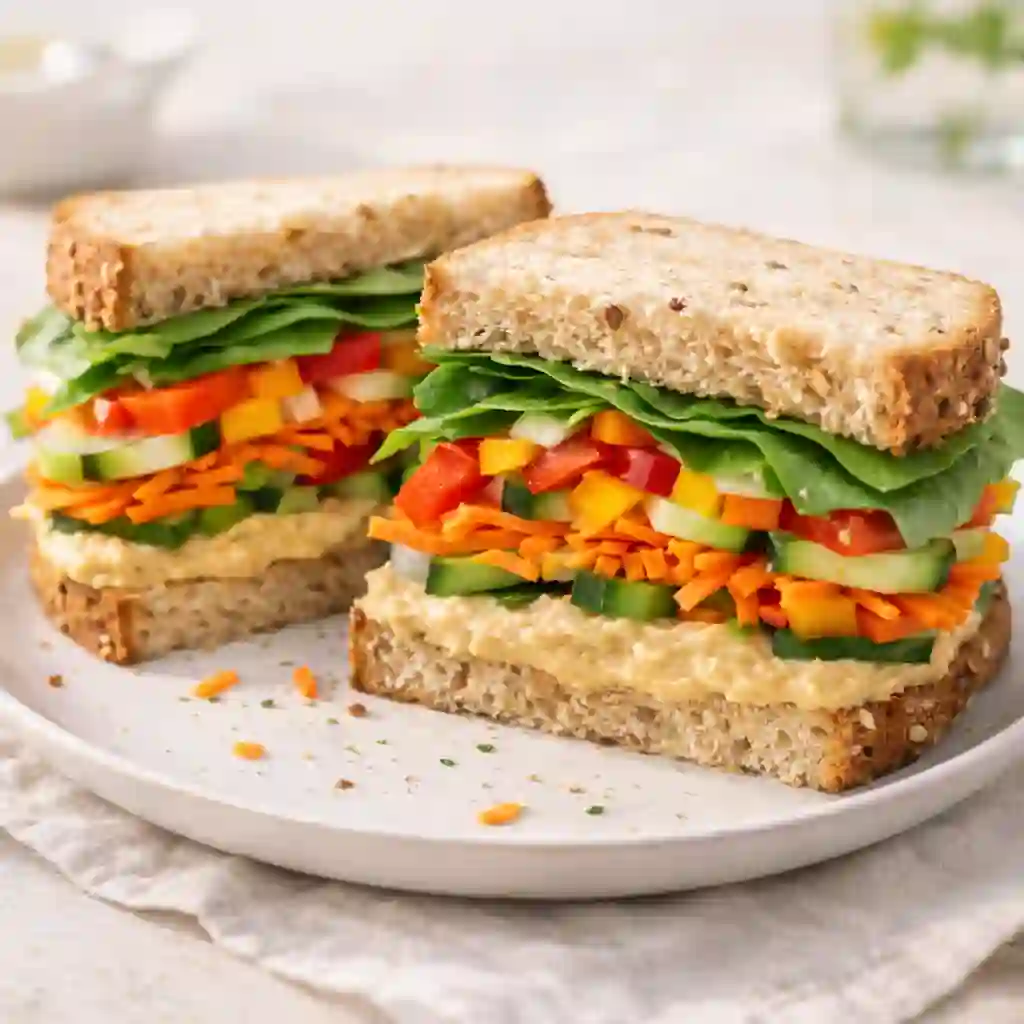
The Veggie Hummus Sandwich is fresh, colorful, and full of natural flavor. It is a light yet filling option that works perfectly for picnics and quick lunches.
Creamy hummus spread over soft bread creates a rich base, while crisp vegetables add crunch and freshness.
This sandwich is simple to prepare and requires no cooking, which makes it ideal for busy days.
It stays fresh when wrapped well and tastes great chilled. Packed with wholesome ingredients, it offers a balanced and satisfying bite that feels both nourishing and refreshing.
Ingredients
- 8 slices whole wheat or multigrain bread
- 1 cup hummus
- 1 small cucumber, thinly sliced
- 1 carrot, grated
- 1 small bell pepper, thinly sliced
- Lettuce leaves
- 1 tablespoon olive oil optional
- Salt to taste
- Black pepper to taste
How to Make Veggie Hummus Sandwich
- Wash and prepare all vegetables before starting. Slice the cucumber and bell pepper thinly. Grate the carrot and pat dry if needed.
- Lay the bread slices on a clean surface.
- Spread a thick and even layer of hummus on one side of each slice. Make sure the surface is fully covered.
- Drizzle a few drops of olive oil over the hummus if desired for added richness.
- Place lettuce leaves on four slices to create a base layer.
- Add cucumber slices evenly over the lettuce.
- Sprinkle grated carrot over the cucumber for color and crunch.
- Add thin slices of bell pepper on top.
- Lightly season with salt and black pepper to enhance the taste.
- Cover with the remaining bread slices, hummus side down.
- Press gently to hold the layers together.
- Cut each sandwich in half for easy serving.
- Wrap tightly in parchment paper if packing for a picnic.
- Store in a cooler and serve chilled for the best flavor and texture.
Nutritional Facts Per Sandwich Approximate
- Calories: 360 to 420 kcal
- Protein: 12 grams
- Carbohydrates: 45 grams
- Fat: 16 grams
- Fiber: 7 grams
- Sodium: 480 mg
10 – Roast Beef and Cheddar Sandwich.

The Roast Beef and Cheddar Sandwich is rich, hearty, and full of bold flavor.
Tender slices of roast beef paired with sharp cheddar cheese create a perfect balance of taste and texture.
This sandwich is filling enough for lunch yet simple enough to prepare in minutes.
It works well for picnics because it holds its shape and stays fresh when wrapped properly.
With soft bread, savory meat, and creamy cheese, every bite feels satisfying. It is a classic choice for anyone who enjoys a strong and comforting sandwich option.
Ingredients
- 8 slices sandwich bread or ciabatta rolls
- 10 to 12 slices roast beef
- 4 slices sharp cheddar cheese
- 2 tablespoons mayonnaise
- 1 tablespoon Dijon mustard
- Lettuce leaves optional
- 1 small red onion, thinly sliced optional
- Salt to taste
- Black pepper to taste
How to Make Roast Beef and Cheddar Sandwich
- Lay the bread slices flat on a clean surface.
- Spread mayonnaise evenly on one side of four slices.
- Spread Dijon mustard on the remaining four slices for added flavor.
- Place lettuce leaves over the mayonnaise side if using.
- Layer roast beef slices evenly over the lettuce. Fold the slices slightly to create thickness and texture.
- Add thin slices of red onion on top of the beef if desired.
- Place one slice of cheddar cheese over the roast beef on each sandwich. Make sure it covers most of the surface.
- Sprinkle a small amount of black pepper over the filling for extra flavor.
- Cover with the mustard coated bread slices, mustard side down.
- Press gently to secure the layers.
- Cut each sandwich in half for easy serving.
- For a warm version, lightly toast the sandwich in a pan for a few minutes until the cheese begins to melt.
- Wrap tightly if packing for a picnic and store in a cooler to keep fresh.
Nutritional Facts Per Sandwich Approximate
- Calories: 480 to 540 kcal
- Protein: 32 grams
- Carbohydrates: 34 grams
- Fat: 24 grams
- Fiber: 2 grams
- Sodium: 950 mg
Admin