Australian Pink Jelly Coconut Cakes Recipe Homemade
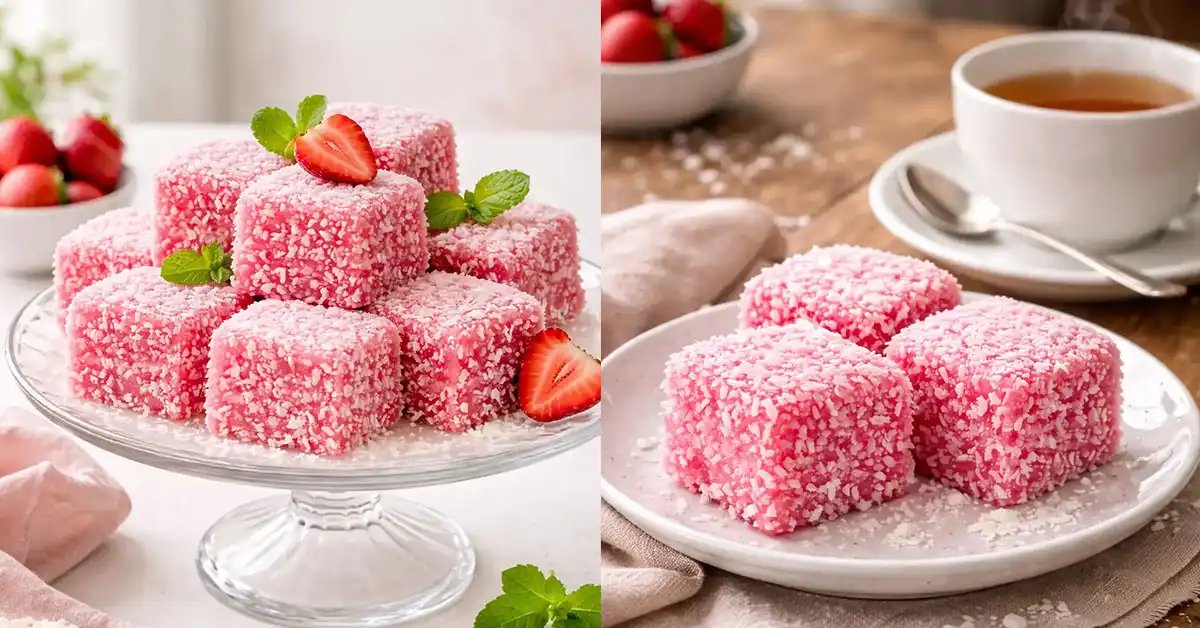
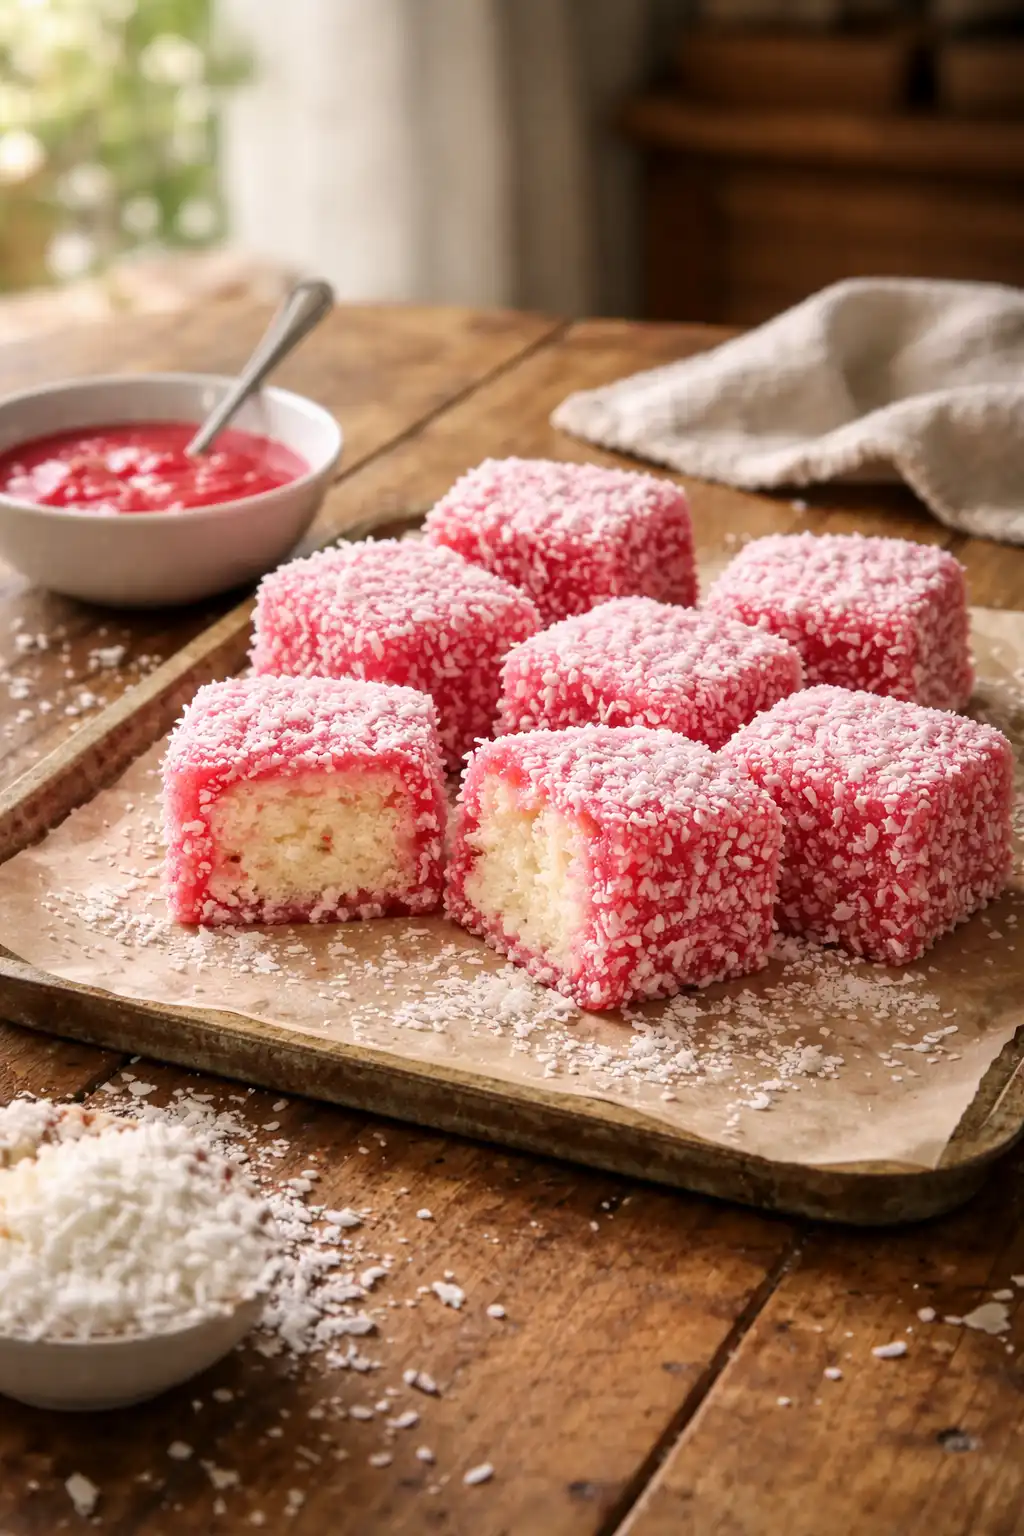
Pink Jelly Coconut Cakes are soft, sweet sponge cakes that are dipped in bright pink jelly and covered with fine shredded coconut.
This treat comes from Australia and is a fun twist on the classic lamington cake. The cake is light and fluffy inside, while the outside has a soft jelly layer with a slightly chewy coconut coating.
These cakes are usually cut into small squares, which makes them easy to serve and enjoy. The pink color often comes from strawberry or raspberry jelly, giving the cake a fruity taste and a fresh smell.
Some versions also include a cream filling in the middle, adding extra richness and making each bite even more delicious.
Why I Love This Recipe
I love this recipe because it is simple, fun, and always brings a smile. The soft cake, sweet jelly, and coconut create a perfect mix of taste and texture. It is easy to make at home without any hard steps. The bright pink color also makes it look beautiful on any table.
Ingredients for Pink Jelly Coconut Cakes
- All purpose flour – 1 cup
- Sugar – 1/2 cup
- Eggs – 2 large
- Butter (softened) – 1/2 cup
- Milk – 1/2 cup
- Baking powder – 1 teaspoon
- Vanilla extract – 1 teaspoon
- Strawberry or raspberry jelly crystals – 1 pack (about 85 grams)
- Hot water – 1 cup (to prepare jelly)
- Desiccated coconut – 1 1/2 cups
Kitchen Tools You Will Need
- Mixing bowls – Use at least two bowls for mixing dry and wet ingredients
- Electric mixer or hand whisk – Helps make the batter smooth and fluffy
- Measuring cups and spoons – For accurate ingredient amounts
- Baking pan (square or rectangular) – To bake the sponge evenly
- Parchment paper – Prevents the cake from sticking to the pan
- Cooling rack – Allows the cake to cool properly after baking
- Sharp knife – To cut the cake into neat squares
- Deep bowls – For dipping cake pieces into jelly and coating with coconut
- Fork or tongs – Makes dipping easier and less messy
Preparation Time
- Prep time – 15 minutes
- Cooking time – 25 minutes
- Cooling time – 30 minutes
- Jelly setting time – 10 minutes
- Total time – About 1 hour 20 minutes
This recipe is simple and does not take too long to prepare. Most of the time is spent waiting for the cake to cool, which is very important before dipping it into the jelly.
How to Make Pink Jelly Coconut Cakes
- Preheat the oven
Set your oven to 180°C (350°F). Line your baking pan with parchment paper to keep the cake from sticking. This step helps the cake bake evenly and come out clean. - Prepare the batter
In a mixing bowl, cream the softened butter and sugar until light and smooth. Add the eggs one by one and mix well after each. Stir in the vanilla extract for a soft, sweet flavor. - Mix dry ingredients
In another bowl, combine flour and baking powder. Slowly add this to the wet mixture. Pour in the milk and mix until the batter is smooth and lump free. Do not overmix, as it can make the cake dense. - Bake the cake
Pour the batter into the prepared pan and spread it evenly. Bake for about 25 minutes or until a toothpick inserted in the center comes out clean. Let the cake cool completely on a rack. - Cut into squares
Once cooled, cut the cake into small even squares. Clean cuts help the cakes hold their shape during dipping. - Prepare the jelly
In a bowl, dissolve the jelly crystals in hot water. Let it cool slightly but do not let it fully set. The jelly should be liquid but not too hot. - Dip the cake pieces
Using a fork or tongs, dip each cake square into the jelly. Make sure all sides are lightly coated but do not soak too long to avoid breaking. - Coat with coconut
Roll each jelly covered piece in desiccated coconut. Press gently so the coconut sticks well on all sides. - Let them set
Place the coated cakes on a tray and allow them to rest for a few minutes. This helps the outer layer set nicely. - Serve and enjoy
Your pink jelly coconut cakes are now ready. Serve them fresh or slightly chilled for a soft and refreshing treat.
Step by Step Instructions
- Start with a clean setup
Make sure all your ingredients are measured and ready. Keep your tools nearby so the process stays smooth and easy from the beginning. - Make the cake base
Prepare the sponge batter by mixing butter, sugar, eggs, and vanilla. Add the dry ingredients and milk, then mix until soft and smooth. - Bake with care
Pour the batter into a lined baking pan. Bake until the cake is light golden and fully cooked inside. Allow it to cool fully before moving to the next step. - Cut into equal pieces
Place the cooled cake on a flat surface. Use a sharp knife to cut it into small squares. Try to keep the size even for a neat final look. - Prepare the jelly mix
Dissolve the jelly in hot water and let it cool slightly. It should be liquid but not too hot or too thick. - Dip each cake piece
Gently place each cake square into the jelly. Turn it to coat all sides evenly. Work carefully so the cake stays intact. - Cover with coconut
Roll each coated piece in desiccated coconut. Make sure the coconut sticks well to the surface. - Place on tray to set
Arrange the finished pieces on a tray. Leave space between each piece so they do not stick together. - Let them rest
Allow the cakes to sit for a short time so the outer layer sets nicely. - Ready to serve
Once set, the cakes are ready to enjoy. Serve fresh for the best taste and texture.

Tips for Perfect Pink Jelly Coconut Cakes
- Use fresh ingredients
Always use fresh eggs, butter, and baking powder. This helps the cake rise well and keeps the texture soft and light. - Do not overmix the batter
Mix until just combined. Overmixing can make the cake dense instead of soft and fluffy. - Let the cake cool completely
This is very important. A warm cake can break when dipped in jelly. A fully cooled cake holds its shape better. - Cut neat and even squares
Use a sharp knife for clean cuts. Even pieces make the final result look more neat and professional. - Keep jelly at the right temperature
The jelly should be slightly warm and liquid, not hot or too thick. Hot jelly can damage the cake, while thick jelly will not coat evenly. - Dip quickly and gently
Do not leave the cake in the jelly for too long. A quick dip is enough to coat it without making it too soft. - Use fine coconut
Fine desiccated coconut sticks better and gives a smooth finish. It also improves the overall texture. - Coat evenly on all sides
Make sure each piece is fully covered with coconut. This gives a balanced taste in every bite. - Let them set properly
Allow the cakes to rest after coating. This helps the outer layer firm up and improves the final texture. - Store in a cool place
Keep the cakes in an airtight container to maintain freshness and softness for a longer time.
Variations You Can Try
- Cream filled version
Cut the cake in half and add a layer of fresh cream or whipped cream inside for a richer taste. - Chocolate twist
Use chocolate sponge instead of plain cake for a deeper flavor. - Different jelly flavors
Try raspberry, cherry, or mixed berry jelly for a new taste each time. - Extra coconut layer
Add a thicker coconut coating for more texture and flavor.
How to Store Pink Jelly Coconut Cakes
- Use an airtight container
Store the cakes in a sealed container to keep them soft and fresh. - Keep in the fridge
They stay fresh for up to 3 days when refrigerated. - Avoid open air
Exposure to air can dry out the cake quickly. - Bring to room temperature before serving
This helps restore the soft texture and best taste.
Nutrition Facts (Per Serving Approximate)
- Calories – 180 kcal
- Carbohydrates – 25g
- Sugar – 15g
- Fat – 7g
- Protein – 3g
- Fiber – 1g
Serving Ideas
- With tea or coffee
Perfect as a light snack during tea time. - Party treat
Serve on a tray for birthdays or small gatherings. - With fresh fruits
Pair with berries for a fresh and colorful plate. - As a dessert platter
Combine with other small sweets for a beautiful presentation.
FAQs
- What are Pink Jelly Coconut Cakes?
These are soft sponge cake squares dipped in pink jelly and coated with desiccated coconut. They are light, sweet, and easy to enjoy at any time. - Can I use any jelly flavor?
Yes, you can use strawberry, raspberry, cherry, or any flavor you like. Each flavor gives a slightly different taste and color. - Why is my cake breaking when dipping?
This usually happens if the cake is still warm or too soft. Always let the cake cool fully before dipping into the jelly. - Can I make them ahead of time?
Yes, you can make them a day in advance. Store them in the fridge and take them out before serving for the best texture. - Do I need to use fresh coconut?
No, desiccated coconut works best because it sticks easily and gives a nice texture. - Can I freeze these cakes?
Freezing is not recommended, as it can change the texture and make the cakes too soft after thawing. - How do I keep the cakes soft?
Store them in an airtight container and avoid leaving them exposed to air. This helps keep them moist and fresh. - Can I add filling inside?
Yes, you can add cream or jam between two cake layers for extra flavor and richness. - Is this recipe beginner friendly?
Yes, it is very simple and does not require any advanced baking skills. Just follow each step carefully. - How long do they stay fresh?
They stay fresh for about 2 to 3 days when stored properly in the fridge.

Australian Pink Jelly Coconut Cakes Recipe Homemade
4
servings15
minutes25
minutes300
kcalCooling time – 30 minutes
Jelly setting time – 10 minutes
Ingredients
All purpose flour – 1 cup
Sugar – 1/2 cup
Eggs – 2 large
Butter (softened) – 1/2 cup
Milk – 1/2 cup
Baking powder – 1 teaspoon
Vanilla extract – 1 teaspoon
Strawberry or raspberry jelly crystals – 1 pack (about 85 grams)
Hot water – 1 cup (to prepare jelly)
Desiccated coconut – 1 1/2 cups
Directions
- Preheat the oven
Set your oven to 180°C (350°F). Line your baking pan with parchment paper to keep the cake from sticking. This step helps the cake bake evenly and come out clean. - Prepare the batter
In a mixing bowl, cream the softened butter and sugar until light and smooth. Add the eggs one by one and mix well after each. Stir in the vanilla extract for a soft, sweet flavor. - Mix dry ingredients
In another bowl, combine flour and baking powder. Slowly add this to the wet mixture. Pour in the milk and mix until the batter is smooth and lump free. Do not overmix, as it can make the cake dense. - Bake the cake
Pour the batter into the prepared pan and spread it evenly. Bake for about 25 minutes or until a toothpick inserted in the center comes out clean. Let the cake cool completely on a rack. - Cut into squares
Once cooled, cut the cake into small even squares. Clean cuts help the cakes hold their shape during dipping. - Prepare the jelly
In a bowl, dissolve the jelly crystals in hot water. Let it cool slightly but do not let it fully set. The jelly should be liquid but not too hot. - Dip the cake pieces
Using a fork or tongs, dip each cake square into the jelly. Make sure all sides are lightly coated but do not soak too long to avoid breaking. - Coat with coconut
Roll each jelly covered piece in desiccated coconut. Press gently so the coconut sticks well on all sides. - Let them set
Place the coated cakes on a tray and allow them to rest for a few minutes. This helps the outer layer set nicely. - Serve and enjoy
Your pink jelly coconut cakes are now ready. Serve them fresh or slightly chilled for a soft and refreshing treat.
Notes
- Use fresh ingredients
Always use fresh eggs, butter, and baking powder. This helps the cake rise well and keeps the texture soft and light. - Do not overmix the batter
Mix until just combined. Overmixing can make the cake dense instead of soft and fluffy. - Keep jelly at the right temperature
The jelly should be slightly warm and liquid, not hot or too thick. Hot jelly can damage the cake, while thick jelly will not coat evenly. - Use fine coconut
Fine desiccated coconut sticks better and gives a smooth finish. It also improves the overall texture. - Let them set properly
Allow the cakes to rest after coating. This helps the outer layer firm up and improves the final texture.
Admin