
Spring Blossom Cookies Recipe Sweet and Colorful Cookies
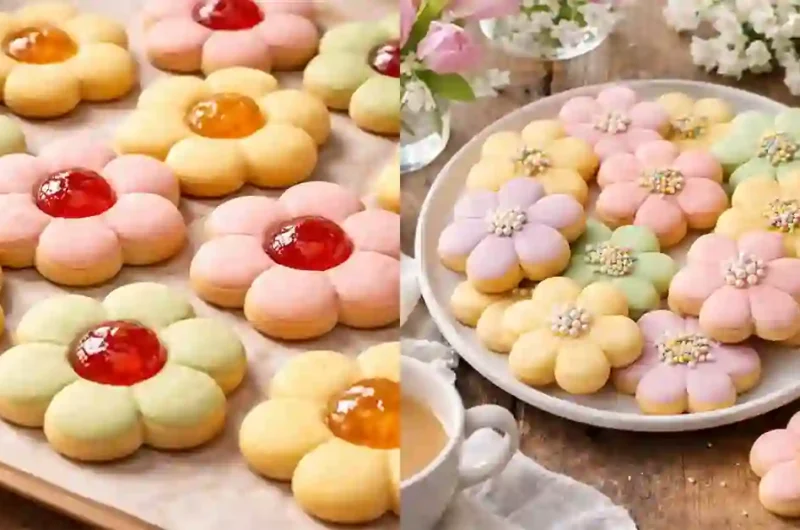
Spring Blossom Cookies are soft, sweet treats that capture the fresh and cheerful feeling of spring. These cookies are often inspired by blooming flowers, using light colors like pink, yellow, and green to reflect the season.
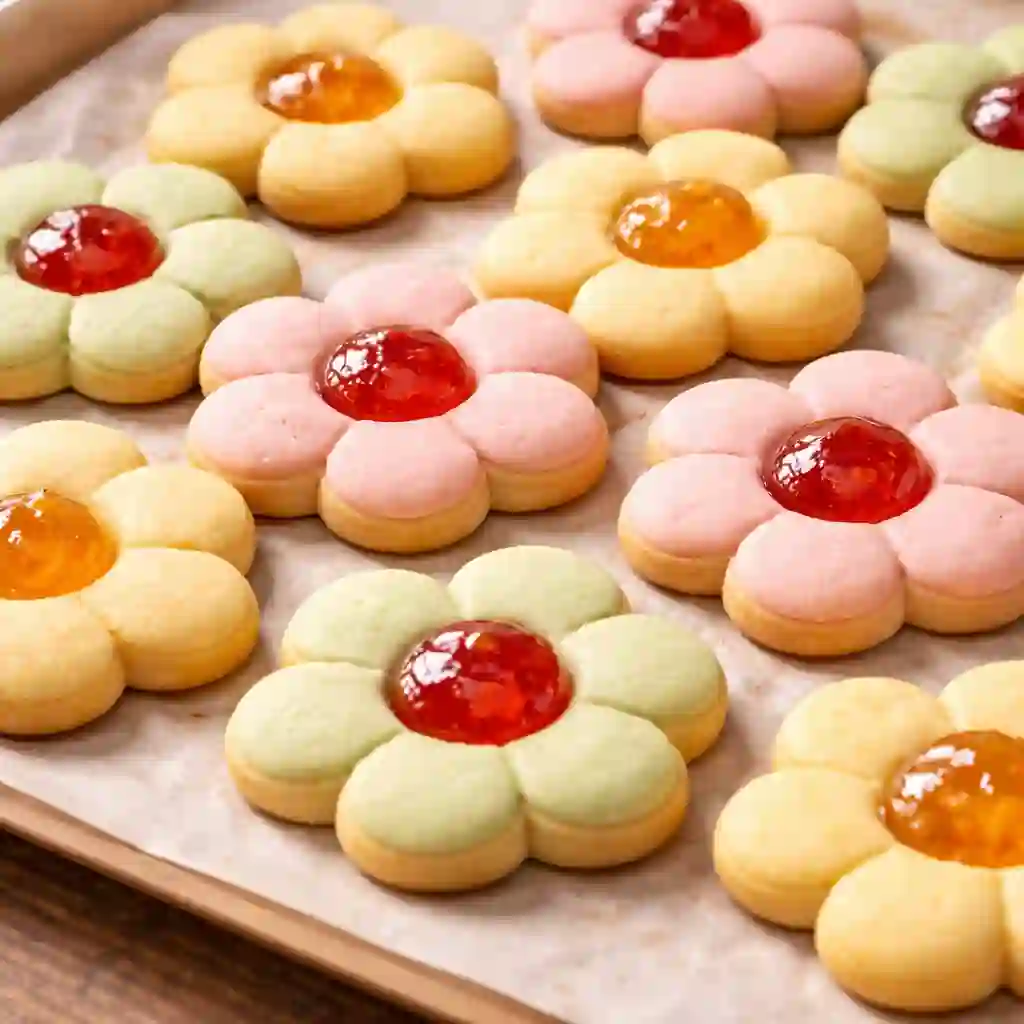
They are usually made with a simple sugar or butter cookie base and decorated to look like flowers or blossoms. Some versions have a soft center filled with jam, chocolate, or icing, which adds both flavor and beauty.
What makes these cookies special is their look and feel. They are not just baked for taste but also for presentation.
Many people shape them like flowers or add colorful toppings to create a bright and joyful design. Because of this, they are popular for spring events like picnics, parties, Easter, and family gatherings.
Why I Love This Recipe
I love this recipe because it is simple, fun, and always brings a smile. The soft texture and sweet taste make these cookies perfect for any occasion. What I enjoy most is decorating them with bright spring colors, which makes each batch feel special.
Ingredients for Spring Blossom Cookies
- All Purpose Flour – 2 ½ cups
This forms the base of the cookies and gives them structure. - Unsalted Butter – 1 cup (softened)
Adds rich flavor and keeps the cookies soft and tender. - Granulated Sugar – 1 cup
Provides sweetness and helps create a light texture. - Eggs – 2 large
Help bind the ingredients and give the cookies a soft crumb. - Vanilla Extract – 1 teaspoon
Adds a warm, sweet flavor that enhances the overall taste. - Baking Powder – 1 teaspoon
Helps the cookies rise slightly and stay soft. - Salt – ¼ teaspoon
Balances the sweetness and improves flavor. - Milk – 2 tablespoons
Adds moisture and helps create a smooth dough. - Food Coloring – a few drops (pink, yellow, or green)
Gives the cookies a bright, spring inspired look. - Jam or Chocolate Pieces – ½ cup (optional)
Used for filling or topping to add extra flavor. - Icing or Sprinkles – ½ cup (optional)
Perfect for decorating and creating a blossom style finish.
Preparation Time
- Prep Time – 20 minutes
Time needed to mix ingredients and prepare the dough. - Chilling Time – 30 minutes (optional)
Helps the dough firm up for better shaping. - Baking Time – 10 to 12 minutes per batch
Cookies bake until lightly golden. - Total Time – About 1 hour
Includes prep, chilling, and baking time.
How to Make Spring Blossom Cookies
- Step 1: Prepare the Oven and Baking Tray
Preheat your oven to 180°C (350°F). Line a baking tray with parchment paper to prevent sticking and ensure even baking. - Step 2: Cream Butter and Sugar
In a large bowl, beat the softened butter and sugar together until the mixture becomes light and fluffy. This step helps create a soft texture. - Step 3: Add Eggs and Vanilla
Add the eggs one at a time, mixing well after each addition. Stir in the vanilla extract to enhance the flavor. - Step 4: Mix Dry Ingredients
In a separate bowl, combine flour, baking powder, and salt. Slowly add this dry mixture into the wet ingredients while mixing gently. - Step 5: Add Milk for Smooth Dough
Pour in the milk and mix until a soft dough forms. The dough should be smooth and easy to handle, not too sticky. - Step 6: Add Color for Spring Theme
Divide the dough into small portions and add a few drops of food coloring to each. Mix until you get soft pastel shades like pink, yellow, or green. - Step 7: Shape the Cookies
Take small portions of dough and roll them into balls. Gently flatten them and shape them into flower designs using your hands or simple tools. - Step 8: Add Toppings or Filling
Press a small amount of jam or a piece of chocolate into the center of each cookie to create a blossom look. - Step 9: Arrange on Baking Tray
Place the shaped cookies on the prepared tray, leaving space between each one to allow for slight spreading. - Step 10: Bake the Cookies
Bake in the preheated oven for 10 to 12 minutes or until the edges are lightly golden. Avoid overbaking to keep them soft. - Step 11: Cool and Decorate
Let the cookies cool on a rack. Once cooled, decorate with icing or sprinkles if desired for a beautiful spring finish. - Step 12: Serve and Enjoy
Your Spring Blossom Cookies are now ready to serve. Enjoy their soft texture and sweet, fresh flavor.
Tips for Perfect Spring Blossom Cookies
- Use Softened Butter
Make sure the butter is soft, not melted. This helps create a smooth dough and soft texture in the cookies. - Measure Ingredients Correctly
Always use proper measurements, especially for flour. Too much flour can make the cookies dry and hard. - Do Not Overmix the Dough
Mix just until everything is combined. Overmixing can make the cookies dense instead of light and soft. - Chill the Dough if Needed
If the dough feels too soft or sticky, chill it for 20 to 30 minutes. This makes shaping much easier. - Use Light Food Coloring
Add only a few drops of color to keep soft pastel shades. Too much color can make the cookies look too bright. - Keep Cookie Size Even
Try to make all cookies the same size so they bake evenly and look neat. - Do Not Overbake
Bake just until the edges turn light golden. Overbaking will make the cookies hard and dry. - Leave Space on the Tray
Place cookies with enough space between them so they do not stick together while baking. - Add Toppings Gently
Press jam or chocolate lightly into the center so the shape stays neat. - Let Cookies Cool Properly
Allow cookies to cool before decorating. This helps icing and toppings stay in place. - Store the Right Way
Keep cookies in an airtight container to maintain their softness and fresh taste.
Decoration Ideas
- Use Soft Pastel Icing
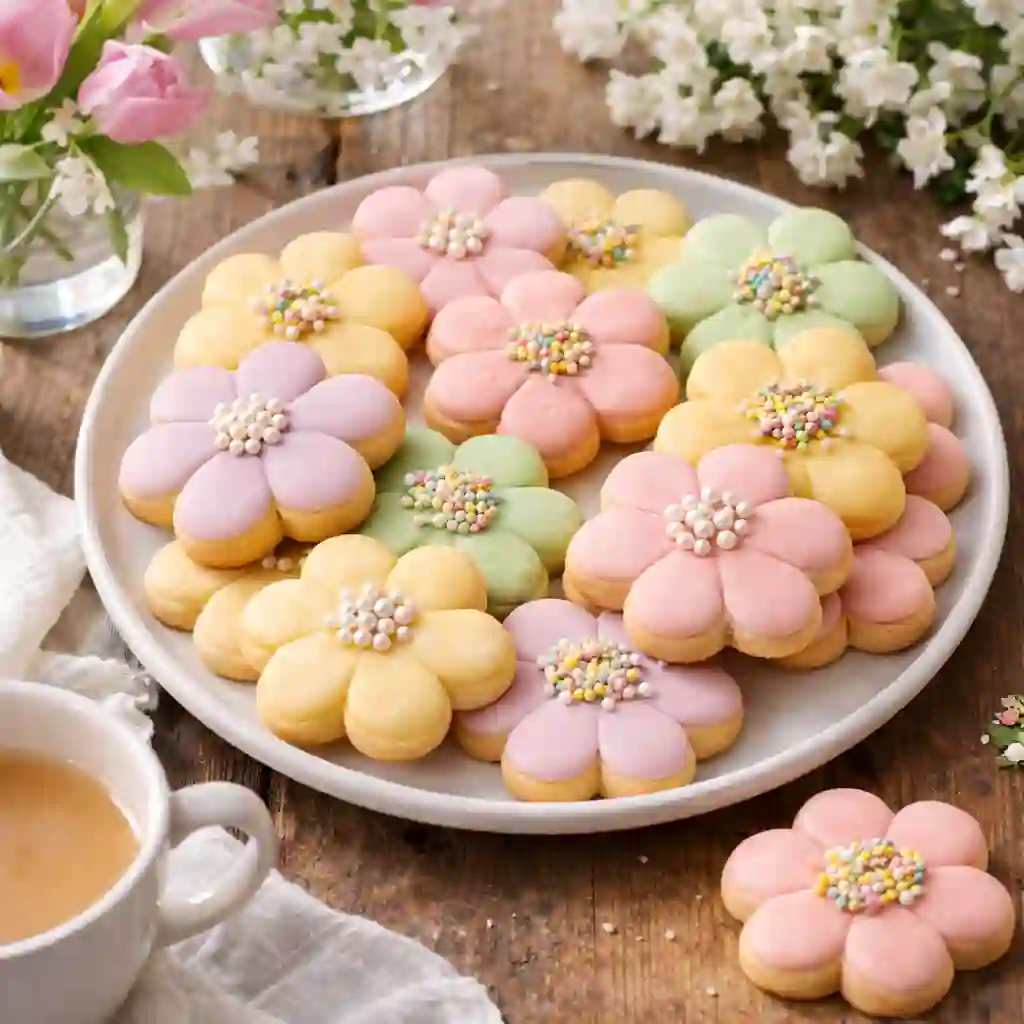
Decorate the cookies with light shades like pink, yellow, green, and lavender. These colors give a fresh spring feel and make the cookies look soft and pretty. - Create Simple Flower Designs
Use a piping bag to draw small petals or flower shapes on top of each cookie. Even simple designs can look beautiful and eye catching. - Add a Jam Center
Place a small drop of strawberry, raspberry, or apricot jam in the middle. This gives a shiny blossom look and adds a fruity flavor. - Use Chocolate as a Center
Press a small chocolate piece into the center of the cookie for a rich and sweet touch. It also adds contrast to the light colors. - Sprinkle Colorful Toppings
Add sprinkles in soft shades to give a fun and festive look. This works well for parties and family gatherings. - Dust with Powdered Sugar
Lightly sprinkle powdered sugar on top for a soft and elegant finish. It gives a clean and delicate appearance. - Add Edible Pearls or Sugar Beads
Place small edible pearls in the center to create a flower effect. This adds a nice detail without much effort. - Use Leaf Details
Add tiny green icing leaves around the flower shape to enhance the spring theme. - Mix Colors in One Cookie
Combine two or three soft colors in one design to make the cookies look more creative and unique. - Keep It Simple and Neat
Avoid over decorating. Clean and simple designs often look the most attractive.
Serving Suggestions
- Serve with Tea or Coffee
These cookies pair perfectly with a warm cup of tea or coffee, making them a great choice for a relaxing break. - Perfect for Spring Gatherings
Place them on a decorative tray for picnics, parties, or family get togethers to add a bright seasonal touch. - Great for Kids’ Treats
Their soft texture and fun colors make them a favorite for children’s snacks or lunchboxes. - Gift Them красиво
Pack the cookies in a small box or jar to share with friends and loved ones as a thoughtful homemade gift.
Storage Instructions
- Use an Airtight Container
Store the cookies in a sealed container to keep them fresh and soft for longer. - Keep at Room Temperature
They stay fresh for up to 4 to 5 days when kept in a cool, dry place. - Avoid Moist Areas
Do not store in humid places, as moisture can make the cookies soggy. - Freeze for Longer Storage
You can freeze the cookies for up to 2 months. Thaw them at room temperature before serving.
Nutrition Facts
- Calories – 120 per cookie (approx)
A light sweet treat suitable for occasional enjoyment. - Carbohydrates – 15g
Provides quick energy from sugar and flour. - Fat – 5g
Comes mainly from butter, giving a rich taste. - Protein – 2g
A small amount from eggs and flour. - Sugar – 8g
Adds sweetness and flavor to the cookies. - Sodium – 60mg
A minimal amount for balanced taste.
Instructions
- Step 1: Preheat the Oven
Set your oven to 180°C (350°F) and prepare a baking tray with parchment paper. - Step 2: Mix Butter and Sugar
In a bowl, beat softened butter and sugar until the mixture becomes light and smooth. - Step 3: Add Eggs and Vanilla
Add eggs one by one, mixing well after each. Stir in vanilla extract for flavor. - Step 4: Combine Dry Ingredients
In another bowl, mix flour, baking powder, and salt. Slowly add this to the wet mixture. - Step 5: Form the Dough
Add milk and mix until a soft dough forms. The dough should be smooth and easy to handle. - Step 6: Add Colors
Divide the dough and mix in a few drops of food coloring to create soft pastel shades. - Step 7: Shape the Cookies
Roll small portions into balls, flatten them, and shape into simple flower designs. - Step 8: Add Center Filling
Gently press jam or chocolate into the center of each cookie. - Step 9: Place on Tray
Arrange cookies on the tray with space between each one. - Step 10: Bake the Cookies
Bake for 10 to 12 minutes until edges are lightly golden. - Step 11: Cool Completely
Let cookies cool on a rack before adding any decoration. - Step 12: Decorate and Serve
Add icing or sprinkles if desired, then serve and enjoy.
FAQs
- What are Spring Blossom Cookies made of?
Spring Blossom Cookies are made using simple pantry ingredients like flour, butter, sugar, eggs, and vanilla extract. They are often decorated with food coloring, jam, chocolate, or icing to give them a soft and colorful spring look. - Can I make these cookies without food coloring?
Yes, you can skip food coloring if you prefer a natural look. The cookies will still taste delicious. You can also use natural color options like beet powder or turmeric for light shades. - How do I keep the cookies soft?
To keep the cookies soft, avoid overbaking them. Remove them from the oven when the edges are lightly golden. Also, store them in an airtight container to lock in moisture. - Can I prepare the dough in advance?
Yes, you can prepare the dough ahead of time and store it in the refrigerator for up to 24 hours. This can also help improve the texture and make shaping easier. - What type of jam works best for the center?
Strawberry, raspberry, and apricot jam are great choices. They add a sweet and slightly tangy flavor that pairs well with the soft cookie base. - Can I freeze Spring Blossom Cookies?
Yes, these cookies freeze well. You can store them in a freezer safe container for up to 2 months. Let them thaw at room temperature before serving. - Why did my cookies spread too much?
This can happen if the butter was too soft or melted. Chilling the dough before baking can help the cookies hold their shape better. - Can I make these cookies without eggs?
Yes, you can use egg substitutes like yogurt or mashed banana. However, the texture may be slightly different. - Are these cookies suitable for special occasions?
Absolutely. Their bright colors and flower shapes make them perfect for spring parties, birthdays, and festive gatherings.
Spring Blossom Cookies Recipe Sweet and Colorful Cookies
4
servings20
minutes120
kcalBaking Time – 10 to 12 minutes per batch
Ingredients
All Purpose Flour – 2 ½ cups
Unsalted Butter – 1 cup (softened)
Granulated Sugar – 1 cup
Eggs – 2 large
Vanilla Extract – 1 teaspoon
Baking Powder – 1 teaspoon
Salt – ¼ teaspoon
Milk – 2 tablespoons
Food Coloring – a few drops (pink, yellow, or green)
Jam or Chocolate Pieces – ½ cup (optional)
Icing or Sprinkles – ½ cup (optional)
Directions
- Prepare the Oven and Baking Tray
Preheat your oven to 180°C (350°F). Line a baking tray with parchment paper to prevent sticking and ensure even baking. - Cream Butter and Sugar
In a large bowl, beat the softened butter and sugar together until the mixture becomes light and fluffy. This step helps create a soft texture. - Add Eggs and Vanilla
Add the eggs one at a time, mixing well after each addition. Stir in the vanilla extract to enhance the flavor. - Mix Dry Ingredients
In a separate bowl, combine flour, baking powder, and salt. Slowly add this dry mixture into the wet ingredients while mixing gently. - Add Milk for Smooth Dough
Pour in the milk and mix until a soft dough forms. The dough should be smooth and easy to handle, not too sticky. - Add Color for Spring Theme
Divide the dough into small portions and add a few drops of food coloring to each. Mix until you get soft pastel shades like pink, yellow, or green. - Shape the Cookies
Take small portions of dough and roll them into balls. Gently flatten them and shape them into flower designs using your hands or simple tools. - Add Toppings or Filling
Press a small amount of jam or a piece of chocolate into the center of each cookie to create a blossom look. - Arrange on Baking Tray
Place the shaped cookies on the prepared tray, leaving space between each one to allow for slight spreading. - Bake the Cookies
Bake in the preheated oven for 10 to 12 minutes or until the edges are lightly golden. Avoid overbaking to keep them soft. - Cool and Decorate
Let the cookies cool on a rack. Once cooled, decorate with icing or sprinkles if desired for a beautiful spring finish. - Serve and Enjoy
Your Spring Blossom Cookies are now ready to serve. Enjoy their soft texture and sweet, fresh flavor.
Notes
- Use Softened Butter
Make sure the butter is soft, not melted. This helps create a smooth dough and soft texture in the cookies. - Measure Ingredients Correctly
Always use proper measurements, especially for flour. Too much flour can make the cookies dry and hard. - Do Not Overmix the Dough
Mix just until everything is combined. Overmixing can make the cookies dense instead of light and soft. - Chill the Dough if Needed
If the dough feels too soft or sticky, chill it for 20 to 30 minutes. This makes shaping much easier. - Let Cookies Cool Properly
Allow cookies to cool before decorating. This helps icing and toppings stay in place.
Admin